A step by step tutorial for building a farmhouse dining table from start to finish.
Disclosure: Osborne Wood Products provided a discount on the table legs and apron/skirt featured in this blog post. All opinions, images and love of pretty farmhouse dining tables are 100% mine.
Today is an exciting day!!
We built a farmhouse dining table, and if you’d told me that a year ago, I’m not sure I would have believed you.
But if we can do it, you can, too! It really wasn’t hard. It does take some time (it took us about three full weekends), but in the end, when you have something this gorgeous that you made yourself, it’s worth it!
It’s just fab to have a real dining room table.
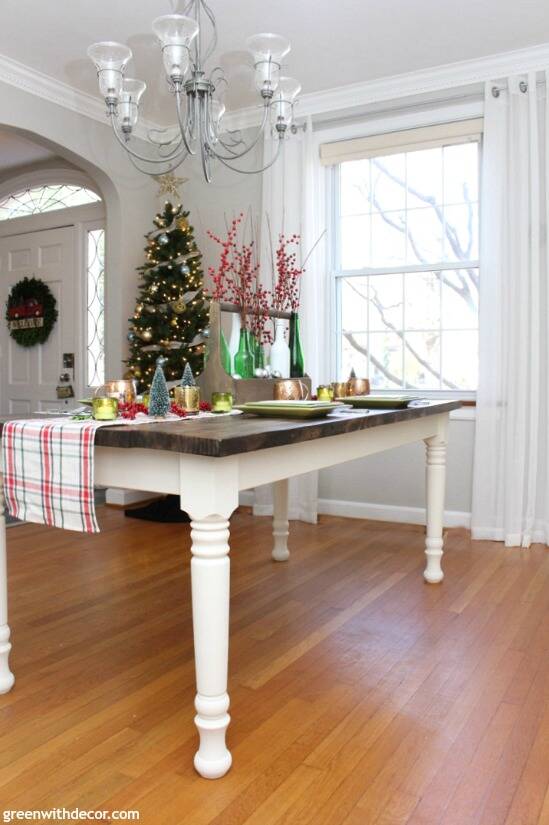
We’ve never had one before, and I’ve been having fun playing around with Christmas tablescapes since we finished. You can see the plaid Christmas tablescape here …
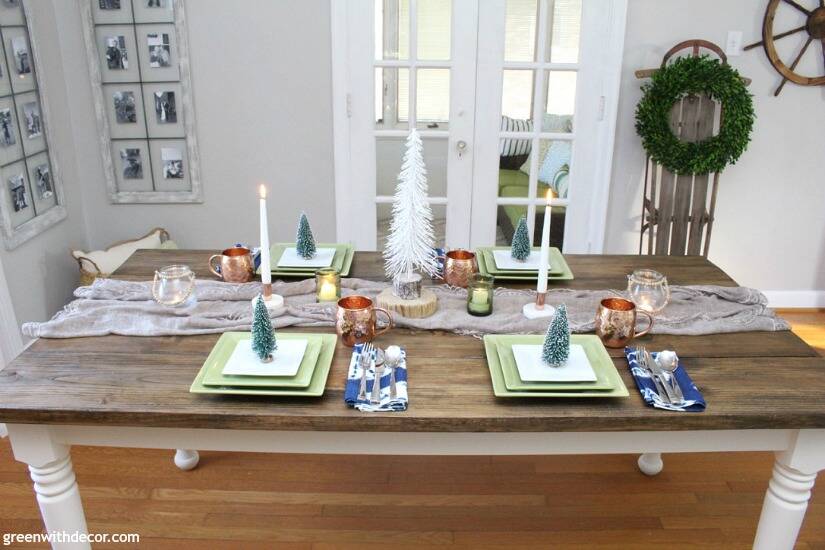
or the blue and copper Christmas tablescape here …
Or this simple Christmas tablescape.
I’m loving this table setting thing!

Plus we worked with Osborne on this post, and they offer table apron sets.
I’ll dive in more below, but basically you pick out your dining legs (all of their gorgeous options are here), type in your table measurements, and then the apron and table legs show up at your door.
We’ve never built anything before so we’d have zero clue how to build table legs, and having the apron taking care of just made this whole project way easier. If you’re taking on a table build for the first time, I’d highly recommend doing the same thing!
So now that I’ve convinced you that you can do this, too, let’s chat about how to build a farmhouse dining table.
This post contains affiliate links. This means if you click the link and buy something, I may receive a small percentage of sales at no extra cost to you.
Supply list to build a farmhouse dining table:
- (4) 2″x10″x8′ treated boards
- (4) 2″x4″ boards
- (about 30) 2″ wood screws
- Miter saw (we used our RYOBI miter saw)
- Drill
- Safety glasses
- Belt sander
- Orbital sander
- Sanding discs (we used six of each grit)
- 80 grit
- 120-grit
- 220 grit
- (2) sawhorses
- (2) 48″ clamps
- (2) 24″ clamps
- Tape measure
- T-square (optional)
- Dining table legs (we used these.)
- Table apron set
- Drop cloth
- Painter’s tape
- Stain (color of your choice)
- Rags to apply stain
- Caulk
- Polycrylic
- Paint (optional) – we painted our table legs
- Paint brush
How to build a farmhouse dining table:
1. Figure out what size you want your table to be.
We measured so the table would fit in our Milwaukee house dining room since that’s where it will end up eventually. So the table isn’t the perfect size for this current dining room, but it fits just great!
Our finished table is 37″ x 72″. We can sit 6 comfortably, 8 for holidays and such.
Most tables are between 36-40″. If you’re stumped trying to figure out what size you want, lay out plates on the counter, floor, wherever and see how much space you want in the center of your table for a centerpiece and/or food dishes and then how many plates you want lengthwise. Sometimes jut seeing it all laid out helps!
Because 2″x10″ boards are actually 9.25″ wide (not 10″), we were able to pick four boards for a perfect 37″ table.
2. Pick your boards for the tabletop.
Really examine the boards, don’t just take the four off the top of the pile at the local home improvement stores.
Pick boards that are straight, not warped or too banged up.
3. Line up the 2″x10″s next to each other lengthwise on the floor, pushed up against a wall. Place the sides of the boards you want as the top of the table face down.
4. Put your 2″x4″s on each end, standing vertically, and use the 48″ clamps to draw the boards together, getting as small of a gap as possible.
5. Cut four 2″x4″s a width that will be determined by the width of your table.
We cut our 2″x4″s to 29″ long given our table size and table overhang choice (2″ – more on that below).
Use wood screws to attach these boards to the 2″x10’s. Be sure these boards are centered on the four tabletop boards so they don’t end up getting in the way of the apron later on.
When you’re screwing these 2″x4″s in, start at 40″ inch from one end of the table, leaving a 10″ gap between each board.
6. Flip the tabletop over and put it on two sawhorses.
(You might need some extra muscle for this step! 🙂 )
7. Cut the tabletop to the size you want it.
Line up a 2″x4″x40″ so the saw blade will cut at 24″, which means the board will be a little further in than 24.”
Make sure the board is square to the table top. you can either use a T-square to measure this or measure with your tape measure on each end to ensure it’s even.
Put the 24″ clamps on each side and cut the table top on each end at this measurement.
8. Sand the sides of the table.
All of the sanding took FOREVER, but it’s worth it.
Sand the sides of the tabletop with the belt sander.
Use some pressure in places where you need to sand out some imperfections or make subtle changes to the length if the boards aren’t quite even.
9. Sand the top of the table.
Use the orbital sander, starting with the 80 grit sanding pads, and start sanding the top of the table.
For each board, we went back and forth, back and forth (almost like creating four horizontal lines across the table) to ensure we covered each part of the surface.
Repat this with the 120 and 220 grit sanding pads. We used about six of each grit sanding disc to get a smooth finish on the top of our table.
In total, we spent about six hours anding the top of the table.
It’s amazing to feel the top of the table as you get further into the sanding. It gets so smooth!
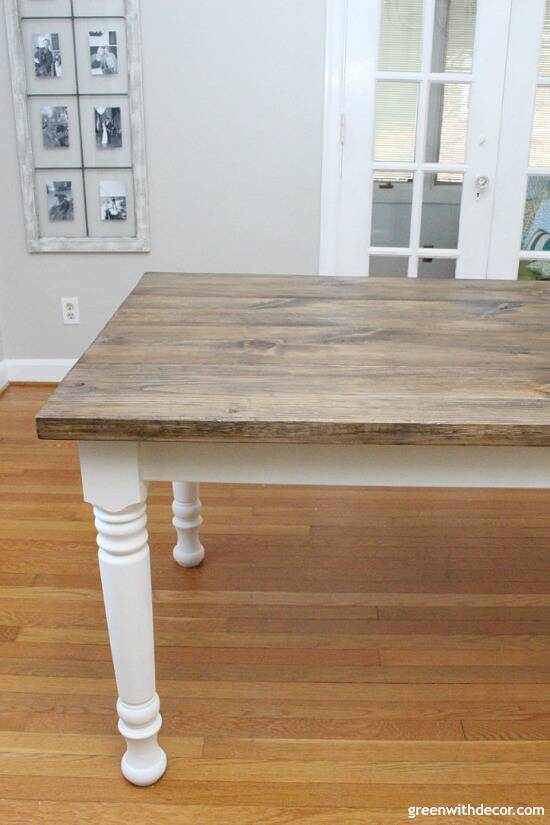
10. Sand the corners of the table.
Use the orbital sander to lightly hit the edges of the table to create a rounded edge so your table doesn’t have sharp corners.
11. Attach the apron to the table legs.
You can order your table apron set (including the table legs) here.
The online form walks you through everything, which is really helpful especially if you’ve never built a table before!
Here’s what the form walks you through and what we chose:
- Table height/leg type: 29″x3.5″ Husky Farm Dining Table Leg
- Leg wood type: Knotty Pine
- Tabletop size (needed so they can build the apron specific for you): 72″x37″
- Table overhang: 2″ (Decide between 2″ and 3″. Look at what you have now if you’re having trouble deciding.)
- Apron profile: Round style
Once everything arrives, connect your apron to the table legs using the mortise and the tenon joint (pre-drilled by Osborne).
This makes it super easy to start this process. Use the screws provided to fasten the apron to a table leg.
12. Attach the wood corner block to the table leg using the washer, hanger bolt and nuts.
Then use the wood screwed provided to further attach/secure it.
Be sure the hanger bolt is tight but is not bowing the apron out. The apron has to be at a 90-degree angle coming off all four table legs.
A T-square would be useful for this step, too.
13. Place the table top on the base you just put together.
14. Measure all four corners of the table to make sure you have the same table overlay length in all four directions.
If you have to, apply pressure to the apron to get the distances correct. (You’ll need two strong people for this step.)
15. After the table is squared and evenly spaced, start screwing the wood screws through the pocket holes in the apron into your table top.
Once everything is screwed in, your table will officially be secure!
16. Stain or paint the top of the table.
We stained our tabletop and painted the apron and legs white.
This post is getting long, so I wrote separate posts on staining the wood for the tabletop and painting the table legs.
This was my first time staining anything, and I was nervous, but it was way easier than I thought it’d be. Plus I figured if we’d just built a table, I could figure out how to stain wood!
If you’re going to do the tabletop and legs different stains/paints like we did, use painter’s tape to avoid getting stain on the table legs (and then later to avoid getting paint on the newly stained tabletop).
I also put extra shopping bags along the apron and table legs to protect them from any stain drips.
17. Caulk in between the apron and tabletop.
Be sure to use paintable caulk. We used this.
18. Paint or stain the apron and table legs.
If you want the whole table one color, you can stain in it all, but we’ve always loved the two-toned furniture look.
You can see how to paint table legs here.
And just like that, we built a table!
I can’t wait to get this room whipped into shape! Building the farmhouse dining table was definitely the biggest to-do, so it feels good to have it done!
We’re planning to build benches for the sides of the table and still on the lookout for chairs for the heads of the table plus a pretty rug to go underneath. (Update: see the DIY benches here.)
You can see the design plans for the coastal dining room here.
GET THE LOOK: Brown lace scarf | Candleholders | White taper candles | Dinner plates | Salad plates | Appetizer plates | Napkin fabric | Moscow Mule mugs | White curtains
Remember to bookmark or pin this post if you want to save it for later!
Pin it!
Want to read more posts like this?
Follow along: Get my emails | Facebook | Pinterest | Twitter | Instagram
Ella says
Great job. It looks fantastic!
GreenWithDecor says
Thank you!
Melody Walley says
Can you tell me what color stain you’re using in the pictures? I love the color of this table!
GreenWithDecor says
We used Dark Walnut by Minwax – I linked to it under “Supply list”! We love the color, too!