Make these easy DIY wedding table numbers! An easy tutorial, tips for taking wedding number photos and ideas for poses with different numbers.
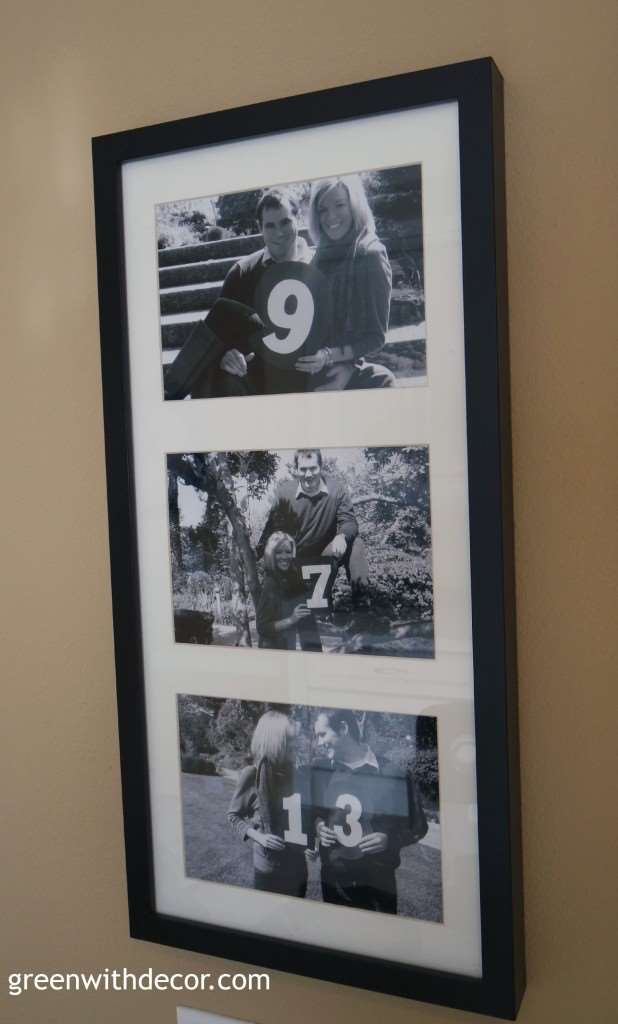
One of my favorite decorations in our kitchen is this frame of us holding the numbers that make up our wedding date.
We used these pictures as our table numbers at our wedding. It was a fun, easy way to add a personal touch to the wedding.
There wedding table numbers were so easy to make!
This post contains affiliate links. This means if you click the link and buy something, I may receive a small percentage of sales at no extra cost to you.
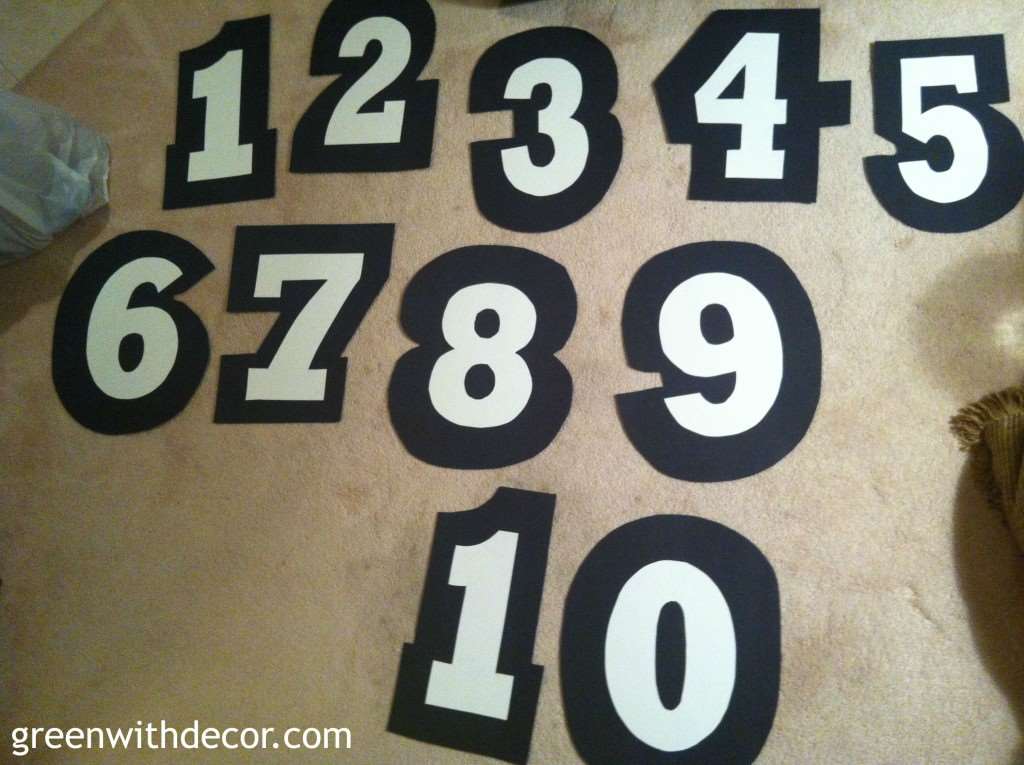
Supply list for DIY wedding table numbers:
- Black tagboard
- White tagboard
- Pencil
- Rubber cement
- Scissors
- Stencils or traceable numbers (two sizes – smaller for white tagboard, larger for black tagboard)
How to make DIY wedding table numbers:
1. Draw the numbers in pencil on both the white and black tagboard.
2. Cut the numbers out.
3. Use rubber cement to paste the white numbers on top of the black numbers.
I like how the white numbers pop on top of the black.
The funniest part of this whole project was that my college-aged brother Stephen took the pictures of us in a local park (Ault Park for those in the Cincinnati area).
When I went to pick up the prints at Walgreen’s, I had to sign a form stating I had copyrights to the pictures. They thought the pictures were professionally taken! I told my brother he should start hiring out for engagement pictures.
Tips for taking wedding table numbers photos:
- We took the pictures mostly in order so we wouldn’t accidentally miss a number, but we took “12” and “21” back to back – same with “13” and “31,” etc. The numbers were already out anyway, so this made the photo session go a bit faster – which both Kalen and my brother appreciated!
- If you’re going to frame your actual wedding date like we did, think about which 3 poses are your faves and use those for those numbers. I didn’t think about it until after we had the pictures done.
- Coming up with 30-some poses was harder than making the numbers! Scroll through Pinterest (and this blog post – I shared all of our poses below!) and save your favorite poses to a Pinterest board you can easily reference on the day of your photo shoot.
- Figure most reception venues seat 8-12 per table, so based on your guest list, take enough photos for the maximum number of tables you could have so you don’t end up short and having to dress back up and take more photos.
- Check the weather before you head out for photos, of course! And the event schedule if you’re in a public park. We realized when we got there that there was a festival later that afternoon. Luckily we had time to get all of our photos in before it started, but it would have been a huge bummer to have to go back to finish.
I had the pictures printed in black and white for a more classic, timeless look. (If you’re going to print yours in black and white, too, remember that your outfit color choices don’t really matter since it’ll all be shades of gray!)
Poses with wedding numbers:

It only took us about an hour to take all the pictures.
I love that we can use the pictures as decor in our house now – fun memories of a fun day!
Oh, and I’ve gotten questions about my scarf. It’s linked here, it comes in a bunch of colors.
What are your favorite DIY wedding table numbers you’ve seen?
For more wedding DIYs, check out these:
- A clever wedding thank you note idea
- DIY wedding place cards from corks
- Repurpose old windows into picture frames
Remember to bookmark or pin this post if you want to save it for later!
Pin it!
Want to read more posts like this?
Follow along: Get my emails | Facebook | Pinterest | Twitter | Instagram
Annie @ Annie's Noms says
This is such a great idea!! I’m just starting to plan our wedding and I’m over run with ideas from Pinterest, but I really like that this is a personal touch and I’m sure it would get loads of compliments!
GreenWithDecor says
Thanks, Annie!! Enjoy wedding planning 🙂
Chelsea says
Your pictures are gorgeous!! It’s kind of funny- you actually look SO MUCH like a friend of mine! My mind is blown!!
GreenWithDecor says
Thanks, Chelsea! Ha – that’s too funny!
Kayleigh @ Sugar in My Texas Tea says
Such a cute idea! I just made something similar with my infant for our family calendar.
GreenWithDecor says
Thanks, Kayleigh! What a fun idea – I bet the calendar is adorable!
Heather @ The Deans List Blog says
That is SUCH a fun idea — makes me want to get married all over again! 😉
GreenWithDecor says
Thanks, Heather! 🙂
Cathy says
That is a really cute idea – I love it. Your pictures are all so awesome. Cathy
GreenWithDecor says
Thanks, Cathy!
Roxanne says
Such a sweet idea!
GreenWithDecor says
Thanks, Roxanne!
Kate says
This is a great easy idea! Thanks for sharing.
GreenWithDecor says
Thanks, Kate!
Dayne says
Such a great concept that turned into a beautiful reality! Love these pics!
GreenWithDecor says
Thanks, Dayne!
Mandi says
You two are super cute! 😀 I love DIY Wedding projects. We did a lot for our wedding as well
GreenWithDecor says
Thanks so much, Mandi! DIY is a lot of fun!
Amanda @ Old House to New Home says
So cute! And I am impressed you were able to think of so many poses to go with each number!!
GreenWithDecor says
Thanks, Amanda! Ha – it was a lot of poses!
Ruthie says
What a fun way to use those again! I just got all of mine from my mom so that I could try and sell them! Great way to get some new/current photos of you and your husband!
GreenWithDecor says
Thanks, Ruthie! What a fun idea!
April R @Uncookie Cutter says
This is so cute Meg!
GreenWithDecor says
Thanks, April!