Disclosure: This post is sponsored by Dixie Belle Paint Company. All opinions, images and love of painting projects are 100% mine.
Kalen and I went to a sale at a local home decor store over the summer (I can’t resist a good sale), and we found this old shutter.
It wasn’t in great shape, and I had no idea what I was going to do with it, but it was only $5 so obviously it had to come home with us.
Here’s how it looks now:

This post contains affiliate links. This means if you click the link and buy something, I may receive a small percentage of sales at no extra cost to you.
I just love the white distressed look. Shocker, right?! Based on my furniture makeovers, you probably already knew that.
I used Dixie Belle, a new-to-me paint, on the shutter. I like trying new paints to see how they cover and hold up so I can be sure I’m always using (and telling you guys about) quality paints.
Here’s how the shutter started:
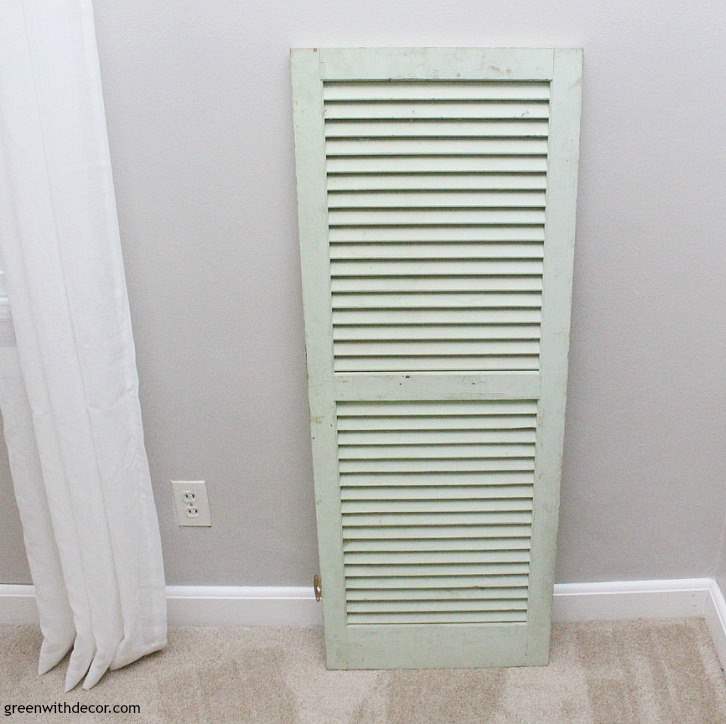
Much better after some pretty paint and distressing, right!? Oh, and cleaning. See all that dirt?!
Ironic I painted over something green, I know, but it wasn’t my favorite shade of green and needed some updating.
Supply list:
- Drop cloth (or old sheet)
- Screwdriver
- Wood filler
- Putty knife
- Dixie Belle’s Cotton Chalk Mineral Paint
- A paint brush (a chip brush works best)
- Sanding sponges
- Dixie Belle’s Gator Hide
- Cling on brush or sponge applicator
Who ever thought I’d have something called Gator Hide on a supply list?!
Dixie Belle has a bunch of wax, glazes and finishes to pick from, but with a name like Gator Hide, you know I was trying that first.
How to paint and distress an old shutter:
1. Clean
Scrub your piece, especially if it’s covered with dust and dirt like this shutter was.
I also realized about 5 seconds into this project that this shutter was going to take way longer than a table or dresser because of alllll of the slats. Wiping each one clean took a bit of time.
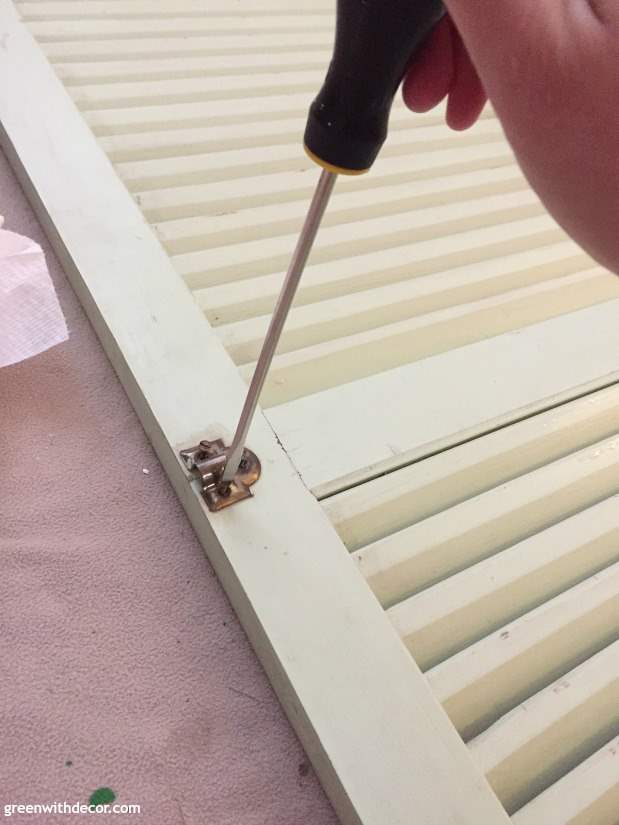
2. Remove any hardware.
The shutter had a couple hinges I took off and got rid of.
I figured I didn’t need them, but if you want to reattach them, you totally could after you’re done painting.
3. Use wood filler to fill in any holes or divots.
Use a putty knife (or your finger in small areas) and work it into the hole.
After it’s dry, use a sanding sponge to sand off any excess.
4. Paint!
You don’t have to worry about priming with Dixie Belle.
Dixie Belle is pretty thick paint and gets thicker the longer you leave the lid off. You can add some water to thin it out if you want to work with a thinner paint.
Use a damp brush and apply the paint in the same direction as the wood grain of the piece, which means going up and down each slat of the shutter.
Again, this took a while! (ignore the purplish color, I’d originally painted this another color but decided to change directions and go with white.)
Dixie Belle dries pretty quickly. The shutter was dry in under an hour.
If your piece needs it, give it a second coat. I typically do two coats on anything I’m painting for good even coverage.
Then let it dry.
5. Distress your piece. (optional)
Use a sanding sponge to rough up the piece.
I went over the edge of each slat (and was starting to wonder why I EVER thought painting a shutter was a good idea!) and around the edges to sand off the paint to show the original wood underneath.
6. Apply Dixie Belle’s Gator Hide to seal your piece.
Dixie Belle’s paint doesn’t require anything to seal it, but they have plenty of waxes and other finishes if you want to add an extra layer of protection.
I had to try Gator Hide because of its name, and I hadn’t seen anything like it before.
A little goes a long way. Let your piece sit for a day or two so the paint has some time to set. Then use a sponge applicator to apply thin, long strokes over your entire piece.
Let it dry for an hour or two, then apply a second coat. Let it dry again, and apply a third coat. It takes three coats to give your piece a water resistant finish.
Let the Gator Hide dry for at least 48 hours before you use your piece for anything. This is especially important if you’re using it on a table or something where you’ll be putting other things on top of the surface.
If you have more questions about how to use Dixie Belle’s paint or other products, they have video tutorials on pretty much everything that you can watch here. You can buy right from their website or find a store near you here.
I love how the shutter pops agains this green wall.
Green and white will probably always be my favorite color combo. I’m debating hanging the shutter up but I kind of like the casual look of it just hanging out leaning against the wall. What do you think?
It’s easier to see the distressing close up.
The painted chair and DIY pillow were fun projects, too. (I used this fabric on the pillow.)
Have you painted an old shutter without losing your mind?
It’s one of the more tedious painting projects I’ve taken on, but I love how it looks now.
Remember to bookmark or pin this post if you want to save it for later!
Pin it!
Want to read more posts like this?
Follow along: Get my emails | Facebook | Pinterest | Twitter | Instagram
Vicki and Jenn 2 Bees in a Pod says
Thanks so much for the chance for the giveaway. We would love the opportunity to use Dixie Belle Paint!
GreenWithDecor says
It’s great paint! Good luck!
Teri Ronk says
Turned out beautiful!!! Thank you for trying Dixie Belle Paint!!
GreenWithDecor says
Thanks, Teri! So glad we could work together!
Darlene Charneco says
Thank you so much for the opportunity!
GreenWithDecor says
Of course! Good luck!
Emily says
Oh man, all those slats! Haha! Your shutter turned out great – I like it casually leaning somewhere. Plus you could drape it with a garland or use it as a card display for the holidays if you like. And thanks for the chance at the giveaway 🙂
GreenWithDecor says
Yes, the slats were killer haha! Thank you! I like it leaning, too. I’m thinking about using it for Christmas decor – great minds think alike!