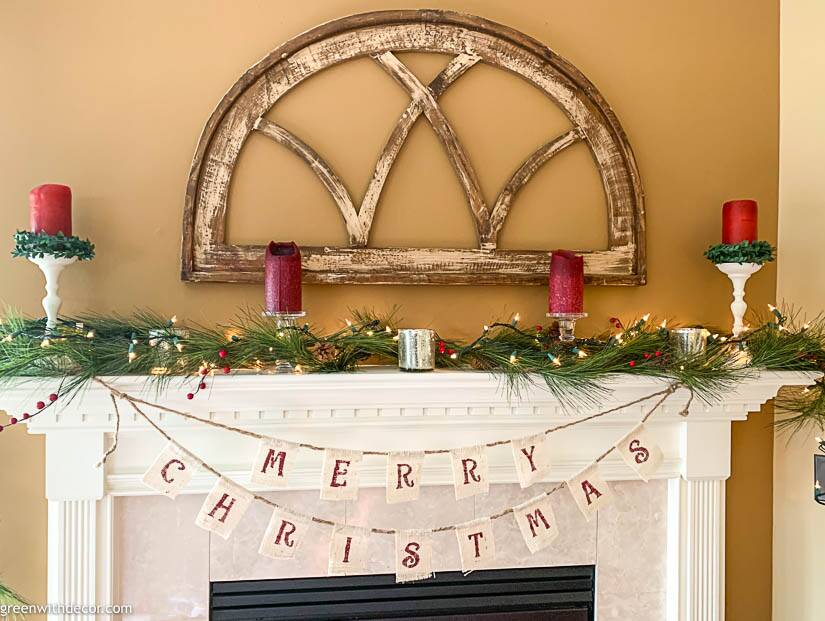
This DIY Christmas banner is an easy Christmas craft and a cute way to dress up your mantel for the holidays!
I have such a cute easy Christmas craft to share today!
My mom and I made a DIY Christmas banner for my parents’ mantel, and it’s so festive!
This post contains affiliate links. This means if you click the link and buy something, I may receive a small percentage of sales at no extra cost to you.
Supply list for a DIY Christmas banner:
- Burlap
- Iron
- Stencils
- Tape measure
- Needle
- Pins
- Fabric scissors
- Craft paint
- Foam brush
- Paper plate or plate tray
- Tan thread
- Twine
How to make a DIY Christmas banner:
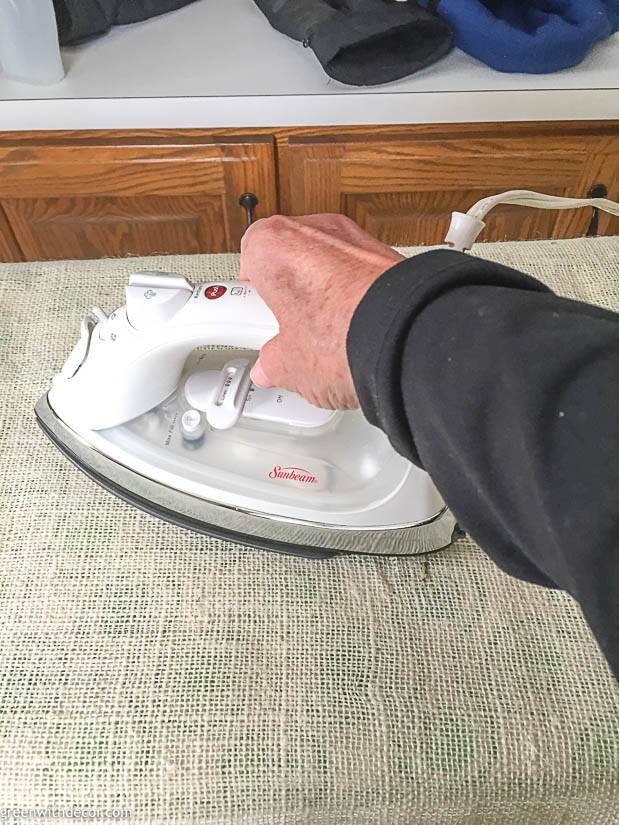
1. Iron your burlap.
2. Determine the size of each burlap piece.
Place one of your stencils on your burlap to determine the height and width you’ll want each burlap piece to be.
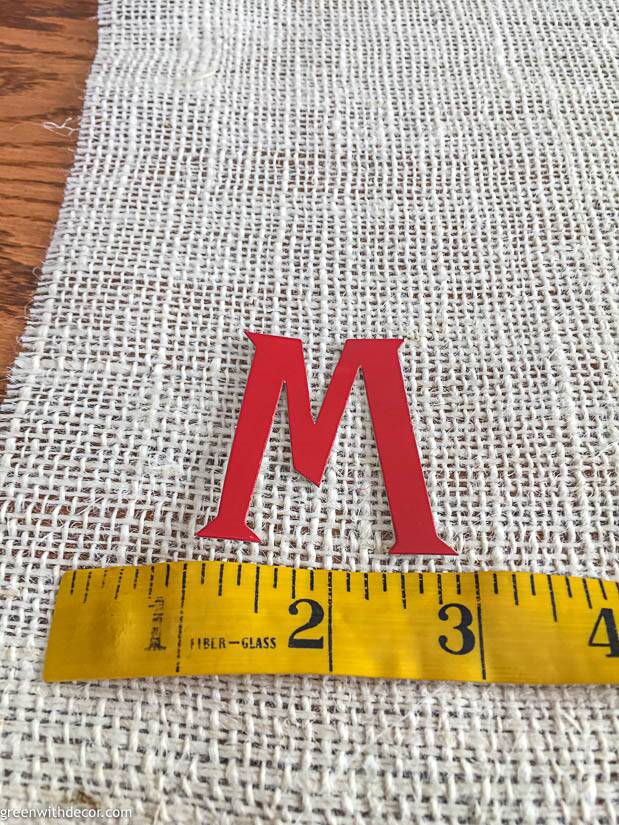
This will depend on the size of your stencil. My burlap pieces were 5″ x 3″. (Just substitute in whatever your numbers are to follow the steps below!)
Also keep in mind that the top of each piece of burlap will be folded over (so the twine can slide through the back for you to hang the sign), so you’ll want the burlap pieces to be a bit taller than you actually want it to look when it’s finished.
More on this in step #5.
3. Measure and cut for the height:
Measure 5″ up from the bottom of the burlap.
Use a pin to hook a piece of thread and pull it out from the burlap to give yourself a straight cutting line.

(By the way, this is SUCH a good trick for cutting burlap in a straight line!)
Cut the burlap along this line so you end up with a long horizontal piece of burlap.
If the horizontal piece isn’t long enough to fit the letters all of ‘Merry Christmas’, repeat this step so you have enough burlap for step #4.
(You’ll need 3″ x 14 letters = 42″ of burlap for this – or however wide your pieces are x 14 letters.)
4. Measure and cut for the width:
Measure 3″ across, and pull a thread out to give yourself a straight cutting line. Cut along that line.
Repeat this step for each letter (14 for ‘Merry Christmas’).
5. Paint:
Place your stencil on a burlap piece.
Pour some paint on a paper plate or paint tray. Dip your foam brush in some paint and blot onto the burlap until you’ve filled in the stencil.
(Hold your stencil in place while you do this with your other hand so it doesn’t move and ruin your design – it’s just impossible to take a picture of this while also holding the stencil and the foam brush!)
Repeat for each letter. Let your paint dry.
6. Fold the top over:
Fold 1″ of a burlap piece over so you have a loop for the twine to slide through the back of the banner. (Of my original 5″, this leaves the front 4″ tall.)
Pull a piece of thread out to mark where you’ll be folding the piece over. This ensures you’re folding along a straight line.
Repeat for each burlap piece.
7: Attach your twine:
Place the twine on the back of a burlap piece.
Sew the burlap together, with the twine nestled in the fold of the burlap.
Repeat for each burlap piece, paying attention to how far apart you want the burlap pieces to be from each other. Mine are spaced 2″ apart.
Do one piece of twine for “Merry” and another piece of twine for “Christmas.”
8. Tie your two pieces of twine together.
The two pieces of twine together at each end so that “Merry” is centered above “Christmas.”
9. Hang up!
Isn’t this the cutest DIY Christmas banner?!
For more Christmas craft ideas, check these out:
Remember to bookmark or pin this post if you want to save it for later!
Pin it!
Want to read more posts like this?
Follow along: Get my emails | Facebook | Pinterest | Twitter | Instagram
Leave a Reply