This is an easy DIY tutorial on how to paint candlesticks – perfect if you find some at a local thrift store or in the basement.
Ready for the easiest project ever?!
My mom and I did this one months ago and I’ve been meaning to share it, so today’s the day.
Today’s post is part of the new Thrift Shop Challenge series I’m doing with a few of my blogging friends. We’re all taking thrift shop finds and transforming them, so you’re sure to find tons of inspiration from their projects linked at the bottom of this post!
Except I might be cheating because these candlesticks aren’t technically from the thrift store. (Shhh!) They’re from my parents’ basement.
But they totally could be from a thrift store, and if you want to do a similar project, I bet you’d find some old candlesticks at your local thrift store, so let’s go with it!
This post contains affiliate links. This means if you click the link and buy something, I may receive a small percentage of sales at no extra cost to you.
Supply list to paint candlesticks:
How to paint candlesticks:
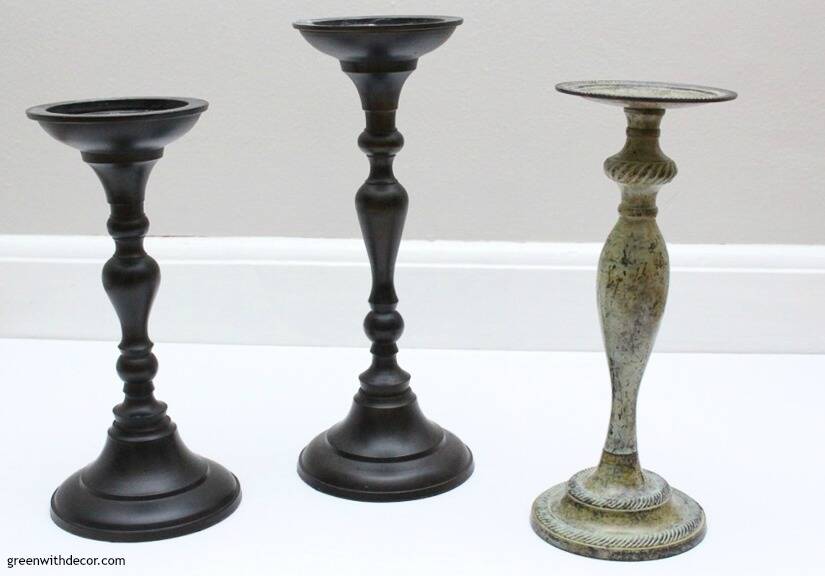
1. Prep your candlesticks.
Make sure they’re not dirty or dusty. Ours started like this:
2. Paint the candlesticks.
Apply the brushstrokes in the same direction as much as possible for a cleaner look. Obviously, it gets a little tricky around the round tops, so just be sure to paint everywhere to get good coverage.
I realized as I was putting this post together that I don’t have any pictures of the actual painting process (bad blogger, I know), but use your imagination. 🙂
Let it dry and do a second coat of paint. I’m always amazed at the difference between one and two coats of paint, so don’t worry if your first coat looks kind of like this:

(This picture is from my post on an easy way to DIY faux concrete vases – just wanted to give you an idea of what the paint coverage will most likely look like after one coat of paint!)
Note: We actually didn’t seal these candlesticks with anything. We painted them months ago and they’ve been just fine. Since you really don’t touch the candlesticks once you put them somewhere, they shouldn’t get scratched up.
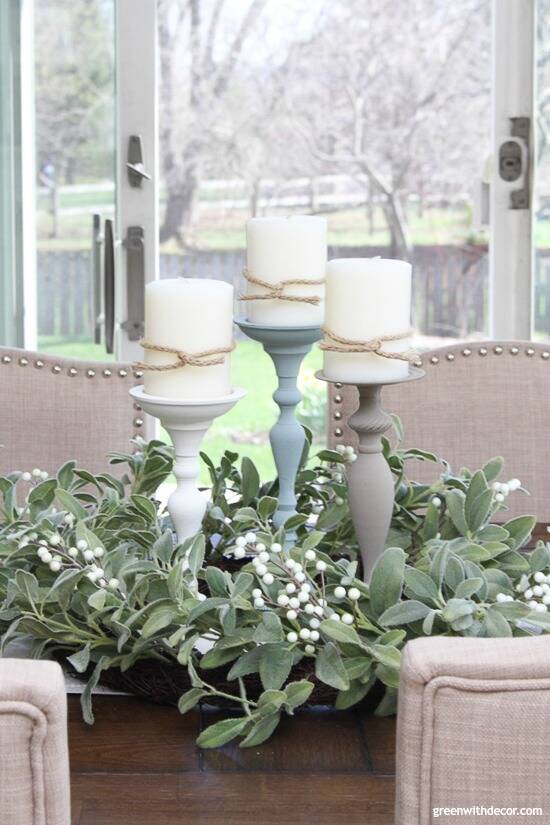
Aren’t they the perfect centerpiece on my parents’ table?! It’s amazing how easy it is to paint candlesticks and give your table a new look!
Their gorgeous dining chairs are here. The wreath is from the Magnolia collection at Target, but I don’t see it online anymore.
You can see the other bloggers’ Thrift Store Challenge makeovers here:
Love & Renovations – Metal barstool makeover
A Crafted Passion – Thrift store play kitchen makeover
Green With Decor – How to paint candlesticks (you’re here!)
Home Beautifully – Shabby chic mirror makeover
Making Manzanita – White pumpkin decor
Small Stuff Counts – Thrift store lamp makeover
Love Create Celebrate – DIY modern wind chimes
Amber Oliver – Spray painting picture frames
Have you been thrifting lately? Tackle any good projects?
We’ll be back in early December with the next Thrift Store Challenge post just in time for some fun Christmas project inspiration!
Remember to bookmark or pin this post if you want to save it for later!
Pin it!
Want to read more posts like this?
Follow along: Get my emails | Facebook | Pinterest | Twitter | Instagram
Chelsea @ Making Manzanita says
I’m always seeing these at thrift store! What a great idea. They turned out sooooo good! Love it!
GreenWithDecor says
Thanks, Chelsea!
Cheryl Atkinson says
Hi Meg! I love these colors. I am always painting candlesticks to sell in my booth. These turned out so pretty.
GreenWithDecor says
Thanks so much! Such a fun, easy project!
Cheryl Atkinson says
hi Meg!! I love painting candlesticks! they are a big seller in my booth. thank you for sharing.
GreenWithDecor says
Such an easy project, and they look so good!