Disclosure: This post is sponsored by Country Chic Paint. All opinions, images and love of painting projects are 100% mine.
I’ve been on a furniture makeover spree lately. I used Country Chic Paint’s clay paint a few weeks ago to give my Grandpop’s old writing desk a makeover, which I love, and it was so easy and fun to use, I wanted to try another color.
Guess what? I didn’t go with green!
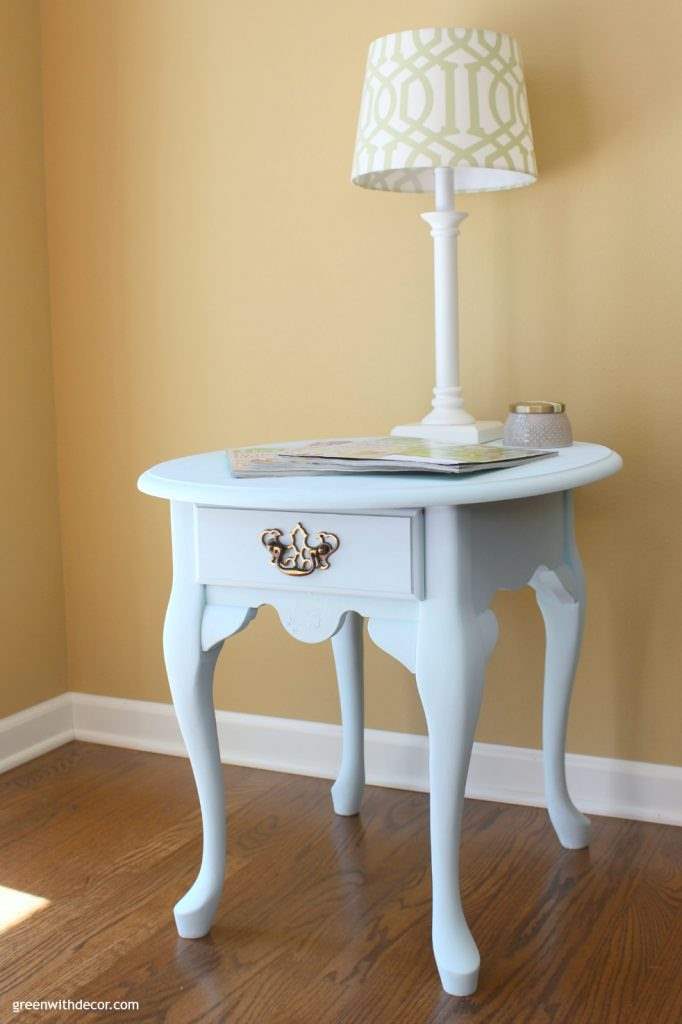
Not yet anyway. I’m sure I’ll use their green paints, at some point (see here or here), but I decided to pick Icicle, a light blue, this time.
It’s a pretty, springy shade:
My parents had this Queen Anne table in their living room when I was little, and it has been sitting in their basement for years.
My mom has all sorts of old furniture and decor items down there I can’t wait to paint and update.
The table started like this:
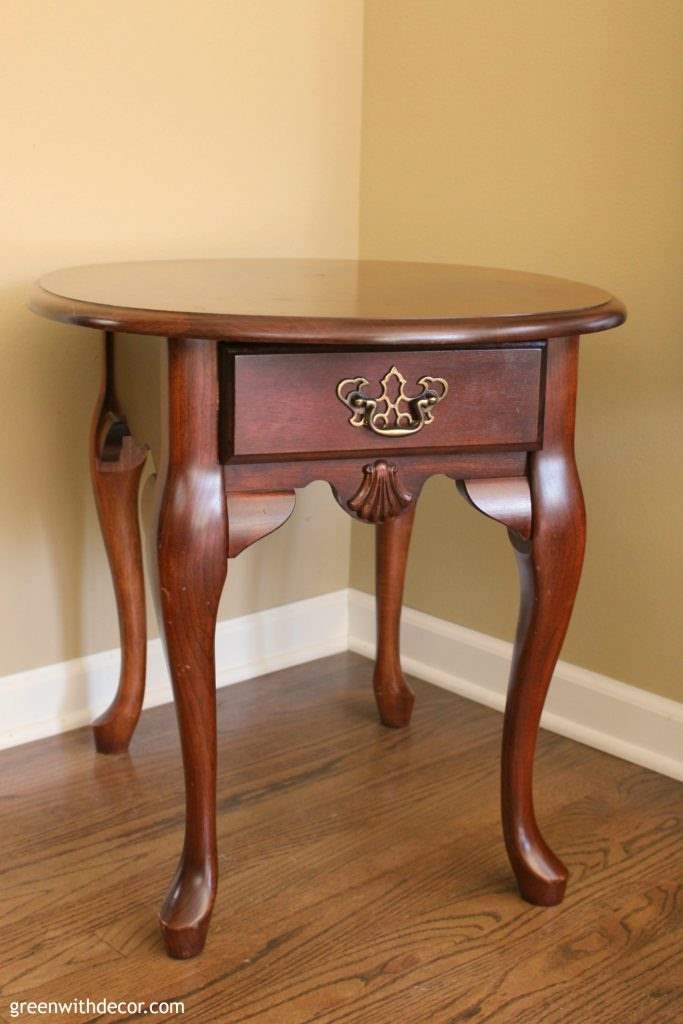
I like the Queen Anne style of the table – those curved legs are pretty, but I knew the Icicle paint would brighten up the piece.
I used to paint a lot of furniture black, but I like lighter colors lately. A bright piece of furniture can really lighten up a room.
This post contains affiliate links. This means if you click the link and buy something, I may receive a small percentage of sales at no extra cost to you.
Supply list for a table makeover:
- Country Chic Paint, Icicle
- Country Chic Paint’s Natural Wax
- Drop cloth
- Paint brush
- Screwdriver
- Hammer
- Sanding sponge
- Painter’s tape
- Paint stir stick
- Lint-free cloth
- Wax brush
- New hardware (optional)
- This one looks like what’s on my table if you want the same look.
How to paint a table with clay paint:
Clay paint is easy to use. I sanded the table a bit with a sanding sponge (my new favorite instead of sandpaper) and wiped it off with a damp clean cloth, then a dry clean cloth.
I taped around the sides of the drawer so I wouldn’t get random paint strokes on the sides of the drawer.
Then it was time to paint!
Shake and stir the paint before you use it. With clay paint, all the pigments sit at the bottom so you want to move the paint around before you use it.

After the first coat, I decided I didn’t want the seashell on the front of the piece so I pried it off with a screwdriver and hammer.

I did three coats of the Icicle, with all the brush strokes going in the same direction.
If you want a more brushed chalky look, you can stick with just a coat or two. I wanted more paint coverage so I went with three.
And if you want a distressed look, you could sand the piece. Given the Queen Anne style of the table, I didn’t think a distressed look was a fit here.
Which is also why I kept the original hardware. I like how the paint gives the piece an updated look while the hardware and legs keep its original charm. What do you think?
Once the paint was dry, I sealed the piece with Country Chic Paint’s clear Natural Wax.
To apply wax, cover the whole piece (I use a wax brush), then use a clean, lint-free cloth to buff the piece, getting rid of any excess wax.
Here’s the piece all finished: A fun twist on the Queen Anne style.
For more details on using clay paint, check out my post on the desk makeover or head to Country Chic Paint’s YouTube channel for video tutorials for just about anything you want to know.
You can see my HGTV Magazine obsession is still alive and well. 🙂
You can see more table makeovers here:
- How to paint a table with detailed trim
- A Queen Anne foyer table makeover with clay paint
- A quick table makeover with a paint sprayer
Remember to bookmark or pin this post if you want to save it for later!
Pin it!
Want to read more posts like this?
Follow along: Get my emails | Facebook | Pinterest | Twitter | Instagram
Robin Kramer says
Beautiful! Like you, I had painted a few pieces in darker colors in years past, and recently I’ve been drawn to lighter/brighter DIY paint jobs. It looks so fresh!
Great work!
GreenWithDecor says
Love the lighter colors! Thank you!
Linda Vorisek says
Love it!!!!!!!
GreenWithDecor says
Thank you!!