Disclosure: This post is sponsored by Eclectic Products. All opinions, images and love of DIY painting projects are 100% mine.
You know I love painting furniture and trying out all sorts of new paints and materials.
When I heard about Electric Products’ Famowood Glaze Coat and Unicorn Spit Gel Stain and Glaze, I thought they’d be fun to try.
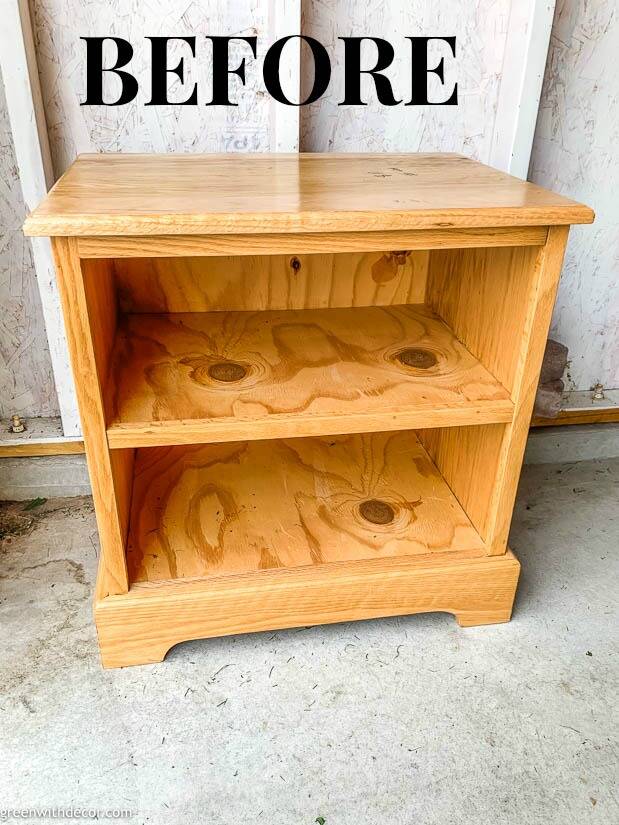
I think this before and after speaks for itself:
And now:

It’s always amazing what you can do to an old furniture piece, right?!
This was a fun project.
I love trying new painting methods!
This post contains affiliate links. This means if you click the link and buy something, I may receive a small percentage of sales at no extra cost to you.
Supply list:
- Drop cloth
- Sander
- Unicorn Spit Gel Stain and Glaze (available here or here)
- Painter’s tape (I used this and this – more on that below)
- Paint brush (or 2 if you’re also using 2 Unicorn Spit colors)
- Rag or paper towel
- Level
- Pre-taped masking film (available here or here)
- Latex gloves
- Famowood’s Glaze Coat (available here, here or here)
- Paint stir stick
- Disposable measuring cups
- Plastic putty knife
- Heating device (heat gun or hair dryer)
The Unicorn Spit Gel Stain and Glaze comes in 14 solid colors and 6 sparkling colors, plus you can mix them to create whatever custom color you want.
You can also dilute Unicorn Spit with water if you want so basically you really can get any color/saturation level you want. I feel like this could be so much fun when my daughter is a bit older and interested in crafts! (Unicorn Spit Gel is non-toxic.)
Unicorn Spit Gel Stain and Glaze works on raw wood, metal, glass, fabric and more.
And the Glaze Coat is equivalent to using 70 (!!!) coats of varnish, how crazy is that?! Love that you get so much protection with just one coat.
Plus it self-levels (as long as your table is on a level surface).
How to use Unicorn Spit and Glaze Coat for a colorful table makeover:
1. Prep your table.
Be sure to set your table on a drop cloth, especially for the Glaze Coat steps because you’ll have some material runoff.
If your table also has a glossy finish like this one, sand it down to get rid of that finish before applying the Unicorn Spit Gel Stain.
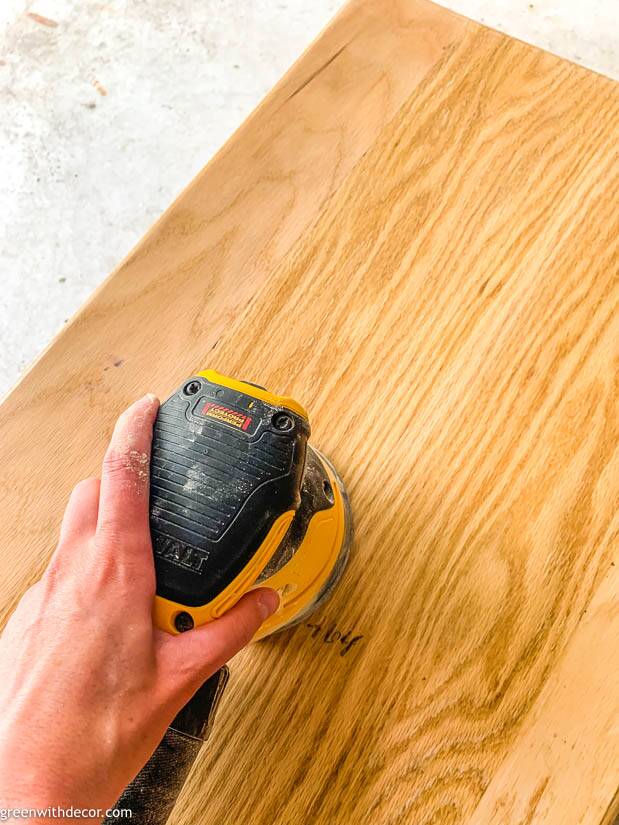
Wipe your table down to get rid of any dirt and dust. Let it dry before you start your project.
2. If you’re also using two colors, use painters tape to tape off your piece to paint your first color.
I used this painters tape for this part since it works on pretty much any surface.
3. Apply the Unicorn Spit Gel Stain and Glaze.
I used Weathered Daydream for the outside of the table.
Shake the Unicorn Spit before using. I squeezed some onto a paper plate and then used a paint brush to spread it on the table.
Just like when painting furniture, brush on the Unicorn Spit in the same direction as the wood grain.
The Unicorn Spit has a jasmine smell. I’m super picky about smells, and I even liked it so you know it’s good and not overpowering.
Wipe off any excess gel with a clean cloth. You can see it’s darker as it goes on, lightening up as it dries.
4. Take your painters tape off.
5. If you’re doing a second Unicorn Spit color, repeat steps 2-4.
I used this painters tape for this part since it works on fresh paint (dry to the touch – not totally wet paint), so I knew it wouldn’t take off the Weathered Gray color.
I used Zia Teal for the insides of the shelves.
6. Check that your table is level before applying Glaze Coat.
7. Use pre-taped masking film to tape off the top of your table and protect the sides.
8. Measure your Glaze Coat.
Glaze Coat comes with two bottles in each box: resin and hardener. You’ll want to use equal parts of each.
The amount you’ll need depends on the size of your table. Glaze Coat provides measurements in the instructions, but basically, you’ll multiple your square feet by 5 to get the amount of fluid ounces you’ll need.
Pour the resin and hardener into separate measuring cups.
Wear gloves for this part. This stuff is STICKY and hard to get off your hands, although I did eventually get it off with soap and water. (I used gloves during the project but accidentally touched a little bit later when I went out to see how my table was curing!)
9. Mix your Glaze Coat.
Pour your hardener into the measuring cup with the resin.
Mix for 6 minutes.
Don’t use anything electric to mix or the material will thicken too quickly. I just used a paint stick.
Pour the mixture into a clean measuring cup.
Mix again for 6 minutes.
10. Pour your Glaze Coat.
Pour your Glaze Coat in the center of your table. You’ll have 10-15 minutes to work before the Glaze Coat begins to harden.
Spread the mixture evenly across your table with a plastic putty knife, but be careful not to overspread or it won’t self-level as it cures.
11. Get rid of surface bubbles with a heating device.
You have to take care of surface bubbles while the Glaze Coat is still wet.
I used our heat gun (on a low setting), moving it over the table several times until the bubbles disappeared. You could also use a hair dryer.
12. Let your Glaze Coat cure.
Full cure time is 72 hours.
Take off your pre-masked taping film and discard, and then you’re all set!
Isn’t this the cutest little table for a playroom?! Not that we have one of those yet, ha. One thing at a time!
Do you have any fun table makeovers planned? Have you tried any new products lately? It’s always fun to try something new!
Remember to bookmark or pin this post if you want to save it for later!
Pin it!
Want to read more posts like this?
Follow along: Get my emails | Facebook | Pinterest | Twitter | Instagram
Leave a Reply