Disclosure: This post is sponsored by Country Chic Paint. All opinions, images and love of painting projects are 100% mine.
This post contains affiliate links. This means if you click the link and buy something, I may receive a small percentage of sales at no extra cost to you.
If you’ve been around the blog for awhile, you know two things: I get my decorating sense from my mom (aka the Hand Model because her nails always look way better than mine), and both my mom and I love the color Vanilla Frosting by Country Chic Paint.
After my brothers and I moved out, my mom started making over all of our bedrooms at my parents’ house.
It’s been fun to talk with my mom about different decorating ideas. We have pretty similar styles, so even though we usually ask each other opinions on different pieces (if we’re not already at the store together), we typically end up agreeing with each other and have houses decorated pretty similarly.
I don’t really remember where the idea for these nightstands came from–probably just from the fact we both have an obsession with painting all of our furniture white at the moment (you may recall my bookshelf or desk, or her foyer table)–but my mom decided she wanted to paint the nightstands in one of the guest rooms (my old bedroom actually).
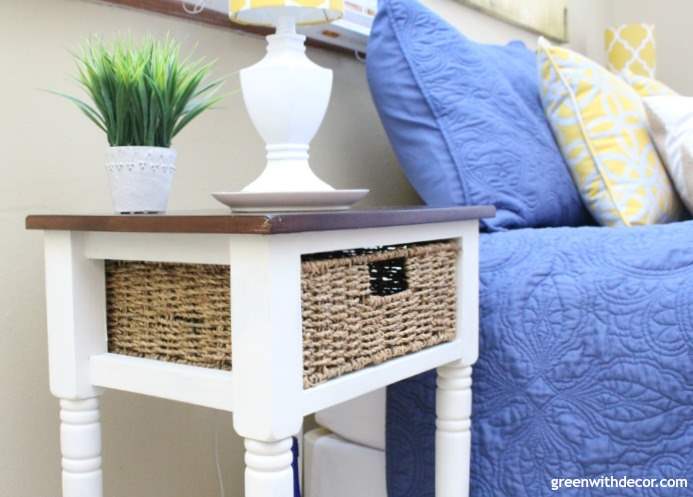
Even better, she wanted to keep the pretty wood tops and just paint the bottoms white. I was all about a two-toned makeover. Isn’t it pretty?!
I love trying different looks with furniture, and the two-toned makeover was new project for me.
Even though the painting process for painting a whole piece or just painting the bottom is really the same, it’s still fun to take a piece and transform the look of it with some paint.
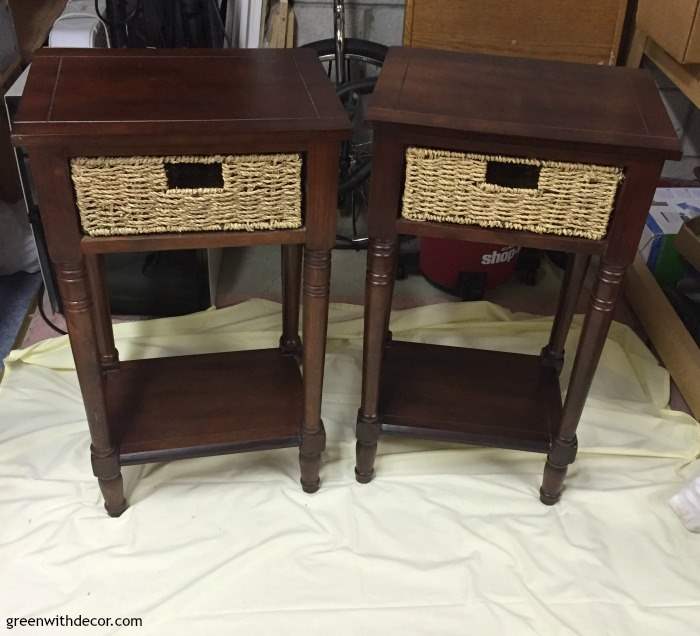
Here’s how the nightstands started:
Supply list for a two-toned nightstand makeover:
- Country Chic Paint, Vanilla Frosting
- Country Chic Paint, Natural Wax
- Drop cloth or an old sheet
- Paint brush
- Stir stick
- Painter’s tape
- Wax brush
- Lint-free cloth
How to give furniture a two-toned makeover:
1. Tape off the top of the nightstand to protect it from stray brush marks.
With clay paint, you don’t need to do any prep work, although you can give you piece a quick sand down if it’s in rough shape.
Since these nightstands looked pretty much new, we skipped the sanding.
2. Paint.
Shake and stir the paint, then start painting!
Something about painting is so therapeutic. My mom and I had a bit of a painting day when we worked on these nightstands (two more table makeovers coming to the blog soon), and it was so relaxing. I just love hanging out painting and catching up with my mom.
Paint in the same direction as the wood grain of your piece.
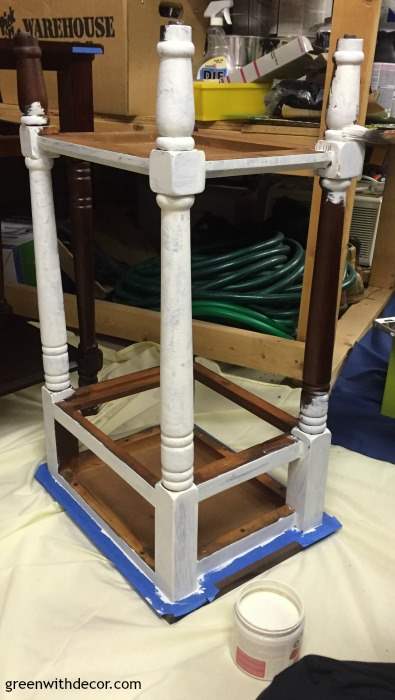

Let the paint dry, then give it a second coat. You can see the difference between one coat and two.
I’m always amazed how much deeper the coverage is after a second coat with this paint.
3. Take the painter’s tape off.
4. Distress your piece. (optional)
If you’re going to distress your piece, do it before you wax. Use a sanding sponge (my choice) or sandpaper and rough it up around the edges.
We didn’t distress the nightstands, but I talk more about this in my blog post I did on painting my desk.
5. Seal your piece with wax.
Let the final coat of paint dry for a day or two before you apply the wax.
You can use different waxes to change the final look/color of your piece, but my mom and I are (again) are pretty similar in that we love the Natural Wax on top of the Vanilla Frosting.
Use a wax brush, and let me say, a good wax brush really does make a huge difference. I bought the Country Chic Paint wax brush recently, and it works soooo much better than cheaper wax brushes. I’m all about saving money, but do yourself a favor and buy a good wax brush.
Swirl your nice wax brush around in the wax container and then apply the wax to the piece using circular motions.
Then use a clean, lint-free cloth (old white t-shirts work just fine) and wipe off any excess wax. If you haven’t used wax before, Country Chic Paint gives more info on using their wax here.
I love how fun and beachy this guest room is. And that canvas above the bed!
Aren’t these little table lamps fun? We found them at HomeGoods in Cincinnati back when we lived there — the store in Hyde Park is seriously THE BEST HomeGoods if you’re ever in the Cincinnati area!
I can’t find them anywhere online, but these lamp shades are similar and these lamps are similar with the base/shades flipped.
I just love the two-toned nightstand look in here.
It really completes the coastal look, don’t you think!?
GET THE LOOK:
Since a popular question I get is “Where’d you get that?!,” here are links to the same or similar sources:
If you love furniture makeovers, these are some of my favorites:
- Paint an old desk with clay paint
- A two-toned round table makeover
- How to distress a chest for a chippy farmhouse look
Remember to bookmark or pin this post if you want to save it for later!
Pin it!
Want to read more posts like this?
Follow along: Get my emails | Facebook | Pinterest | Twitter | Instagram
Emily says
The two-toned look works so well on these nightstands! I love how they turned out!
GreenWithDecor says
Thanks, Emily!
Maria says
They came out so good! Great job my friend.
Maria
GreenWithDecor says
Thanks, Maria!