Wondering how to paint a bookshelf: spray it or paint it by hand? This DIY tutorial walks through painting a bookshelf to take it from dark to light!
Disclosure: Country Chic Paint provided the paint for this project and D. Lawless Hardware provided the new hardware. All opinions, images and love of painting projects are 100% mine.
Painting this bookshelf was one of the biggest projects in our home office makeover.
Several people commented that it must have taken me forever and they can’t believe I painted this by hand.
Believe me, it did take a while. I did about four coats of paint to get the bookshelf fully covered. Painting white over black takes a bit!
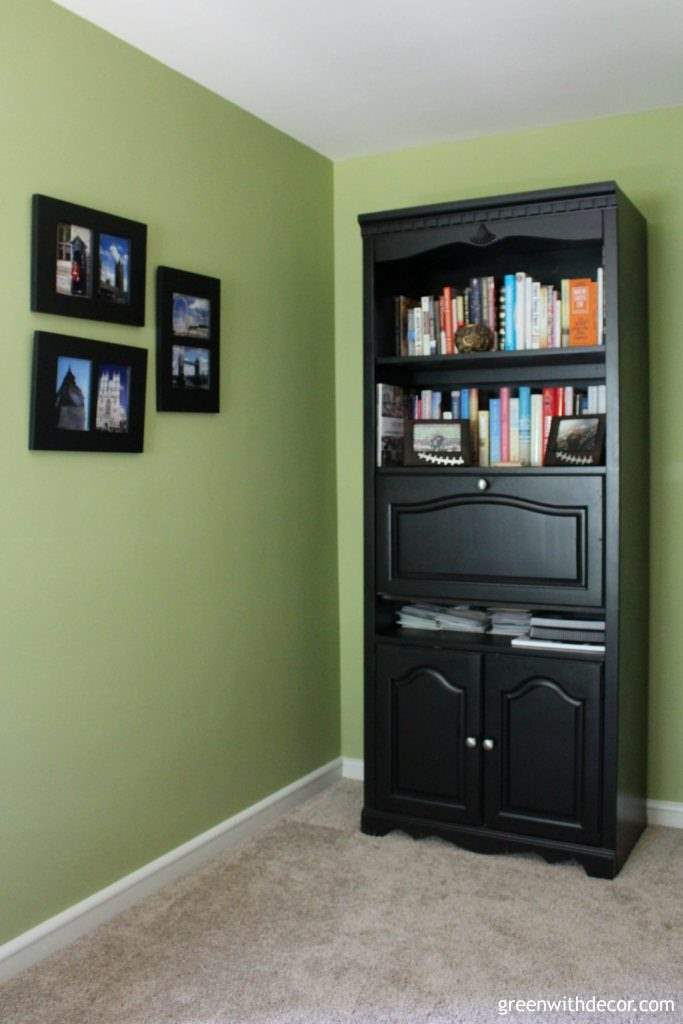
Here’s how our bookshelf started:
This post contains affiliate links. This means if you click the link and buy something, I may receive a small percentage of sales at no extra cost to you.
I had fun with this project since I love painting. Big surprise with all the furniture makeovers I do around here, right?!
You know what I do hate though? Moving big furniture. Who agrees? (You’re all raising your hands, right?)
Kalen and I decided painting the bookshelf right where it was would be waaaaay easier than moving the bookshelf downstairs to paint and then moving it back up.
And guess what? After painting the bookshelf by hand, I still agree. Plus I learned a few things about the best way to paint a bookshelf along the way.
If you have a new (or new-to-you) bookshelf that you haven’t yet moved into your house, I’d leave it in the garage and spray it with either spray paint or a paint sprayer depending on the paint color you want to use.
But if you already have the bookshelf in the room you want it in, I’d leave it.
Especially if moving it involves a flight of stairs.
You can paint it by hand or, if you want to spray your bookshelf without moving it to another room/outside, tape drop cloths or pre-taped masking film all around it to protect the rest of the room like we did when we painted this room with a paint sprayer.
I didn’t know about those when I painted the bookshelf!
Supply list for painting a bookshelf:
- Drop cloth
- Screwdriver
- Painter’s tape
- Plastic resealable bags
- Sanding sponge
- Wood filler
- Primer (optional)
- Paint – I used Vanilla Frosting paint by Country Chic Paint
- Paint stir stick
- Paint brush or paint sprayer and pre-taped masking film
- Wax – I used Natural Wax by Country Chic Paint
- Wax brush
- Lint-free cloth
- New hardware
How to paint a bookshelf by hand:
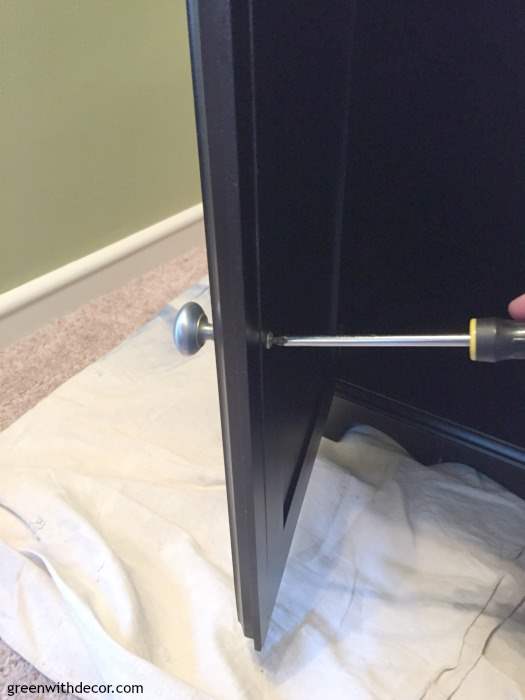
1. Take the hardware and doors off the bookshelf.
Take the hardware off the doors.
If you’re going to use it again after the piece is painted, keep it with the screws. Otherwise, set it aside.
Take the cabinet doors off.
Use a screwdriver and take all the screws out of the bookshelf and doors.

I’d recommend putting each hinge with its screws in a resealable bag and labeling it (left door or right door) so it’s easier to put back on later.
I realize all the screws look exactly the same, but you’d be amazed how some just fit better than others, especially on old pieces like this bookshelf.
You’ll save yourself a lot of frustration at the end of the project.
2. Tape off where the screws will go.
I put pieces of painter’s tape over the holes for the screws on the front and back of each door to keep paint from dripping into the holes and drying in there, making it harder to get the screws back in.
3. Prep the bookshelf.
Wipe down your bookshelf to get rid of any dust and dirt. A damp cloth usually does the trick.
Use wood filler to fill in any random nail holes or scuffs on the bookshelf. Then sand it down with a sanding sponge.
Because I used clay paint, I didn’t have to worry about sanding the bookshelf before diving into painting.
4. Prime the bookshelf. (optional but DO IT if you have a dark piece!)
I should have used primer on this bookshelf (like I did with this chippy dresser makeover), but I skipped this step.
Bad idea!
The best way to paint a bookshelf is definitely to prime before painting it! It took me about four coats of white paint to cover the dark bookshelf.
Dark colors are always hard to paint over, because they just keep seeping through.
When you use primer before painting, you can typically do just two coats of paint to get good coverage on a furniture piece – total time save when painting a bookshelf or other big piece!
Let the primer dry before painting the bookshelf.
If you’re painting a light piece another light color, you can skip priming since clay paint provides such good coverage.
5. Paint!
Shake and stir your paint. With clay paint, the pigments sit at the bottom, so it’s important to really shake and stir the paint.
I’ve used Country Chic Paint’s Vanilla Frosting on other pieces, like this desk makeover and this foyer table makeover, and I’ve never had to apply this many coats of paint before.
But the bookshelf was darker than the original colors of those other pieces.
(Again, I should have used primer!)
After each coat of paint, I noticed a difference in coverage.
I usually let a few hours or a few days pass between coats.
For the trim at the top, I used a smaller paintbrush to make sure paint got into all of the corners of the piece.
Same with the seashell at the top.
Always apply brushstrokes in the same direction as the wood grain of the piece you’re painting.
Sometimes you may have to slip in a perpendicular brush stroke or two, especially if you have trim similar to this bookshelf, but then go back over your brushstrokes with paint in the ‘right’ direction to ensure smooth, even coverage.
6. Distress (optional)
If you want to distress your piece, do it between painting and sealing.
Take your sanding sponge and run it along the edges of your piece to rough it up a bit.
I talk a lot about distressing in these posts about my desk makeover and this chippy dresser makeover, so check those out if you want to learn more!
7. Seal with wax.
I usually use clear wax because I like to keep the original look of the paint I’ve chosen for a piece. I love Country Chic Paint’s Vanilla Frosting, and I didn’t want to alter the color of it by using a darker wax.
I used Country Chic Paint’s Natural Wax to seal the bookshelf.
Grab a wax brush and stir it around in the wax.
Apply the wax to the bookshelf using a circular motion.
Cover the whole piece, then take a clean, lint-free cloth to buff the piece, getting rid of any excess wax.
Wax has to be reapplied every 6 to 12 months to keep a piece sealed. I tend to lean towards the longer side of that.
8. Put the doors and new hardware on the bookshelf.
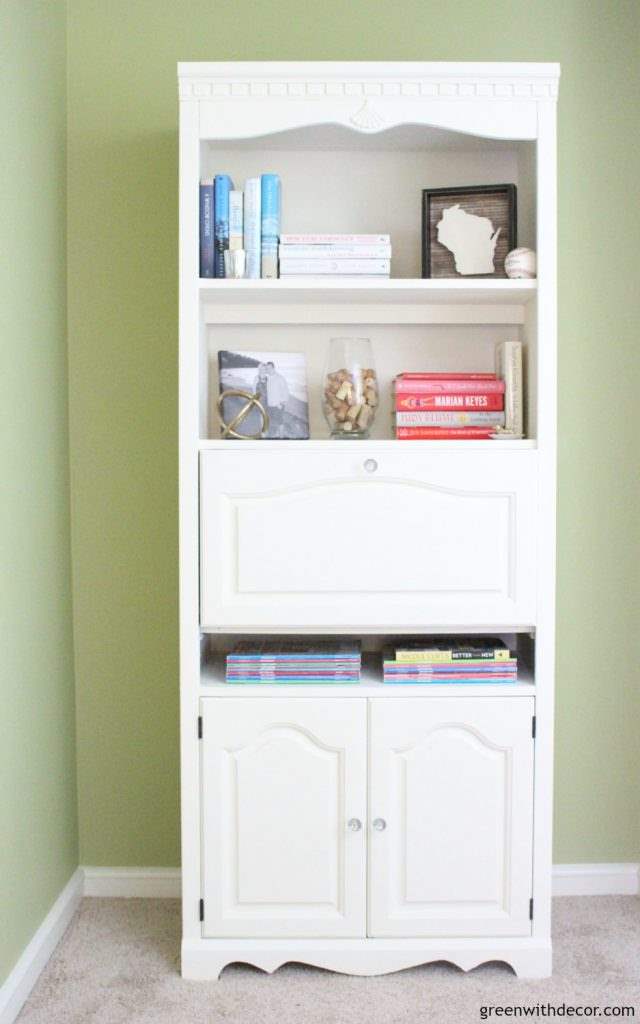
Take off your painter’s tape and screw in the new hardware. I love the new crystal knobs. Aren’t they perfect for a beachy glam feel?!
Then put the hinges back on the door and the bookshelf and screw them in.
And that’s about it for painting a bookshelf!
9. Decorate and style!
Okay not really a DIY step, but who doesn’t love a good shelfie?
I had fun rearranging some books and other decor pieces on here.
Some of my favorite books:A Window Opens | Summer Secrets | Barefoot | The Sound of Glass | The Rumor | How to be a Grown-Up | Everyone Worth Knowing | Who Do You Love | Then Came You
It’s really amazing how much brighter the entire room looks with the bookshelf white instead of black.
You can see all of the home office makeover progress here:
- The home office ‘before’
- How to hem curtains
- 10 pretty silver light fixtures
- How to organize a craft closet without spending a dime
- How to make a throw pillow from extra fabric
- Home office makeover reveal
GET THE LOOK:
Since a popular question I get is “Where’d you get that?!,” here are links to the same or similar sources:
- Wall color: Ryegrass by Sherwin Williams
- Wisconsin sign (other states available)
- Mercury glass votives
- Gold sphere
What do you think? Ready to paint a bookshelf now?
Would you have painted the bookshelf by hand or dealt with moving it downstairs and back up so you could spray it outside?
Remember to bookmark or pin this post if you want to save it for later!
Pin it!
Want to read more posts like this?
Follow along: Get my emails | Facebook | Pinterest | Twitter | Instagram
Leave a Reply