The best microwave height for a built-in microwave cabinet!
This is one of those projects that you’re either going to say, “Oh, I always wondered about that” or “hmmmm … never noticed.”
Well if you’ve been reading the blog for a while, I guess. We finished our white kitchen renovation a few years ago, and we LOVE it. Like really, really love it.
Except for one thing that always bothered me: the microwave height. I have no idea how we decided on the height for this thing, but when it was all installed, it never made any sense to me.
It was dropped below the other cabinets, but not because we needed the space for a massive microwave or something. Which meant there was this extra empty space above the microwave within the built-in microwave cabinet, which wasn’t even painted white to match the cabinets.
Moving Our Built-In Microwave cabinet: Before & After
I always meant to paint the inside of the cabinet to help it blend in a bit more, but I also wanted to somehow magically move the microwave up so I felt like I shouldn’t waste my time painting it.
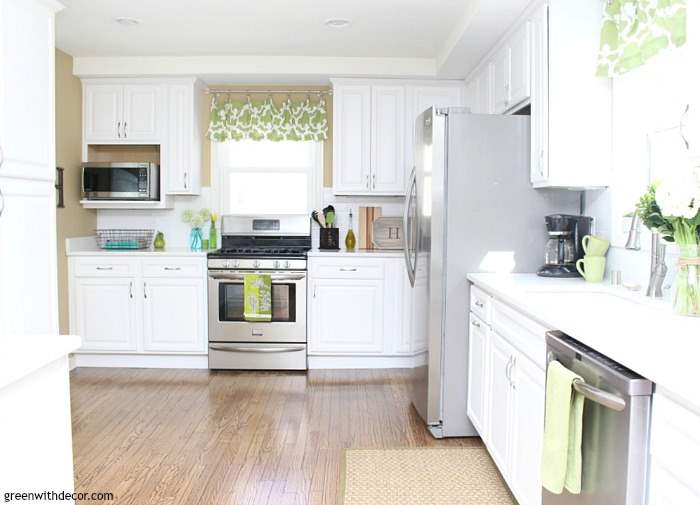
Well, we finally have the microwave at a normal height!

Aside from looks, there was also a practical reason for moving it.
With the built-in microwave cabinet hanging so low, the counter underneath wasn’t really usable. It always felt like you were just staring right into the microwave (especially since a microwave shelf comes out farther than typical upper cabinets) so we couldn’t prep food, sort mail or really do anything underneath it.
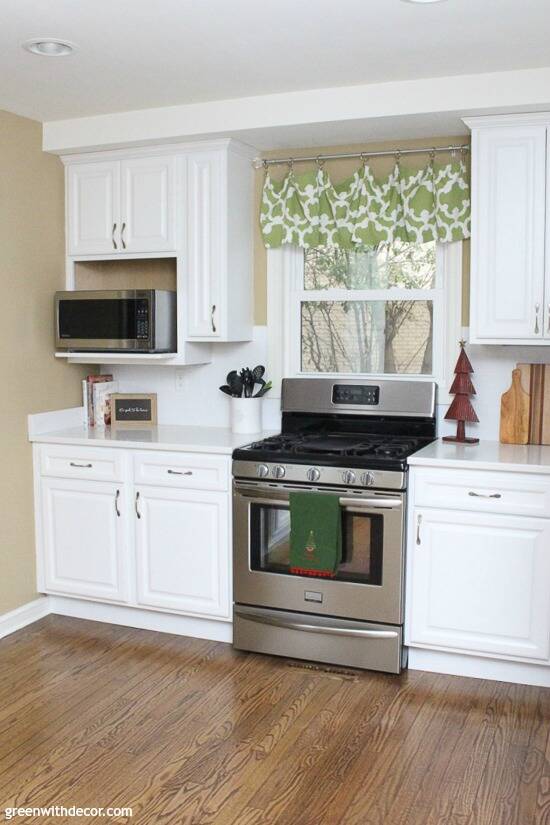
Here’s another before from Christmas so you get the full before and after:
It’s something that always bugged me, and we finally decided to have our contractor fix it when he was here doing the built-in bookshelves.
Because as much as we’d love to learn how to tile (we had to add to the backsplash when the cabinet moved up), realistically, that’s just not something we have the time to learn right now.
(Seriously, how do people get things done with kids?!) And we are definitely not carpenters so it made total sense to hire this one out.
For something I debated about doing for SO long, we should have done this forever ago. The price was totally reasonable.
So this is my PSA if there’s something like this in your house that you’re debating about, get a bid! The price might just be perfect and take care of a project that you just keep thinking about but don’t have the time/skills to tackle!

I share all of this only because it’s something I wish I’d paid more attention to during our kitchen renovation so hopefully if any of you are planning a renovation, this is helpful! Take note of your future microwave height, it definitely matters!
What is the standard height for a built-in microwave cabinet?
I looked into the standard microwave height before we did this to make sure we didn’t screw it up again, and almost everything says the top of your microwave should be 66″ from the ground, which is where ours is now. Perfect!
For reference, our built-in microwave cabinet previously hung with the top of the microwave at about 60″ inches from the ground. It’s crazy what a difference 6 inches can make!
And see our gorgeous crown molding now?! So glad we added that when we did the built-in bookshelves in the living room! I still need some decor for that wall, but I haven’t found anything yet.
There’s still a little bit of space above the microwave within the cabinet, but we left it on purpose for two reasons.
(1) We wanted the cabinet even with the rest of our upper cabinets for a seamless look and (2) if we ever need a new microwave, we didn’t want this one to fit so perfectly that we’d be in a pickle in the future if they decided to make microwaves an inch bigger or something.
This post contains affiliate links. This means if you click the link and buy something, I may receive a small percentage of sales at no extra cost to you.
It took a minute to get used to having the microwave up higher when we were heating food up, but I think that’s just a product of what we were used to. I don’t even notice the difference anymore.
I may still paint the inside of the built-in microwave cabinet, but honestly, you barely notice it so it may just stay this way for a while. Within the shadow of the cabinet, the unpainted wood doesn’t look all that different from our wall color (Camelback) so it seems just fine for now!
And a random side note, but since it’s in the pictures … we started keeping our salt and pepper in our wooden drink caddy so they can stay out on the counter and still be kind of hidden.
I love it! (It took me forever to find ‘pretty’ salt and pepper shakers that would fit in here, but these are perfect!)
Have you renovated your kitchen? Any crazy cabinet mistakes like this microwave height issue you’re dying to fix?!
(Okay, I’ve typed microwave so many times today that it’s starting to look weird to me. Time to stop talking about them!)
GET THE LOOK:
Since a popular question I get is “Where’d you get that?!,” here are links to the same or similar sources:
- Wall color: Camelback by Sherwin Williams
- Counters: Blanco Canvas quartz
- White subway tile
- Stove
- Cabinet handles
- Window valances (DIY)
- Curtain rods, but they’re not always available. These are similar.
- Curtain clip rings
- Cake platter
- Faux boxwood plant
- State cheese board
- Wood drink caddy
- Salt and pepper shakers
- Green spatula
- Olive oil bottle
- Wood cutting board
If you want to see more of our kitchen renovation, you can see the white kitchen renovation reveal here or see all kitchen renovation projects here.
Remember to bookmark or pin this post if you want to save it for later!
Pin it!
Want to read more posts like this?
Follow along: Get my emails | Facebook | Pinterest | Twitter | Instagram
Leave a Reply