A great DIY tutorial for how to paint a room + how to use a paint sprayer. Such a quick, easy way to give a room a new look!
Disclosure: This post is sponsored by Wagner. All opinions, images and love of DIY painting projects are 100% mine.
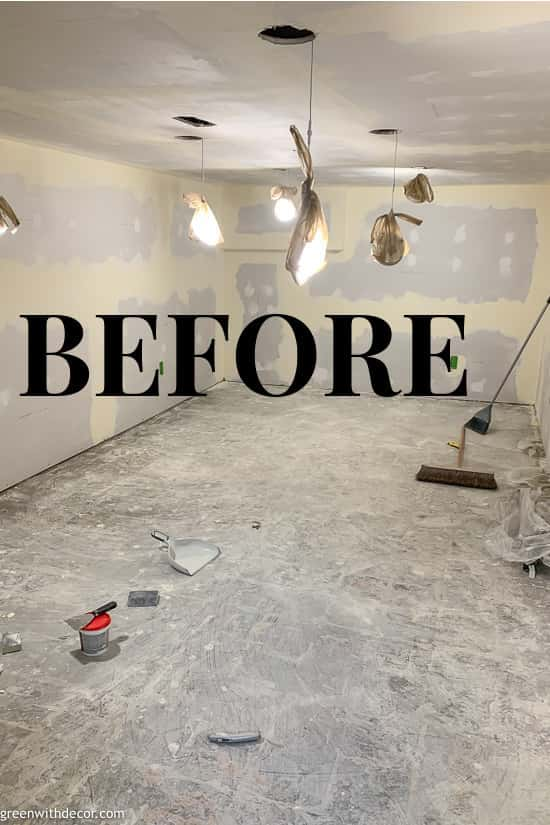
We’ve kicked off another fun room makeover around here: the basement makeover!
i shared our plans for the kid-friendly basement makeover a couple weeks ago in case you missed them. We’re turning this space into the ultimate kids’ indoor playroom / gym!
Next up on our project to-do list was painting the room.
I used our Wagner FLEXIO 3000 paint sprayer to knock this project out.
The sprayer is always a fast way to paint a room, but this project was especially easy since we didn’t have to worry about any overspray on the floor, trim or doors (none of which are installed yet) or ceiling (since we were also painting the ceiling the same color).
I sampled a bunch of white paint colors. There are SO many whites, and I really wanted something BRIGHT since we only have the one window in this room. (See my favorite white paint colors here.)
At some point (realistically, probably next summer), I’m planning to do some sort of fun wall / paint treatment on one of the walls to make this space really fun and playful, but that’s not on the to-do list this year.
For now, we painted the walls so we could move forward with the rest of the room. I decided on Extra White by Sherwin Williams. (See my tips for picking paint colors here.)
I think I’ll do the trim and doors a fun color to add some fun down here, stay tuned.
This post contains affiliate links. This means if you click the link and buy something, I may receive a small percentage of sales at no extra cost to you.
Supply list for painting a room with a paint sprayer:
- Drop cloth
- Pre-taped masking film
- Painters tape
- FLEXIO 3000 paint sprayer (also available here)
- Extension cord (if needed)
- Work light (if needed)
- Paint – I used Extra White by Sherwin Williams
- Paint stir stick
How to paint a room with a paint sprayer
1. Prep your room.
This pre-taped masking film is a GAME CHANGER for taping off doors, windows, trim, the ceiling, etc.
Like I said above, I didn’t have much prep work to do since this room was pretty much a blank slate (the easiest kind of room to paint!), but normally, this is a step you can’t skip. Seal everything off to prevent overspray from getting on surfaces where you don’t want it.
Use a drop cloth to cover your floor. We weren’t too worried about this either since we’ll be putting new flooring down.
Tape off outlets and light switches with painter’s tape.
We ended up disconnecting our ceiling lights and putting them aside to avoid getting paint on them. Then we used a work light to light up the basement to paint.
2. Prep your paint and pour it in the painters cup.
Stir your paint before pouring it in.

As you refill your paint cup while you paint, be sure to stir your paint again first before pouring.
3. Put your paint sprayer together.
Insert the suction tube into the paint sprayer.
Then screw the paint cup into the sprayer, twisting the nozzle into the sprayer toward the ‘lock’ symbol.
4. Set your paint sprayer settings.
You’ll use the iSpray nozzle (the bigger of the two that the sprayer comes with), which means you have a few settings to set:
Power dial: The red dial on top of the sprayer. The thicker your paint, the higher you’ll need this set.
Spray width: The red lever behind the yellow air cap. A wider sprayer width is better for painting walls, and a narrow spray width is helpful near edges and corners.
Material flow: The red knob above/behind the trigger. The thinner your paint, the lower you should set this to start, then slowly increase as needed. If this is set too high, your paint will probably run, and if it’s set too low, you probably won’t get enough coverage.
Air cap: The yellow piece on front. Turn this depending if you want to use horizontal or vertical paint stokes.
5. Paint your room!
If you’ve never used a paint sprayer before, practice on the practice sheet Wagner provides. I know it can seem intimidating at first, but it’s easier than you think. Just go for it!
My best tips for using a paint sprayer to paint a room:
- Move across your wall at a consistent speed, then come back across. Overlap a bit with the paint you just sprayed. Keep doing this until you’ve covered an entire wall, then move onto the next wall.
- The paint sprayer should be 6-8 inches from your wall. If you’re closer, your paint will probably go on too thick.
- Move with your sprayer. Don’t stand still and just flick your wrist or your paint will be sprayed unevenly.
Painting a room with a paint sprayer is fast, but it’s still a lot of area to cover.
You’ll want to wipe down the front of your paint sprayer with a damp paper towel from time to time to prevent any dried bits of paint from messing with your paint flow.
I did two full coats to get good, even coverage over the drywall underneath.
Wagner’s manual is helpful if you run into any issues while painting.
6. Clean the paint sprayer.
This video goes through the cleaning process.
7. Take down the painters tape / masking film and discard.
It’s best to take this down while the paint is still wet to prevent the paint from peeling.
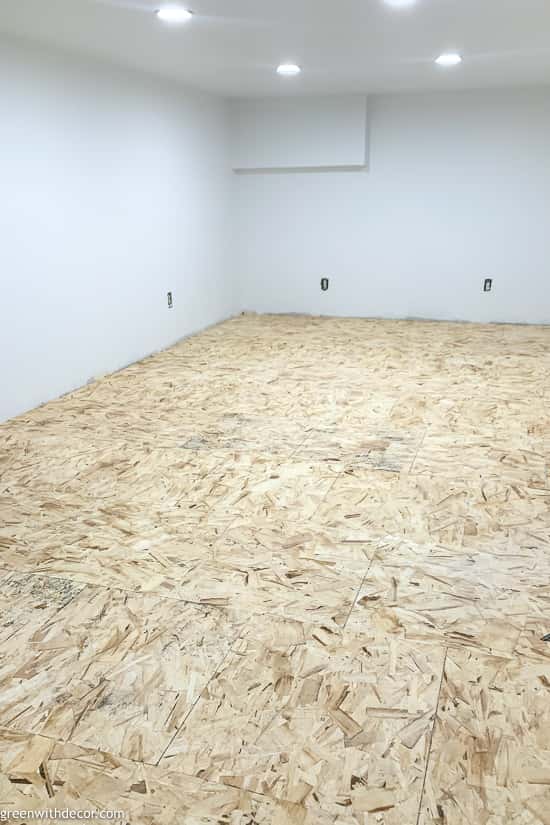
Here’s one more before and after just for fun:
We got the subfloor installed, too, as you can see. Next up is the flooring!
So excited to see this basement come together. Again, check out the basement makeover plans here if you missed them.
Remember to bookmark or pin this post if you want to save it for later!
Pin it!
Want to read more posts like this?
Follow along: Get my emails | Facebook | Pinterest | Twitter | Instagram
Leave a Reply