These DIY picture frames are simple to make and a fun way to display photos. The burned wood finish is easy to achieve with a heat gun!
Disclosure: This post is sponsored by Wagner. All opinions, images and love of DIY projects are 100% mine.
These DIY picture frames are one of those projects that Kalen and I just came up with on a whim, and they turned out SO GOOD.
Gotta love those kind of projects.
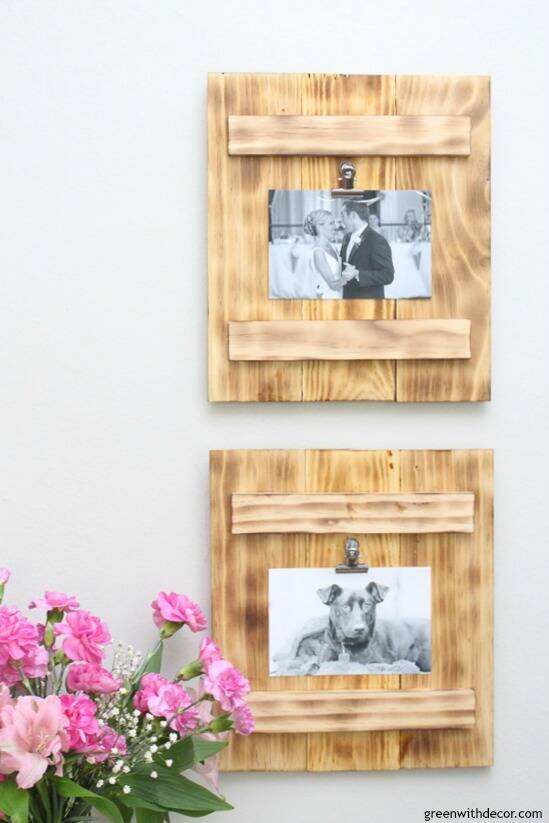
Aren’t they so fun?! I love them!
We love our Wagner heat gun and had been thinking about doing some sort of burned wood finish project with it for a while.
We’d played around with burning wood on some scrap wood pieces a few months ago and knew it was an easy way to make wood look rustic. But we hadn’t done a real project till these DIY picture frames!
The woodworking part was really easy (think wood glue!) if big woodworking projects aren’t your thing, and getting the burned wood finish was super easy with the heat gun.
This post contains affiliate links. This means if you click the link and buy something, I may receive a small percentage of sales at no extra cost to you.
Supply list for DIY picture frames:
- Wagner heat gun, FURNO 750 (also available here)
- Heat resistant gloves
- Wood boards (we used these and these)
- Miter saw
- Safety glasses
- Measuring tape
- Wood glue
- Clamps
- Drill
- Sawtooth hangers
- Clipboard hinge hooks
- Nails
How to make DIY picture frames with a burned wood finish:
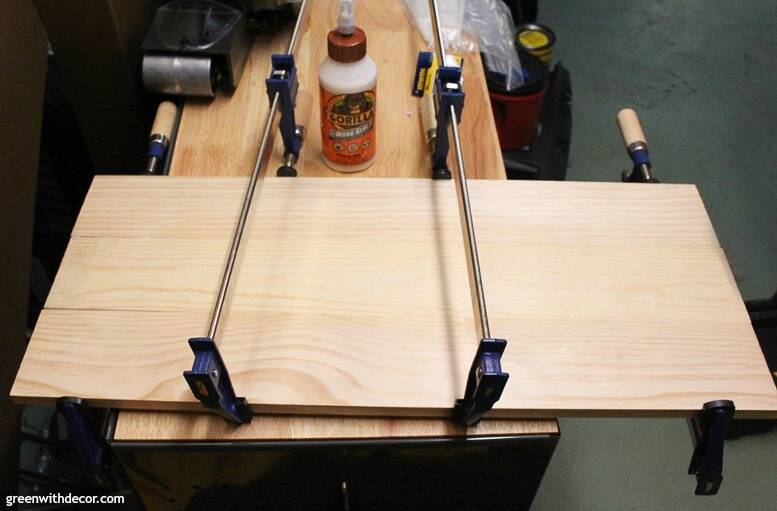
1. Line up three wood pieces and glue them together with wood glue.
This will be the background of the frame. Wood glue is probably the easiest way ever to stick two pieces of wood together.
Place clamps across the wood pieces so everything sets exactly how you want it to, and let it dry for several hours. (We used Gorilla Glue, which fully cures in 24 hours.)
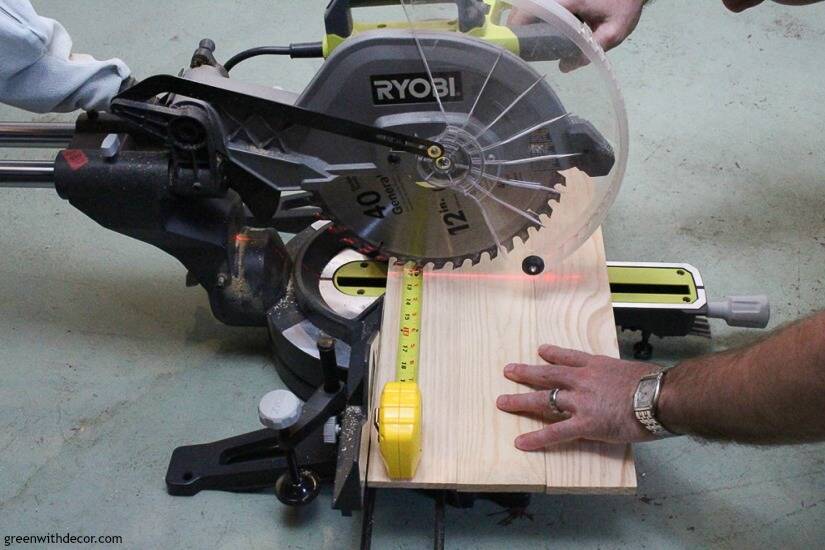
2. Measure your wood and cut the frames and top wood pieces to size.
Pick whatever size you want. We planned to use 4″x6″ photos in the picture frames, so we placed those on top of the wood (along with the other wood pieces and clipboard hinge hook) to figure out how big we wanted the frames to be.
This also helped us figure out how long we wanted the top wood pieces to be.
3. Pick the right attachment for your heat gun.

4. Turn the heat gun on and set the fan to high.
Press the power button in the top left. The heat gun automatically starts at 650F, move the temperature up to 1300F for this project.
If you’re not sure what temperature to set your heat gun at, start low and work your way up. It’s much easier to add heat than to try to save a failed project because you used too much heat.
The Wagner manual has several uses for a heat gun and recommended heat settings for each, so take a look at that if you’re not sure where to start on a particular heat gun project.
5. Place the heat gun pretty close to the wood (without touching it), heating the wood to get a burned wood finish. Keep the heat gun moving so you don’t heat up one spot too long. Move in the direction of the wood grain.
You can always go back over a spot if you don’t think you burned it enough.
It’s such an easy way to make wood look rustic!
Burn the pieces you glued together (step #1) as well as the wood bars you’re going to glue on top of the frame (step #5).
Let all of the wood pieces cool down before touching or moving them.
6. Turn the heat gun off so it’s in cool down mode.
Place the heat gun in the slot on top of its case (with the attachment piece pointing up).
Let the heat gun and attachment cool before putting them away.
7. Determine the placemat of the wood bars on top of the frame.
Again, we found it helpful to lay a picture and the clipboard hinge hook on top of the frame to help with placement for everything.
8. Glue the wood bars on top of the frame.
Use clamps to secure the wood bars on top of the frame, and let it dry for several hours.
9. Drill the clipboard hinge hooks into position.
10. Drill the sawtooth hangers on the back of the frame.
11. Nail your DIY picture frames into the wall.
All done!
Aren’t they pretty?! I just love the rustic look of the burned wood finish.
Have you done any heat gun projects lately? There is SO MUCH you can do with a heat gun, we love to use ours.
You can see other heat gun project ideas here:
- How to crackle paint with a heat gun
- How to use a heat gun to clean a grill
- DIY Christmas icicle ornaments
Remember to bookmark or pin this post if you want to save it for later!
Pin it!
Want to read more posts like this?
Follow along: Get my emails | Facebook | Pinterest | Twitter | Instagram
Vicki And Jenn 2 Bees in a Pod says
This is a fantastic project. We’ve never used a heat gun but now we would love to give it a try! Love the photos that you chose too!
GreenWithDecor says
Thanks, ladies! The heat gun is so much fun, you’d love it!
Lydi @ Lydi Out Loud says
Such a creative project, pinned for later!
GreenWithDecor says
Thanks, Lydi! They were fun to make!
Roxanne says
This is such a cute idea and I love the burned wood look!! Pinning!
GreenWithDecor says
Thanks, Roxanne!