If you’re wondering how to burn wood, follow this easy DIY tutorial to use a heat gun and scrap wood to make these cute DIY Christmas trees!
Disclosure: This post is sponsored by Wagner. All opinions, images and love of DIY projects are 100% mine.
It’s hard to believe Christmas is almost here!
I have a fun little DIY Christmas project today: wood burned DIY Christmas trees from old scrap pieces of wood!
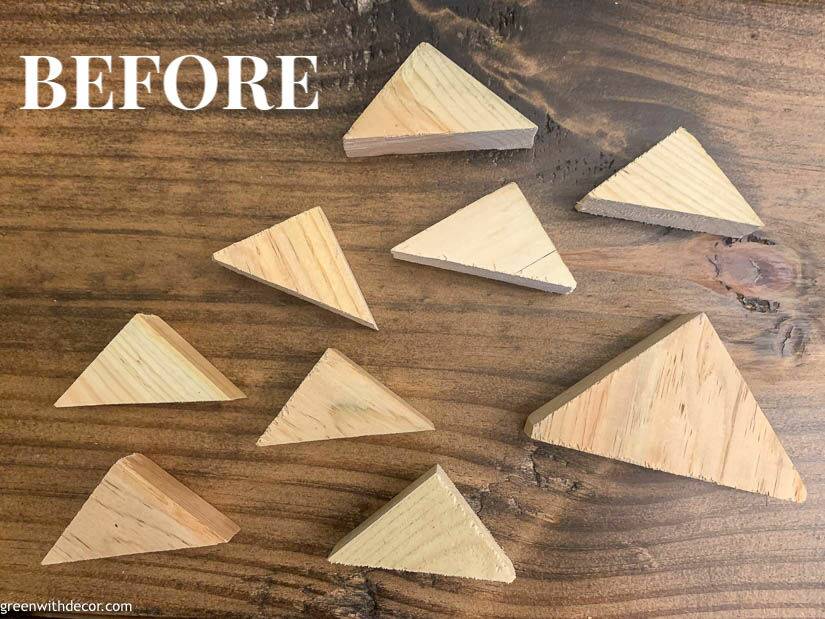
We’ve had these little scrap triangle-shaped pieces of wood sitting aside, um, forever, since we did this DIY distance arrow sign. (They were leftover from the arrow parts of the name signs.)
I thought they’d make the cutest little Christmas trees someday and finally got around to it this year!

I love how pretty the burned wood look is!
I used one of our Wagner heat guns (the FURNO 300), which made this project an easy one.
If you’ve never used a heat gun before, the FURNO 300 is perfect for beginners to start with! It only has two heat settings, which means you don’t have to worry too much about which temperature to use.
This post contains affiliate links. This means if you click the link and buy something, I may receive a small percentage of sales at no extra cost to you.
Supplies to burn wood for DIY Christmas trees:
- Wagner FURNO 300 heat gun (also available here)
- Scrap pieces of wood (triangle shapes) – or use a saw to cut wood pieces into triangles
- Extension cord (if needed)
- Heat resistant gloves
- Bamboo craft sticks
- Tin snips
- A glue/adhesive that works on wood (I used this.)
How to make burned wood DIY ChristmAS TREES:
1. Get your wood pieces ready.
If you don’t have random pieces of wood sitting around, use a saw to cut some wood into triangle shapes you can use.
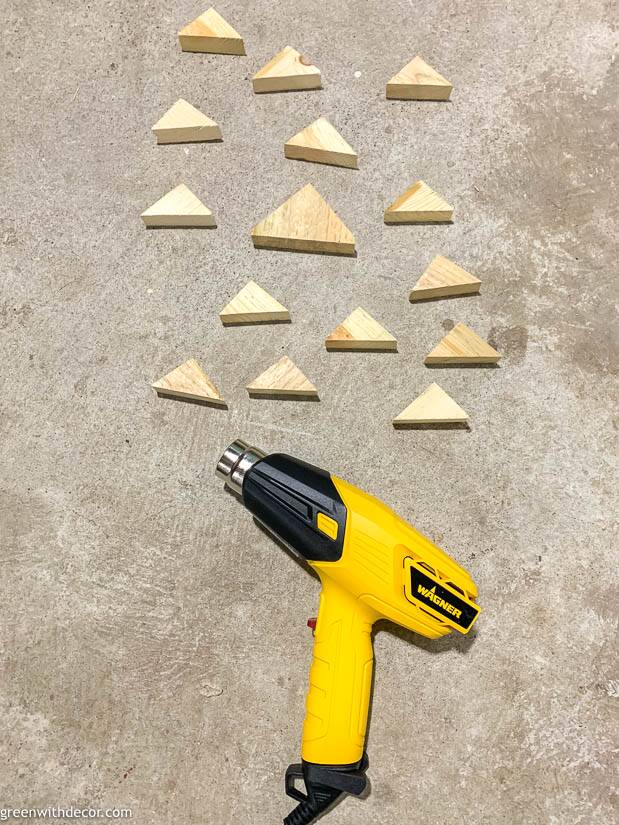
2. Plug the power cord into the heat gun, and plug your heat gun in.
3. Move the red switch to turn the heat gun on.
You’ll hear the fan of the motor as soon as you turn the heat gun on. With the FURNO 300 heat gun, you can choose between the low or high setting. For this wood burning project, I used the high setting.
If you’re unsure which setting to use, Wagner’s manual has a list of suggested heat gun projects along with which heat setting is best for each, so be sure to check that out!
In general, it’s best to start low. You can always turn up the heat to the higher setting!
4. Put the heat gun close to the wood, keeping it moving so you don’t burn the wood in one spot for too long.
You can always go back over a spot if you didn’t quite burn the wood enough.

Move the heat gun in the direction of the wood grain back and forth over each wood piece,
Don’t ever let the heat gun touch your wood pieces.
Let your wood pieces cool down before touching them.
5. Turn the heat gun off and unplug as soon as you’re done.
Or, if you’re pausing in the middle of a heat gun project, unplug your heat gun while you’re away from it.
Let the heat gun cool down completely before putting it away. (And that hanging loop on the handle is for storage – how perfect is that?!)
Note, after several uses, the heat gun’s nozzle will darken in color. We have the FURNO 750 heat gun, too, and our nozzles are dark from using them on various projects, but it doesn’t affect how the heat gun works at all. Just thought I’d mention it!
6. Line up your wood pieces, and cut your bamboo sticks to size.
(I figured with the surface area of a top of a triangle being so small, glue probably wouldn’t permanently hold the trees together, but the bamboo sticks along the back would be hidden and provide support. We use these bamboo sticks, but be sure the width works for your wood pieces before you order them!)
Our Christmas trees are 3 triangles high, but do whatever you want!
We used tin snips to cut the bamboo.
7. Glue the bamboo sticks to the back of your wood triangles.
Follow the directions for your specific adhesive/glue. I used this adhesive – it’s perfect for DIYs like this!
I applied adhesive to both the wood pieces and the bamboo stick.
8. Let the glue dry.
Be sure to let your glue/adhesive cure before standing your trees up.
And that’s it! I love how these turned out!
Burning wood is a really easy way to get a rustic wood look if you’re looking for a fun Christmas DIY!
If you want more fun projects you can do with a heat gun, check these out:
- DIY Christmas icicle ornaments with a heat gun
- DIY picture frames with a burned wood finish
- How to use a heat gun to clean a grill
- Or see more heat gun ideas on Wagner’s website
Do you have any fun Christmas DIYs planned this season?
Remember to bookmark or pin this post if you want to save it for later!
Pin it!
Want to read more posts like this?
Follow along: Get my emails | Facebook | Pinterest | Twitter | Instagram
Emily says
Such a cute idea, Meg! I think we have a stack of little triangles just like these that I’ve been wanting to do something with. Thanks for the inspiration 🙂
GreenWithDecor says
Thanks, Emily! Glad I’m not the only one that hoards wood triangles, ha!