If you’re wondering how to apply wax to chalky paint pieces, follow this quick DIY tutorial for using natural wax and antiquing wax.
I’ve done a lot of furniture makeovers over the years, and a lot of them with clay paint (similar to chalky paint) and a few with chalky paint. The most common way to seal these painted pieces is with wax.
I seem to always get questions about how to wax furniture and instead of pointing people to that step within various furniture makeover tutorials, I thought I’d do a quick post on how to apply wax to chalky paint.
It’s easy, but like anything, can seem intimidating until you actually dive in and do it.
This post contains affiliate links. This means if you click the link and buy something, I may receive a small percentage of sales at no extra cost to you.
Favorite Supplies for waxing furniture:
There are a lot of waxes out there, and I’ve tried different brands over the years. Country Chic Paint is my favorite that I end up coming back to. I like the texture and the finish it provides.
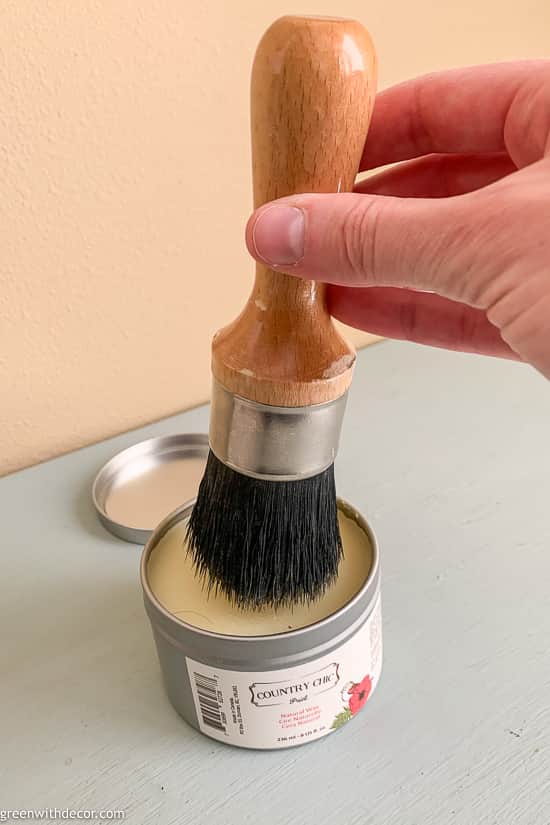
- My favorite wax is Country Chic Paint’s Natural Wax. It doesn’t affect the color of the painted piece but still provides protection.
- If you want to add some contrast to your painted furniture piece, you can also use Country Chic Paint’s Antiquing Wax.
- Country Chic Paint’s wax also comes in other colors that you can see here.
- I’ve tried various wax brushes over the years, including the cheaper ones from various craft stores to try to save some money. This is one of those cases where the nicer wax brushes really do work better. They’re worth the extra cost. The Country Chic Paint wax brush is my favorite.
- A clean lint-free cloth
How to apply wax to chalky paint:
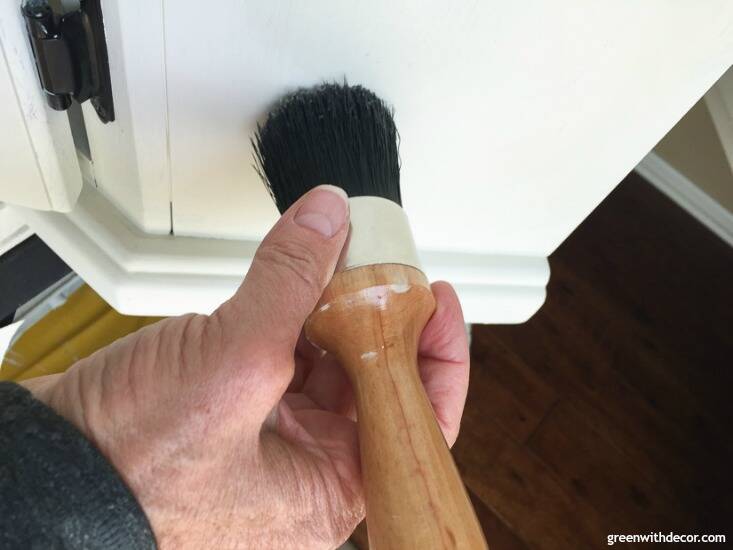
1. Gently swirl your wax brush in the wax container.
2. Apply a thin coat to your painted piece using a circular motion.

3. Take a lint-free cloth and buff the piece to get rid of any excess wax.

4. Let your wax cure.
This can take about 3-4 weeks. It’s best if you can leave your furniture piece in the garage or basement where no one will touch it till it’s all cured!
And that’s all that goes into waxing furniture! Easier than it sounds at first, right?!
5. Reapply wax every 6-12 months.
This is the recommendation, but I’ll be honest, I’m not good about this. On pieces like tables or chairs, I find it’s not really necessary except on the surfaces which receive a lot more action. The legs are usually just fine.
You’ll notice if pieces are getting more bumps or scratches as time goes on. No worries, just apply another coat of wax to protect it. If your piece is fine through continued use, you can also be a rebel like me and ignore the need to re-wax until it’s really necessary.
How to apply antiquing wax:
You’ll follow the same steps as above, starting with natural wax first. This provides a nice layer of protection so the antiquing wax doesn’t go on your piece too dark. (Unless you’re going for a really dark look, then just skip right to the antiquing wax.)
Then apply your antiquing wax using the same method. When you’re buffing the excess wax off, you can leave some of the wax in any nooks or grooves to give it a more complex look.
You can see what I mean with this sled makeover.
And a quick tip: if you applied too much antiquing wax and can’t buff it off, put some natural wax on top of it to soften the look.
Hope that’s helpful if you’ve been wondering how to apply wax to chalky paint pieces! It’s easy once you start, and aside from protecting painted furniture, the different wax finishes can be a fun way to add a little something to painted pieces.
You can see all of my furniture makeovers here if you’re looking for inspiration for your next piece. Happy painting!
Remember to bookmark or pin this post if you want to save it for later!
Pin it!
Want to read more posts like this?
Follow along: Get my emails | Facebook | Pinterest | Twitter | Instagram
Leave a Reply