Disclosure: This post is sponsored by Wagner. All opinions, images and love of DIY painting projects are 100% mine.
Painting a room doesn’t have to be hard. These tools will even help you paint a room in less time!
If you’ve ever moved into a new-to-you house with terrible colored walls and thought, “This isn’t so bad, we’re gonna paint the whole thing!” I’m with you.
And as you were painting, you thought “People complain about painting a whole house? This is fine. It’s kinda fun actually.”
And then, when you walked into approximately the 312th room in the house, those thoughts changed to “OMG, I just cannot paint anymore. But I have to because eek these orange walls have gotta go. There’s got to be a a faster way to get this room painted.”
Oooh same, friend. Same.
But GUESS WHAT?!?!?! The office is officially painted, which means THE ORANGE PAINT IS GONE!
Sorry for the screaming. I’m that excited it’s all done. The house feels much more ‘us’ now with neutral paint on the walls.
And I did it – I found a way to paint a room in less time.
We’re kind of (definitely) kicking ourselves for not looking into painting tools sooner because boy, we spent a lot of time getting those first few rooms painted.
It’s okay. Now we know for future rooms. And I’m not even cringing at the thought of maybe painting the walls in our Milwaukee house when we get back because we have the best painting tools ever to use!
This post contains affiliate links. This means if you click the link and buy something, I may receive a small percentage of sales at no extra cost to you.
Supply list if you want to paint a room in less time:
- SMART Edge Roller from Wagner (you can buy one here)
- SMART SideKick Roller from Wagner (you can buy one here, here or here)
- Drop cloth
- Paint stir stick
Notice what’s not on the list? Painter’s tape.
Because the SMART Edge Roller is that good!
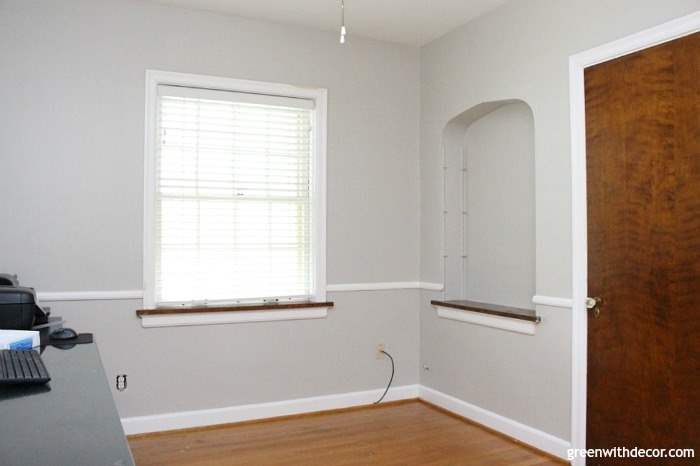
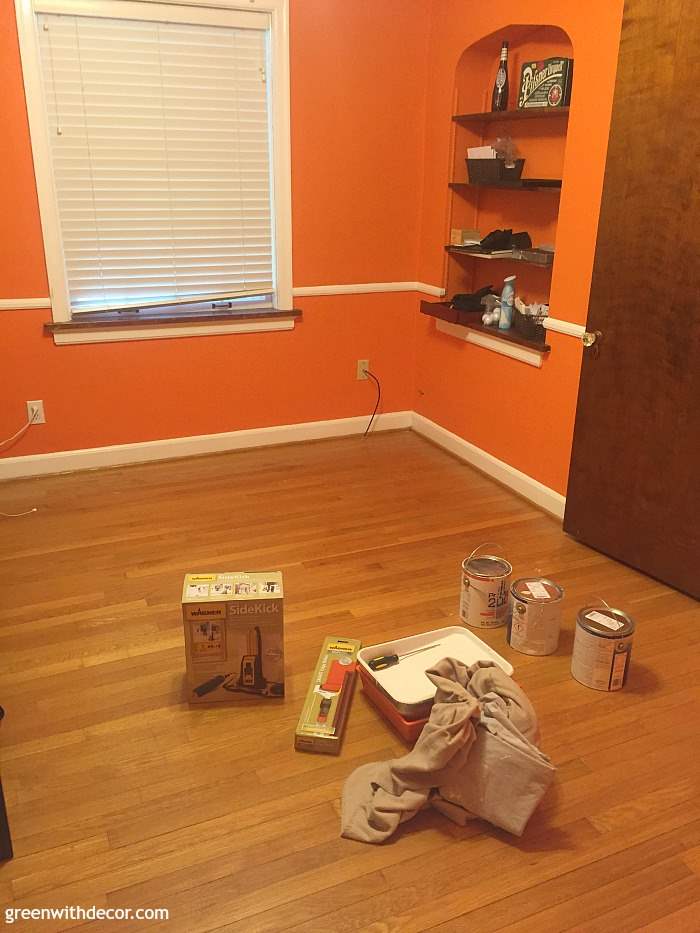
To back up for a second, let’s take a look at this orange ‘before’ so you can really appreciate the ‘after.’
How to paint a room in less time:
The SMART Edge Roller and SMART SideKick Roller from Wagner are serious game-changers.
They each let you keep on painting without stopping to get more paint on your trim brush/roller, which means you can just focus on painting until the room is done!
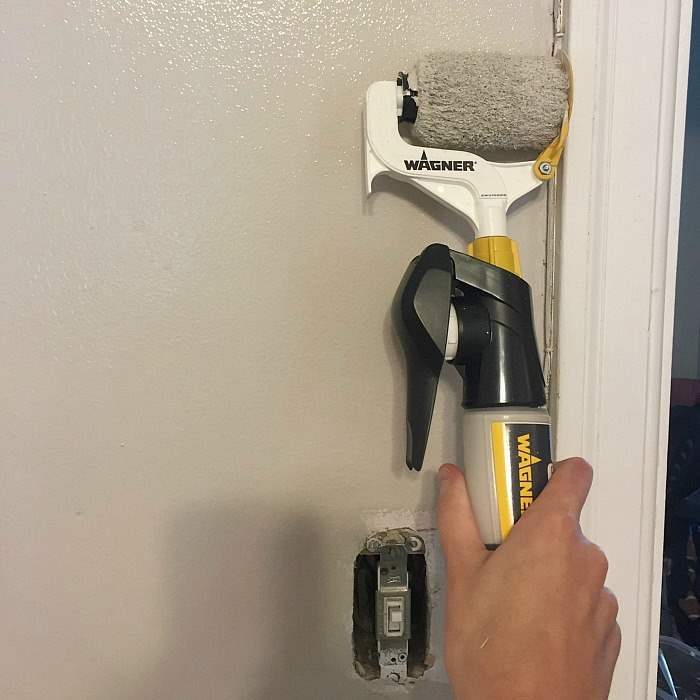
How to use the SMART Edge Roller:
Trim is always my job, and Kalen does the big middle parts of the walls. Fellow trim painters, this SMART Edge Roller is the best.
It works exactly like it looks like it would in the picture:
1. Fill the paint tube.
As with any painting project, be sure to stir your paint before using it.
Twist the roller attachment piece off of the paint tube, then attach the fill tube to the paint tube.
Prop the little hook onto the side of the paint can while dipping the end of the fill tube into the paint. Pull the pump up, and the tube will fill with paint.
Twist the fill adapter and remove it – you can keep it hooked right on the side of the paint can for the next time you fill the tube.
Put the little roller back on top of the paint tube and twist to secure it. These pictures pretty much spell it all out:

2. Start painting!
This was so easy. Pump the trigger a few times to get the paint moving.
Make a ‘W’ shape with the roller so the paint gets evenly distributed across the roller, and then you’re set to paint all the trim.
It’s one of those things you’re a little hesitant to start at first so you don’t have paint going everywhere, but you get the hang of it within a few paint strokes.
Be sure the roller is always facing forward and you’re using it parallel with the trim you’re painting. Move it up and down as you go for full coverage.
Obviously I was having a great hair day while painting. 🙂
In the corners of the room, I had to touch up a few places with a brush because the SMART Edge Roller couldn’t quite get in there. Even still, I spent way less time painting the corners than I did before.
Keep a steady hand, or you might end up with a few strokes of paint on the actual trim. Nothing a damp paper towel can’t erase.
That’s pretty much it. It’s really that easy, and it went so fast! Plus you don’t have to spend all that time taping. Fair warning, you also don’t get the satisfaction of ripping off all that painter’s tape after you’re done painting a room, but I’d say that’s a small price to pay!
You still get these awesome trim lines:
If you have any other questions while using the roller, Wagner gives awesome owner’s manuals with all of their products.
3. Clean the SMART Edge Roller.
Be sure to clean all parts thoroughly so you don’t end up with crusty dried paint in/on it when you go to use the roller next time (because you’ll definitely be using it again).
If you’re priming and painting like we did in this room filled with orange walls, you’ll have to clean out the roller between paint colors.
How to use the SMART SideKick Roller:
This SMART SideKick Roller can move, let me tell ya. Kalen had the office walls done in less than an hour.
1. Get the roller ready.
Move the yellow place holder piece up, place the paint can in between the edges of the yellow piece, and move the yellow piece back down to hold the paint can in place. Guide the suction tube into the yellow holder.
If you’re using a bigger paint bucket, you can attach an arm so that the tube will still reach the bottom of the paint container.
2. Attach the roller arm.
3. Plug in the roller and switch it on.
4. Start painting!
Press and release the button on the roller handle so the paint starts feeding through the tube to the roller.
Paint one wall at a time, working in sections to get full coverage.
Press and release the button the handle as needed for more paint.
5. Clean the SMART SideKick Roller.
The most important thing to remember here is to not submerge the roller handle in any liquids. Otherwise, clean each part thoroughly so it’s all set for future uses.
Again, Wagner’s owners’ manuals are really helpful and full of all sorts of tips and tricks for using the roller if you have further questions.
This roller may have been just the ticket I needed to convince Kalen we can paint a whole house again at some point in the not-so-distant future.
We did two coats of primer and two coats of gray paint (Agreeable Gray by Sherwin Williams), and the room looks so different.
You’d never know it used to be orange. (Whew.)
We still have some decorating to do in here, but at least Kalen can work without getting a headache from the walls in here!
Do you have any other paint time-saving tricks?
I’m not sure we can beat finding these two awesome painting tools, but we’re definitely all ears if you have tips for how to paint a room in less time!
For more room painting tips and tricks, check out these posts:
- How to paint walls with a paint sprayer
- How to pick paint colors without going crazy
- The best neutral paint colors for the whole house
Remember to bookmark or pin this post if you want to save it for later!
Pin it!
Want to read more posts like this?
Follow along: Get my emails | Facebook | Pinterest | Twitter | Instagram
Emily says
I usually get tasked with cutting in because I’m so short, and I prefer not to stand on ladders to paint. The Smart Edge Roller would save me so much time! Also, your office is looking fantastic – I really love the color!
GreenWithDecor says
Thanks, Emily! The SMART Edge Roller is great!
Ann Marie says
Brilliant! My least favorite part of painting is taping and cutting in. Thank you for this!
GreenWithDecor says
Glad to help! Happy painting!