Disclosure: This post is sponsored by Wagner. All opinions, images and love of DIY painting projects are 100% mine.
Today’s post might blow your mind.
Really.
Wagner’s FLEXiO paint sprayers make painting a room approximately 500 times easier AND have you ever heard of pre-taped masking film?
Because it’s amazing.
I reallllly wish I’d tried out the FLEXiO sprayer about 5 or 15 painted rooms ago, but here we are.
It’s good to know for future room painting projects … because you know there’ll be more eventually.
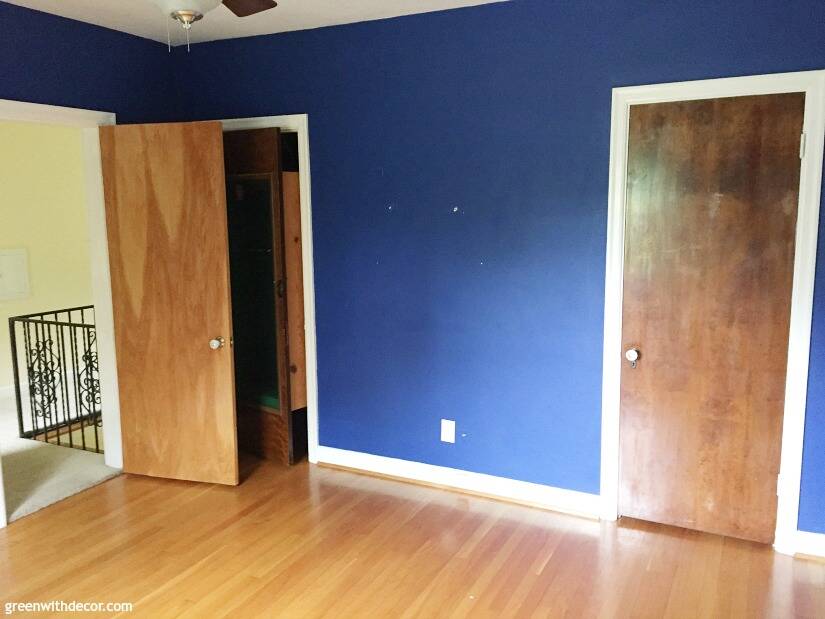
For fun, here’s the bright blue paint that was originally on the walls in the guest room at our rental.
This post contains affiliate links. This means if you click the link and buy something, I may receive a small percentage of sales at no extra cost to you.
Supply list for painting walls with a paint sprayer:
- Drop cloth
- Pre-taped masking film – this is a game changer, I wish I’d known about it sooner!
- Painter’s tape
- FLEXiO 3000 paint sprayer (also available here)
- Extension cord (if needed)
- Paint
- Most paint works just fine in the paint sprayer. We used Sherwin Williams (Agreeable Gray) on this project, and I used Behr when I used this sprayer at Wagner’s headquarters – both worked great.
- Paint stir stick
You can see pictures of Agreeable Gray in finished rooms here.
How to paint walls with a paint sprayer:
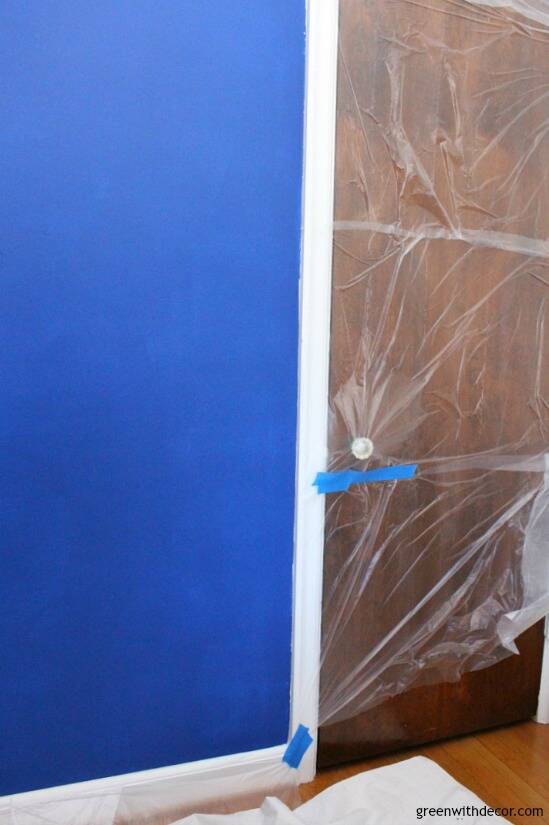
1. Tape off your trim, ceiling and floor.
This pre-taped masking film is awesome. I really can’t believe I went so long without knowing about this stuff!
(When I was at Wagner’s headquarters a few months ago, they told us about it, and you should have heard all of the bloggers dropping their jaws in amazement. How is this stuff a secret?!)
You unroll it, the edge has masking/painter’s tape on it so you just seal it along the trim and then unfold the masking film (it’s all kind of folded under itself) to cover up doors, the floor, ceiling, etc.
If you’re more talented than I am, you might be able to just start unrolling and taping as you go along a whole wall of trim.
I ended up messing it up a couple of times and decided it was just easier to cut pieces of the masking film and then tape them up one piece at a time, using painter’s tape to make sure to overlap the pieces to protect the doors and trim underneath.
Be sure to tape down the edges of your masking film so they don’t fly around when you’re spraying.
This video from Wagner walks through masking a room, too, if you want more info.
We also used painter’s tape to cover outlets and light switches.
2. Pour your paint into the paint cup.
Stir your paint first so you’re getting a good even pour.

When I use the home decor sprayer on smaller projects, I always add water or a paint thinner to thin the paint, but there’s no need to with the FLEXiO’s iSpray nozzle.
3. Assemble the paint sprayer.
Insert the suction tube into the sprayer.
If you’ll be spraying downward, the angled end of the tube should be pointing toward the front of the sprayer, and if you’ll be spraying upward, the angled end should be pointing toward the back.
Then tightly screw the paint cup into the sprayer, and twist the nozzle into the sprayer toward the ‘lock’ symbol.
Wagner’s manual has more info if you have questions.
4. Practice spraying. (optional)
If you haven’t used a sprayer before, I’d practice on a piece of cardboard or something so you get the hang of it.
Paint sprayers can seem kind of intimidating if you’ve never used them, but really, they’re easy! And the amount of time they save you painting is life-changing.
5. Adjust the settings on your paint sprayer.
Paint speed: You can play around with the paint speed by turning the red dial on top of the sprayer.
Spray width: You can change the spray width by adjusting the red lever right behind the yellow air cap. If you’re also painting a wall, a wider spray width is better. The narrow spray width can be helpful near edges and corners.
Material flow: You can adjust the material flow by turning the red knob just above/behind the trigger. If you’re using really thin paint, start at a low setting and slowly increase it. If you’re using thick paint, start at a high setting and slowly decrease it. When your material flow is set too high, your paint will probably run, and when it’s too low, you probably won’t get enough paint coverage.
Air cap: When painting, you can either do horizontal or vertical strokes. We went with horizontal (for no real rhyme or reason – whatever works for you). Just make sure the air cap is twisted the correct way depending on which way you’ll be spraying.
Wagner’s manual is full of helpful tips, too.
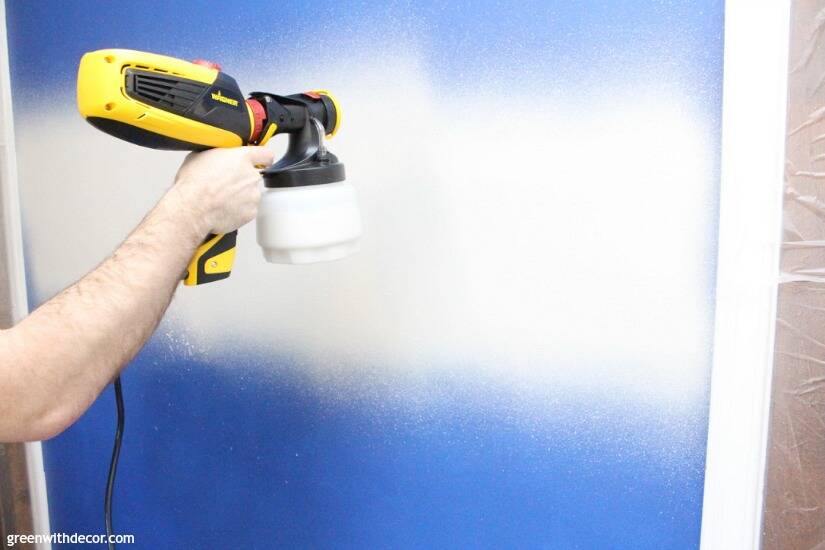
6. Start painting your wall!
Pull the trigger (slightly at first so you get the hang of it) to start the paint flow.
Start on one side, and go across your wall at a consistent speed, then come back across, overlapping a bit with the paint you’ve already sprayed. Repeat until you’ve covered the whole wall.
You’ll want to be about 6-8 inches from your wall.
Stay behind your sprayer, moving with it as you move across the wall. Don’t stand still and just flick your wrist on an angle in either direction.
You might want to wipe the tip of the sprayer with a damp cloth (or paper towel) a few times while you’re painting a whole room just to prevent any bits of dried paint from messing with your paint flow.
If you taped/masked all of the trim and doors off, you can spray right up against the trim, which means no painting the trim later! Total time-saver.
See how good the trim looks after?!
I’d used the FLEXiO before (at Wagner’s headquarters), but Kalen hadn’t, and I was really excited for him to try it.
He agreed it’s way faster than other ways we’ve painted rooms in the past and was happy with it.
Plus with a paint sprayer, you typically only need to do one coat of paint. It comes out at a good consistency and provides good coverage so you’re (usually) off the hook for a second coat.
And just to throw this out there, you can use the FLEXiO 3000 on outdoor projects, too. (Dreaming up a few of those if spring / summer ever arrives over here!)
Unplug the sprayer when you’re done.
7. Clean the paint sprayer.
I feel like this is the part everyone dreads and then when you actually go to clean it, it’s not hard.
Just run warm soapy water through it, rub any paint off and let it dry before you put it all away. (Be sure not to submerge the sprayer in water.)
Again, Wagner’s manual walks you through the cleaning process if you have questions.
8. Take the painter’s tape/masking film down and throw away.
9. Start at your pretty wall and smile.
Okay, that’s optional.
(Also you may recall from the rental house tour that the lovely display case closet door came with the house … not really our thing!
Plus we’re not painting their doors, otherwise they’d already be painted white!)
We’re working on getting this guest room, which is currently a bit of a catch-all, into some sort of shape, but at least it’s painted!
More to come in here!
If you want more ideas on painting rooms, check out these posts:
- How to paint a room in less time (the best paint rollers)
- The best neutral paint colors for the whole house
Remember to bookmark or pin this post if you want to save it for later!
Pin it!
Want to read more posts like this?
Follow along: Get my emails | Facebook | Pinterest | Twitter | Instagram
Amanda says
Your room looks amazing and those products look like it makes painting so convenient! I am definitely going to pick up a few before we start painting our dining room! The ceiling are almost 10 foot high, so the paint sprayer will help me get to the top of those walls!!
GreenWithDecor says
Thanks so much, Amanda! It will be perfect for your dining room!!
Lindi says
Wow! The wall looks amazing! It covered up the blue so we’ll too! I would’ve been skeptical about the coverage of a sprayer but it looks great! Thanks for sharing 🙂
GreenWithDecor says
Thanks, Lindi! The coverage is awesome – so glad that bright blue is gone, haha!
Lydi @ Lydi Out Loud says
I love my sprayer! I have to try this film! Genius!
GreenWithDecor says
Oh yes you do haha, you will love it!
Roxanne says
I’ve never used my paint sprayer for walls, but I’m going to try it now! It must save a ton of time!
GreenWithDecor says
You will love it! It saves so much time!
Vicki and Jenn 2 Bees in a Pod says
Thanks so much for introducing us to this sprayer! We can’t believe the flexibility! Your results were amazing.
GreenWithDecor says
Isn’t is awesome?!
Leticia says
Oh my goodness.. that looks amazing! Thanks for the great tutorial!
GreenWithDecor says
It works so well! Happy painting!
designing vibes says
Wow, Meg! This looks like a game changer. I have rooms I still want to paint, and you definitely have me wanting to try this spray method. It turned out amazing!
GreenWithDecor says
Thanks, Erica! The sprayer definitely makes painting rooms go waaaay faster!
Kim says
Stop! Pre-taped film? That’s amazing! I’ve heard that the Wagner is a life-changer. Glad to hear it’s worth all the hype! PS: I love the color you went with!
GreenWithDecor says
I know!! It really is amazing. You would love it – and the sprayer! And thank you, we love it, too!
Tareque Sarker says
I have already a paint sprayer. I used it to paint my fences. I was searching for how to paint a wall by sprayer. And this is the complete guide for me. Thank you, I love this post.
GreenWithDecor says
The sprayer is perfect for a fence! Glad this post is helpful. Happy painting!