I don’t think it’s a secret that I really like trays. I have them in just about every room, and I keep collecting more.
I came across a few old silver trays recently and, of course, I brought them home with me. I decided to combine my love of trays with the recent chalkboard paint trend to give these trays a fun updated look.
If you haven’t used chalkboard paint yet, you have to give it a try! It’s easy, and I love that you can change out the message on the finished piece whenever you feel like it.
Here’s how my trays came out:

These makeovers were easy!
Here’s how the trays started:
This post contains affiliate links. This means if you click the link and buy something, I may receive a small percentage of sales at no extra cost to you.
Supply list for painting trays:
- Old tray (check Goodwill!)
- Painter’s tape
- Chalkboard paint (I used Rust-Oleum)
- Foam brush
- Small paint brush
- Drop cloth
- Ribbon (optional)
- Glue gun (optional)
How to use chalkboard paint to update a tray:
1. Start by taping your tray.
I wanted to keep the edge of each of my trays silver so it would contrast with the black chalkboard paint in the center.
Chalkboard paint is fun. But you know what’s not fun? Taping on a curve! (Update: I’ve since found this tape that is peeeeerfect for taping on a curve!)
It’s okay, it’s worth it for a pretty piece, right?!
This one was a bit easier to tape than the other two since it was all straight lines.
2. Get your paint ready.
If you’re inside, get a drop cloth ready to protect the surface you’re painting on. It’s still freaking cold in Wisconsin, so I’m still doing all of my painting inside.
Shake your paint, then stir it up.
3. Apply your first coat of chalkboard paint.
Use the foam brush to cover the surface, applying all paint in one direction, say horizontal strokes.
Let it dry for an hour.
Now sometimes I can be a little impatient when I’m in the middle of DIY projects because I just want to see the finished product!
So I tried to apply a second coat of paint before an hour passed. Don’t do this! There’s a reason paint companies tell you to wait an hour. If the paint isn’t fully dry and you try to paint over it, it will bunch up a bit and look not so good.
Hey, now I know. I would have hated waiting a whole hour every time I used chalkboard paint and then later realizing I didn’t have to …
4. Apply your second coat of chalkboard paint.
Now that you’ve waited ONE WHOLE HOUR, apply your second coat of paint in a direction perpendicular to the first coat – so vertical strokes this time.
Take the painter’s tape off, then let the tray dry for 24 hours.
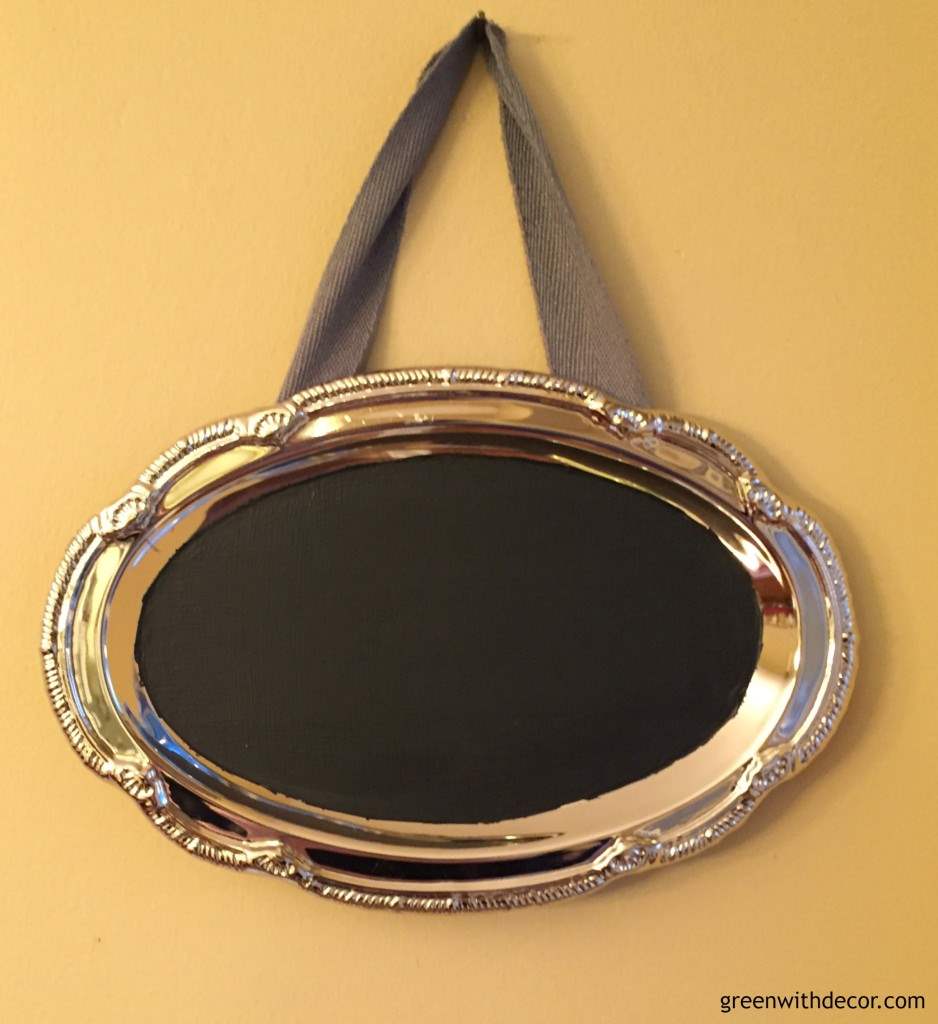
5. Add a ribbon.
thought the small tray would be a fun wall decor piece rather than a tray.
Okay, confession time. I keep EVERYTHING that I think I could possibly maybe use for a future craft or DIY project. Case in point? This ribbon is from an Ann Taylor Loft shopping bag.
But I liked the ribbon! And doesn’t it look nice with this tray?
(Does anyone else keep random things like this? Please say yes!)
I used a glue gun to attach it to the back of the tray. My mom, the hand model because her nails are much nicer than mine, shows this below.
6. Touch up
You can see on the small tray, that I needed to touch up a few places around the curve. (Those dang curves!) I used a small paintbrush for this.
7. Display
These two bigger trays are perfect for all sorts of things: kitchen counter decor, wall hanging, coffee table displays, breakfast in bed (ha, I wish) …
I was originally thinking I’d update the tan handles as well, but once I saw them against the silver trim and black center, I liked all three colors together. What do you think?
And here’s the smaller one displayed:
It’s perfect for those random small walls in a hallway or around the corner of a kitchen that need just a little something …
And since it’s chalkboard paint, you can write whatever you want on the trays and switch it out when you feel like it! Or you can leave them plain like I did for now. (If you write on them, here’s my trick for getting perfect chalkboard letters every time.)
Which tray is your favorite? What would you use it for?
You can see more thrift store makeovers here:
- The pieces not to skip at the thrift store
- Make a DIY towel rack from an old wooden spool
- How to paint a table with a lot of detailed trim
Remember to bookmark or pin this post if you want to save it for later!
Pin it!
Want to read more posts like this?
Follow along: Get my emails | Facebook | Pinterest | Twitter | Instagram
Leave a Reply