If you’re wondering how to paint a nursery, check out this DIY tutorial for the fastest way to paint a nursery!
Disclosure: This post is sponsored by Wagner. All opinions, images and love of DIY painting projects are 100% mine.
Guess what?!
We’re finally working on the nursery!
Which, by the way, I’d suggest doing before the baby is born, because I’m feeling like it’s going to be slow going now that we have a baby. But we just moved back into our house, so oh well!
We might be a little behind on the whole nursery decorating thing, but at least painting the nursery walls went fast!
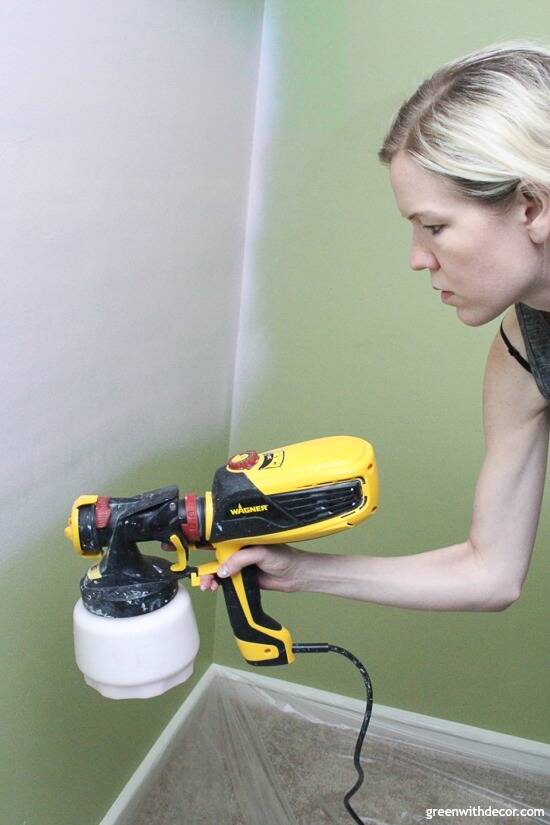
If you’re wondering how to paint a nursery in a hurry, I’d highly recommend using the FLEXiO 3000 from Wagner (our favorite for painting walls).
We busted out our handy paint sprayer and knocked this painting project out in an afternoon … trading off in between baby cries.
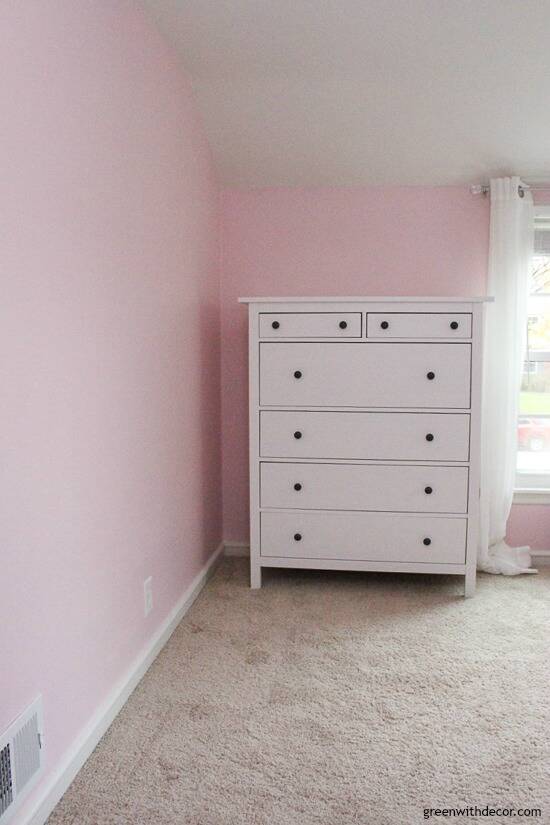
As soon as we found out we were having a girl, I knew I wanted to do pink walls.
We could have definitely kept the Ryegrass green walls we had in this room before (when it was our home office) for a gender neutral space, but nope, I wanted pink!
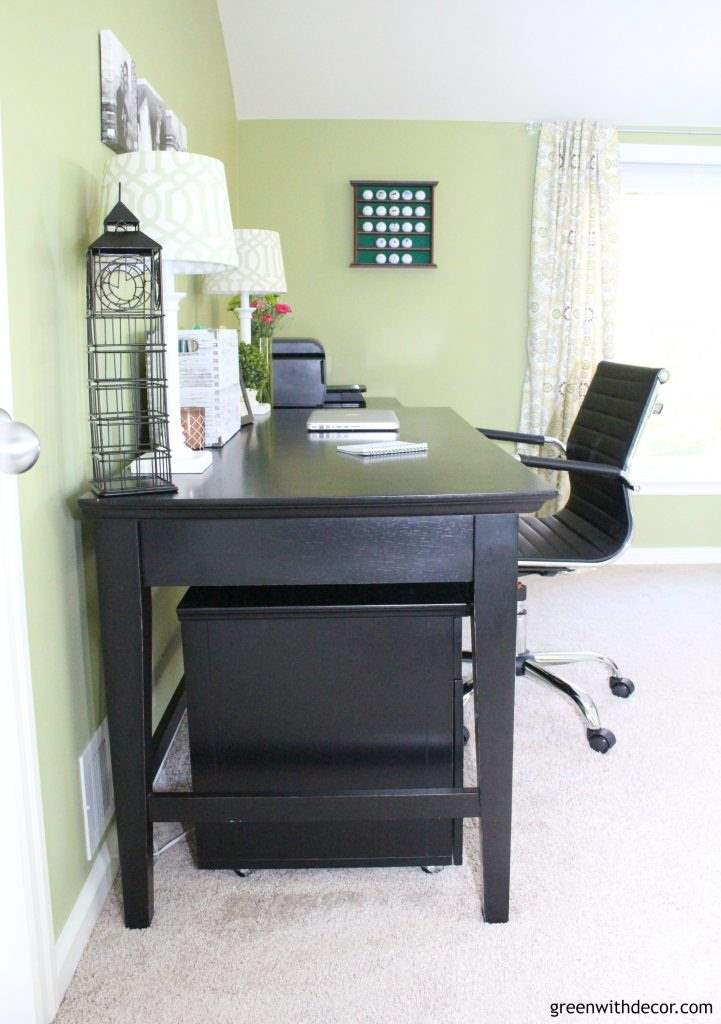
Here’s that same view now:
Oh and for fun, this is what the room looked like when we bought the house:

Life is full of lots of baby snuggles lately, which are oh so wonderful, but it felt great to paint again, too! And to knock something off our house to-do list!
This post contains affiliate links. This means if you click the link and buy something, I may receive a small percentage of sales at no extra cost to you.
Supply list for painting a nursery:
- Drop cloth
- Pre-taped masking film – this is a must for painting a room with a paint sprayer!
- Painter’s tape
- FLEXIO 3000 paint sprayer (also available here)
- Extension cord (if needed)
- Paint – we used Sherwin Williams’ Impatiens Petal
- Paint stir stick
How to paint a nursery:
1. Tape off the room.
Pre-taped masking film is seriously amazing. It makes taping off and protecting a room SO easy.
It comes in a tight roll, and the edge has masking tape on it so you can seal it along the trim of windows, doors and baseboards to cover up all the surfaces you don’t want to paint. It’s awesome.
We cut the masking film in pieces instead of just rolling it forever around the room, but if you can keep one long strip going, go for it!
Tape down the non-taped sides of the masking film with painter’s tape so it doesn’t fly up when you’re spraying.
You can also use painter’s tape to cover outlets and light switches.
This is definitely not the most fun part of the project, but you have to do it to avoid overspray on all the parts of the room you don’t want paint on, so don’t skip it.
If you want more info on masking, this video from Wagner walks you through the whole process.
I’d also recommend either moving your furniture out of the room or covering it all so you protect it from overspray, hence all the drop cloths over furniture in the middle of our nursery!
2. Get your paint ready.
Stir your paint, then pour your paint into the sprayer’s paint cup.
No need to thin the paint when you’re using the FLEXiO 3000. Yay for easy!
3. Assemble your paint sprayer.
Put the suction tube into the sprayer.
If you’re going to be spraying downward, the angled end of the tube should be pointing toward the front of the sprayer, and if you’re going to be spraying upward, the angled end should be pointing toward the back.
Screw the paint cup into the paint sprayer, then twist the nozzle into the sprayer toward the ‘lock’ symbol.
4. Adjust the settings on your paint sprayer.
There are a few settings you can move around to customize the sprayer to your particular project.
I put this little diagram together when we used the paint sprayer to paint our guest room at the rental house. (And wow, I forgot how bright blue those walls were till I looked at this picture again, ha!)
I figured I’d share this picture again since it spells everything out so clearly.
Paint speed (red dial on top of the sprayer): If you’re debating, start on the lower side. You can always adjust it as you work through your project.
For painting walls, Wagner recommends a 6 so we kept it a 6 for painting the nursery.
Spray width (red lever behind the yellow air cap): When painting walls, a wider sprayer is best. The narrow sprayer is really helpful near edges and corners – and if you have little narrow parts of the walls between the window/floor or hallway door/closet door like we do in the nursery.
Material flow (red knob behind/above the trigger): When this is set too high, your paint will probably run, and when it’s set too low, you probably won’t get enough paint coverage.
Which would be a bummer, because one of the best things about Wagner’s paint sprayers is the awesome coverage they provide. We only had to do one coat of pink over this green paint!
If you’re using thin paint, start with the material flow on a lower setting and slowly increase it. If you’re using thick paint, start on a higher setting and slowly decrease it.
Air cap (yellow piece on the front of the sprayer): You can paint walls using horizontal or vertical strokes. We almost always paint walls using horizontal strokes, but it’s just personal preference.
Be sure the air cap is turned the right way to match your spray pattern as outlined in the manual.
Speaking of, the manual is really helpful if you have any more questions on the paint sprayer settings.
5. Paint your walls!
(If you’ve never used a paint sprayer before, I’d practice on a piece of cardboard just so you get the hang of it.)
Start at one side of a wall and pull the trigger (slowly at first) to start painting. You’ll want to be 6-8 inches from the wall. It feels weirdly close, but it’s the best distance.
Move across your wall at a consistent speed. Come back across, overlapping some with the paint you just sprayed. Keep going back and forth across the wall until it’s all painted. It will look streaky at first but will dry solid, so don’t worry about that!
Be sure to move with your sprayer, don’t just stand still and flick your wrist. You want the paint to hit the wall consistently, not at an angle.
When you’re painting a nursery (or any room, really), wipe off the tip of the paint sprayer with a damp paper towel a few times so you don’t get any bits of dried paint messing with your paint flow.
I love how fast you get a wall painted with the sprayer. It’s weirdly satisfying to see how quickly you can get a new color up on the walls!
Plus when you use the masking tape on all of the trim in the room, you can paint right up against the trim, meaning you don’t have to jump in later with a paint brush to paint the trim.
Big time-saver, which is definitely essential when you’re trying to get a room painted before the baby wakes up and starts crying!
6. Clean your paint sprayer.
I feel like people are always asking me about cleaning the paint sprayer. It’s easier than you think.
Overall, painting with a paint sprayer is much faster than using other painting tools, so if cleaning takes a little longer (and I do mean a little), you’re still saving time in the whole painting process.
Run warm soapy water through the sprayer. Take the sprayer apart and wash the small parts. (Wagner even provides a little brush to scrub off any little dried bits of paint!).
Let everything dry before you put it away. Be sure not to ever submerge the sprayer fully in water.
7. Take down the masking film and painter’s tape, and throw it away.
8. Whew! Smile that you got the room done before the baby woke up.
Or if you’re smart, paint your nursery before you have the baby, ha!
Either way, we’re so glad we have the room painted.
There are still some piles of baby clothes to sort through, wall decor to hang and curtains to hem (see how long they are next to the dresser!), but I love walking into this room knowing we have a cute little space for our daughter.
Stay tuned for more nursery projects! It may be a little slow going, but we’re so glad to have the walls painted!
Are you doing any nursery painting lately? Or any other painting? It’s always a fun way to change up a room without spending much!
If you want more painting ideas, check out these posts:
- The best neutral paint colors for the whole house
- The best gray paint colors
- The best tan paint colors
Remember to bookmark or pin this post if you want to save it for later!
Pin it!
Want to read more posts like this?
Follow along: Get my emails | Facebook | Pinterest | Twitter | Instagram
Sarker says
This is an amazing post. I learned lots of thing from this
GreenWithDecor says
Glad it was helpful!