If you’re wondering how to paint shutters, it’s easy with a paint sprayer! Just follow this simple DIY tutorial.
Disclosure: This post is sponsored by Wagner. All opinions, images and love of DIY painting projects are 100% mine.
We’ve been working on an outdoor makeover all summer, which now that it’s August, is finally all wrapping up at once!
We hired painters to paint our exterior brick, because with a toddler nap schedule and general busy-ness of life, there was just no realistic way I was ever going to get it all done.
I figured I could handle painting the shutters and exterior doors though. Those are easy enough to fit in during nap times! And good news, the shutters are done!
Here’s the before shot of one of the sides of our house:
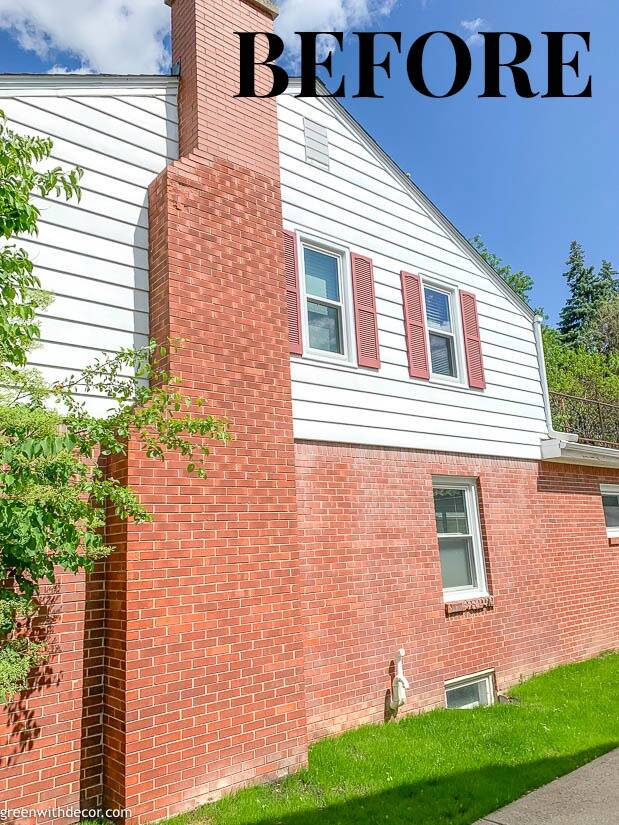
And after:

Crazy what paint can do, right?! (And tree trimming, ha!)
I’ll share more photos of our exterior later as we wrap up other projects around here in the next month or so. Meanwhile, you can see the updated patio here if you missed that post from a few weeks ago!
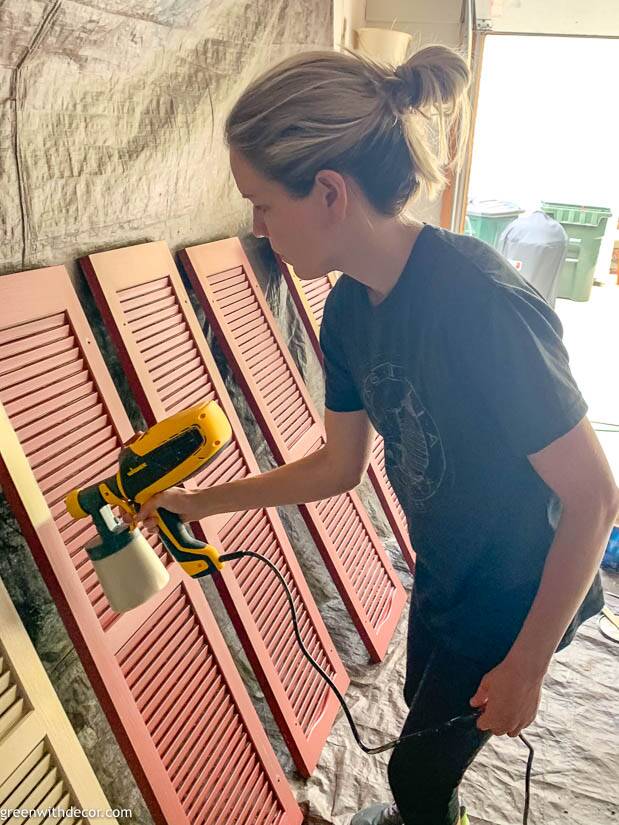
Painting the shutters was really easy with our paint sprayer. The biggest problem was we didn’t have a tarp big enough to fit all of the shutters at once so I ended up doing them in two rounds, which meant washing out the paint sprayer more than I would have liked!
But that’s okay because the painting itself was quick and easy.
This post contains affiliate links. This means if you click the link and buy something, I may receive a small percentage of sales at no extra cost to you.
Supply list for painting shutters:
- Pressure washer or hose
- Drop cloth or tarp
- FLEXiO 3000 paint sprayer (also available here or here)
- Extension cord (if needed)
- Paint – we used Sherwin Williams’ Tony Taupe
- Paint stir stick
- Paper towel
Thanks to all who weighed in on the paint color on Instagram and Facebook! Paint samples really are critical when you’re not sure which direction to go in!
How to paint shutters with a paint sprayer:
1. Clean your shutters.
We just got a pressure washer (more on that soon), which is amazing for washing anything and everything outside. We used it to wash down our shutters.
You could also use a hose and old rag if you don’t have a pressure washer, but the pressure washer definitely saved time. Which apparently is the spirit of this project because the paint sprayer saved a lot of time versus a paintbrush, too!
Let your shutters dry before you start any painting.
2. Prep your paint.
Be sure to stir your paint, then pour it into the sprayer’s paint cup.
3. Put your paint sprayer together.
The FLEXiO 3000 paint sprayer comes with two nozzles: the detail nozzle and iSpray. For projects like painting shutters that have a small surface area (especially when you consider how many slats you’re painting), the detail nozzle is best.
Position the suction tube depending on how you’ll be painting – facing backward if you’re planning to spray upward or facing forward if you’re planning to spray downward.
4. Set your paint sprayer settings.
The settings you’ll use are pretty specific to the project and type of paint you’re using, and Wagner’s manual walks through this in great detail.
Spray shape / air cap (blue knob on the front): This determines the pattern of the spray that will come out of your paint sprayer. You can paint in a horizontal, vertical, or round (best for something like chair spindles) pattern depending on what you’re painting.
I didn’t have to adjust this too much while painting the shutters. I used an up and down spraying motion for almost the entire project (minus a few of the slats where I sprayed side to side – more on that in step #5 below).
Air power control (red knob on the top): The thinner your paint, the lower you’ll set this. I had mine set at a 4 while painting our shutters.
Material flow control (gray knob behind the trigger): This is very dependent on the type of paint you’re using. The basic rule is, if you aren’t getting enough paint coverage, turn this up, and if your paint is running, turn this down.
If you’re having trouble spraying, check the manual because you probably need to adjust one of the settings. (Thinning paint should be a last resort.)
I’ve found with the detail nozzle, the issue I ran into most when I first started using it is that the paint comes out splotchy simply because I was moving too fast. The paint sprayer is definitely fast, but be sure you’re going slow enough to get even coverage on whatever you’re painting versus just rushing through the project and ending up with paint splotches.
5. Paint your shutters!
Start painting! It’s always so satisfying painting with the paint sprayer because projects get done SO FAST!
I’ve painted a shutter by hand before and while you can do it, painting all of these shutters by hand would really have just taken far too long and I’d never have actually done it!
Some projects are just begging for a paint sprayer, and this is one of them.
We lined all of the shutters up along a tarp in our garage. (You will have some paint overspray, so you’ll want the shutters on a drop cloth or tarp.)
We started with them all upside down, and I painted the side edges, bottom edges and the fronts (I did the outside border, then all of the slats).
I did two coats, then once the shutters were dry, flipped them right side up.
Then I painted the tops, a couple of the slats I couldn’t get when the shutters were upside down (this is when I turned the air cap as mentioned in step #4) and any other touchups.
If you only have a few shutters, you could prop them on top of sawhorses and paint all of the edges at once. Then you wouldn’t have to worry about drying time between flipping them.
One other note: We kept the shutters in the same order as the order we took them off the house in just in case they’re not all exactly the same size (old house problems charm). We wanted to be sure we put each shutter back in its exact same spot.
My favorite tips for painting with a paint sprayer:
- Move with your sprayer, don’t just flick your wrist or you won’t get even, consistent paint coverage.
- Keep moving so you don’t end up with too much paint in one spot. I moved up and down the shutters, overlapping slightly with where I just painted until I covered the entire shutter.
- Your paint sprayer should be about 6-8 inches from what you’re painting.
- Do your first coat of paint, let it dry, then do a second coat for full coverage.
- Use a damp paper towel to wipe the nozzle periodically throughout your project. This prevents any dried bits of paint from messing with your paint flow.
6. Clean your paint sprayer.
I cleaned my paint sprayer out any time I was done painting for the day. It doesn’t take that long, and it’s easier than later dealing with dried paint that clogs the paint sprayer.
If you have enough room on a tarp to do all of your shutters at once (and aren’t up against the toddler nap time deadline), you could probably get the whole project done in one fell swoop and only clean the sprayer once.
Wagner’s manual walks through the entire cleaning process. Basically, dump any extra paint back in your paint container then run warm soapy water through your paint sprayer.
Unplug your sprayer and take it apart, cleaning each piece. Don’t ever submerge the whole sprayer under water.
I love the little scrub brush Wagner provides for cleaning any little pieces of paint off. I’ve used an old toothbrush as well.
Then let it all dry and you’re done!
I’m so excited we finally have the shutters painted! I’ve been wanting to tackle painting the outside of our house for YEARS, but we were so focused on the inside and then with our move in and out, we didn’t get around to it until now.
So happy it’s done!
Do you have any shutter painting or other outdoor projects planned before fall sets in?
We still have to paint our exterior doors, install our gorgeous new door hardware, install our new mailbox (our old front door had a mail slot – charming, yes but too cold for these Wisconsin winters!), install our wireless doorbell, and then I think we’re calling the outdoor projects done for the year!
Whew, so glad we’re finally knocking all of these out – it only took 6 years!
For more outdoor paint sprayer projects, check these out:
Remember to bookmark or pin this post if you want to save it for later!
Pin it!
Want to read more posts like this?
Follow along: Get my emails | Facebook | Pinterest | Twitter | Instagram
Tyler Johnson says
That’s a good idea to clean off the shutters before you paint them. I could see how the wind would cover them with dust and dirt over time, so it would be good to get all that off beforehand. If I have some shutters installed on my house, then I’ll have to remember that if I decide to change the color.
GreenWithDecor says
Always good to clean before painting!
Mari says
Thanks for the information! We’re about to embark on our own shutter painting project and I’m curious if your shutters are wood, vinyl or aluminum. Thanks!
GreenWithDecor says
These were vinyl. Good luck painting!