Painting garage walls is easy and fast with a paint sprayer. If you’re wondering how to paint garage walls, follow this easy DIY tutorial!
Disclosure: This post is sponsored by Wagner. All opinions, images, and love of DIY painting projects are 100% mine.
Somewhere along the way, this summer became the summer of updating and painting alllllll the things. We painted our metal patio furniture, painted plastic planters and repaired outdoor furniture scratches on what are otherwise perfectly good chairs.
Basically, paint solves all problems.
And maybe don’t stand still in our yard or you’ll probably end up with paint on you.
It feels SO good to get all of this old stuff updated and feeling FRESH!
To keep the momentum going, today I’m back with another fun paint sprayer project: painting garage walls!
Who knew any sort of project in the garage could be fun, right?
But a paint sprayer can make even something as unglamorous as painting garage walls seem fun because it goes so fast! It’s always amazing what paint can do for an outdated space.
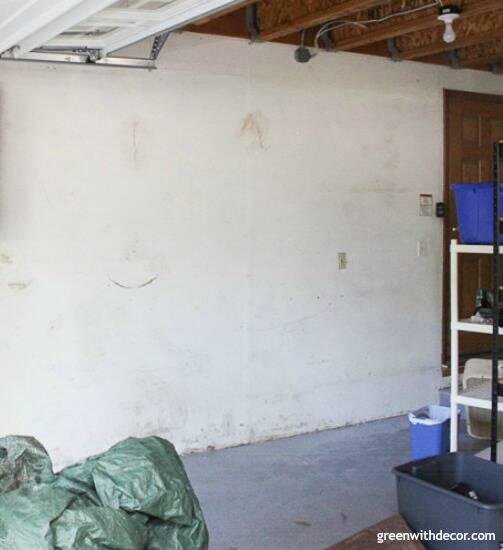
I mean let’s look at how the garage walls started …
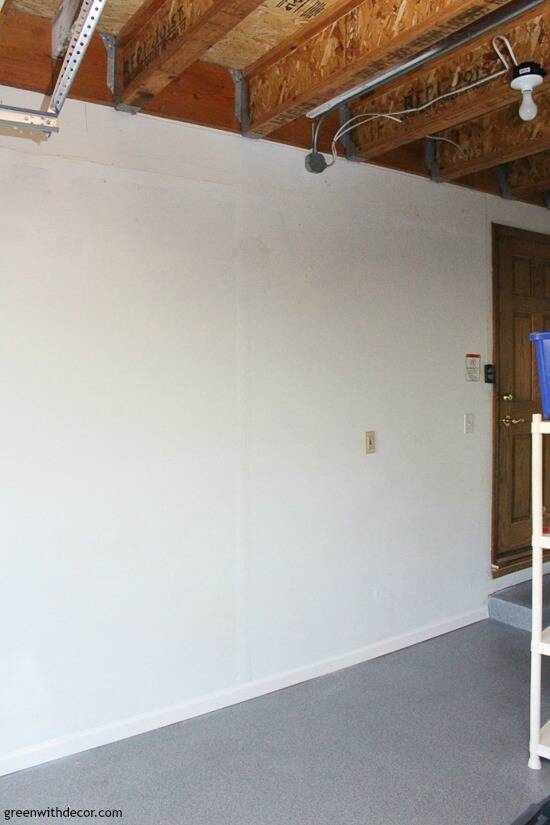
… and how they look now:
Definitely in need of a good paint job, yes?!
If you’ve been wondering how to paint garage walls, this is the post for you.
This post contains affiliate links. This means if you click the link and buy something, I may receive a small percentage of sales at no extra cost to you.
Supply list for painting garage walls:
- Spackling (also available here)
- Old rags for cleaning
- Pre-taped masking film or, depending on your garage floor material, plastic drop cloths paired with wood pieces and painter’s tape
- FLEXiO 3000 paint sprayer (also available here)
- Extension cord (if needed)
- Paint
- Most paint works just fine in the FLEXiO 3000 paint sprayer. We used Sherwin Williams’ Exterior Acrylic Latex in Satin on the garage walls. Even though a garage is technically inside, garage walls are exposed to weather elements whenever the garage door is open so exterior paint is best.
- Paint stir stick
- Paper towel
How to paint garage walls with a paint sprayer:
1. Prep your walls.
If your garage walls have a lot of scrapes and holes in them from years of use like these did, get them ready for painting.
Fill in the holes with spackling and maybe even give the walls a good rub down with a damp rag. It makes all the difference in regards to how the paint will stick to the walls.
2. Tape off the garage floor and doors.
This is definitely the most time-consuming part of the entire project. Especially in this case because – surprise, surprise – painter’s tape doesn’t actually stick to the new garage floor surface in here, so my love for pre-taped masking film didn’t get us very far this time. Sad, I know.
(But, pre-taped masking film IS amazing, and if you’ve never used it, you have to read this post about how to paint walls with a paint sprayer to learn all about it! Or watch this video from Wagner about masking a room if you want more info.)

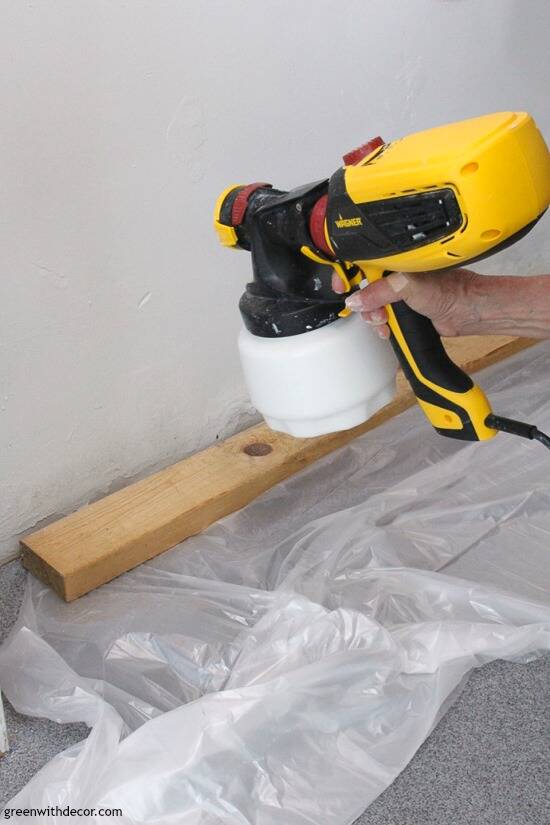
We got creative and used plastic drop cloths to protect the floor, using scrap wood pieces to hold them down so they wouldn’t blow as we were painting with the paint sprayer.
We taped plastic around the garage door and newspaper around the cabinets. Use painter’s tape to cover any outlets or light switches.
3. Assemble your paint sprayer.
Pour your paint into the sprayer paint cup.
Be sure to stir your paint first. You don’t need to thin paint when using the FLEXiO 3000.
Put the paint sprayer together.
Insert the suction tube into the paint sprayer. If you plan to spray downward, the angled end of the tube should be pointing toward the front of the sprayer. If you plan to spray upwards, the angled end should be pointing toward the back.
Screw the paint cup into the sprayer. Twist the nozzle into the paint sprayer toward the ‘lock’ symbol.
Adjust the settings on your paint sprayer.
The FLEXiO 3000 has a lot of setting options, which makes it really easy to customize your settings to whatever particular project you’re doing.
I put together this handy diagram when we used the paint sprayer a few months ago. I wanted to share it again since it spells everything out.
Paint speed: There are handy symbols right on top of the paint sprayer near the paint speed dial so you’ll have a good idea of where to set the paint speed to start. You can always adjust it as needed as you start your project.
We kept the paint speed right at about 7 when painting the garage walls. Wagner recommends about a 6 for painting walls and an 8 for outdoor projects.
Spray width: When painting garage walls – or any walls, really – a wider spray width is best. The narrower spray widths are helpful near edges and corners.
Material flow: This affects if your paint runs (when the material flow is set too high) or if you’re struggling to get enough paint coverage (when your material flow is too low).
If you’re using thinner paint, start with the material flow on a low setting and slowly increase it. If you’re using thicker paint, start on a high setting and slowly decrease it.
Air cap: You can use the paint sprayer to paint horizontally or vertically across a surface. We tend to use the paint sprayer horizontally whenever we do projects, but it’s really just personal preference.
Make sure the air cap is twisted the correct way to match your spray pattern as outlined in the manual. And again, the manual is super helpful if you have any more questions on the paint sprayer settings.
4. Start painting the garage walls!
The moment of truth!
If you’ve never used a paint sprayer, I’d highly recommend practicing on a piece of scrap wood or cardboard.
Once you start spraying, you’ll realize how easy it is, but I’ve had readers and friends comment they’re afraid to start. Go for it on a practice piece and then you’ll have no worries about messing anything up! Plus at the end of the day, remember it’s just paint!
Then it’s time! Forget wondering how to paint garage walls and start painting!
Start at one side of your garage/room. Pull the trigger to start the paint flow, moving across your wall at a consistent speed.
Stand right behind your sprayer (about 6-8 inches from the wall), moving with the paint sprayer as you move across the walls (as long as your air cap is also set to spray horizontally). Don’t just flick your wrist or the paint will be sprayed at an uneven angle instead of a consistent, even flow.
Move across the entire wall, then come back across the wall, overlapping a bit with the paint you just sprayed. Repeat this process until you’ve painted the whole wall.
It’s fun to just watch the old paint disappear in a matter of seconds as it’s covered with the new paint.
I love the paint sprayer because it’s super fast AND because you don’t have to cut back in later to do the trim near the floor/ceiling/door/etc. That alone is such a time saver.
Keep the front of the sprayer clean
Check the front of your sprayer a few times throughout the painting process, especially if you’re painting multiple walls at once.
If there is paint dripping or clumping, take a damp paper towel and wipe the air cap clean. Any dried bits of paint can mess up the paint flow and slow you down and/or result in uneven paint being sprayed.
How many coats of paint?
Whenever we’ve used the FLEXiO 3000 to paint walls, we’ve been good with one coat of paint. The sprayer provides good, even paint coverage, meaning a second coat of paint isn’t necessary. Told you this was fast!
Unplug the sprayer when you’re done.
5. Clean up.
This is definitely where readers and friends always cringe and ask me if the paint sprayer is worth it. Yes, even with cleaning (which is easier than you think), you’re still saving time because you just painted your wall super fast.
Run warm soapy water through the sprayer to get any residual paint out of there. Disassemble the paint sprayer and wash the small parts of the nozzle. Wagner even gives you a handy little brush to scrub off any dried bits of paint.
Don’t ever submerge the paint sprayer under water.
Let everything dry before you put it away.
6. Remove your drop cloths/pre-taped masking film.
And all done!
We even added new baseboard to the bottom of the walls to up the fancy in here a bit. With the new floor (it’s double broadcast quartz), freshly painted walls, new trim and new wall storage, this garage is looking good as new!
Here’s one more before and after:
It’s funny how you just get used to something (like an outdated garage) and now whenever we walk in here, we’re saying, “Wow, it looks great in here!”
Are you tackling any painting projects this summer? Painting garage walls? Tackling that old patio set? I’m telling you, it feels so good to have this stuff updated!
If you want more garage or outdoor projects, check these out:
- How to remove cigarette smell from the garage
- How to paint metal patio furniture
- How to use a heat gun to clean a grill
Remember to bookmark or pin this post if you want to save it for later!
Pin it!
Want to read more posts like this?
Follow along: Get my emails | Facebook | Pinterest | Twitter | Instagram
Michelle from Weekend Craft says
Makes it look so much brighter and cleaner!
GreenWithDecor says
Doesn’t it!? Gotta love paint!
Chelsea @ Making Manzanita says
Looks like a brand new garage!! Gotta love the power of paint! 🙂 That paint sprayer looks awesome too!
GreenWithDecor says
Thanks, Chelsea! I love this paint sprayer – you would, too!
Irene Trentham says
Such a stunning garage makeover! Thank you for going into the details. They’re very helpful for those who have no idea how to get started. Bookmarked for my future project!
GreenWithDecor says
Thank you! Happy painting!
Nita says
Did you paint the ceiling with this too?
GreenWithDecor says
Not with this project, but you can use the sprayer to paint ceilings, too!