These scrabble tile DIY coasters are an easy craft and perfect for a party or cute gift idea! Just follow this easy DIY tutorial.
Disclosure: This post is sponsored by Gorilla Glue. All opinions, images and love of DIY projects are 100% mine.
You know what we never seem to have enough of?
Coasters!
I don’t know why, it seems like a weird thing to run out of.
But I LOVE our round wood coffee table (see our living room here) and refuse to let a sweating cold drink ruin its gorgeous surface.
So it’s a good idea to have extra coasters around here. Which led to me making these cute scrabble tile DIY coasters:
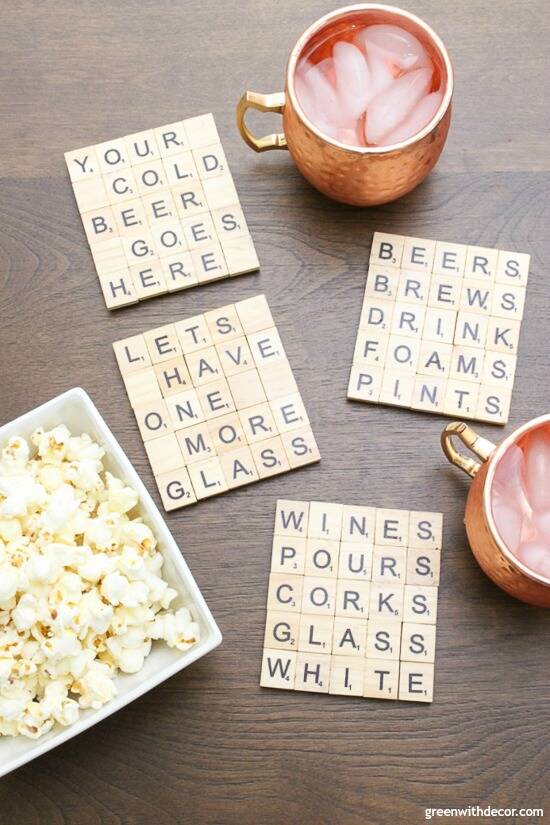
Aren’t they adorable?! And they were easy to make!
This post contains affiliate links. This means if you click the link and buy something, I may receive a small percentage of sales at no extra cost to you.
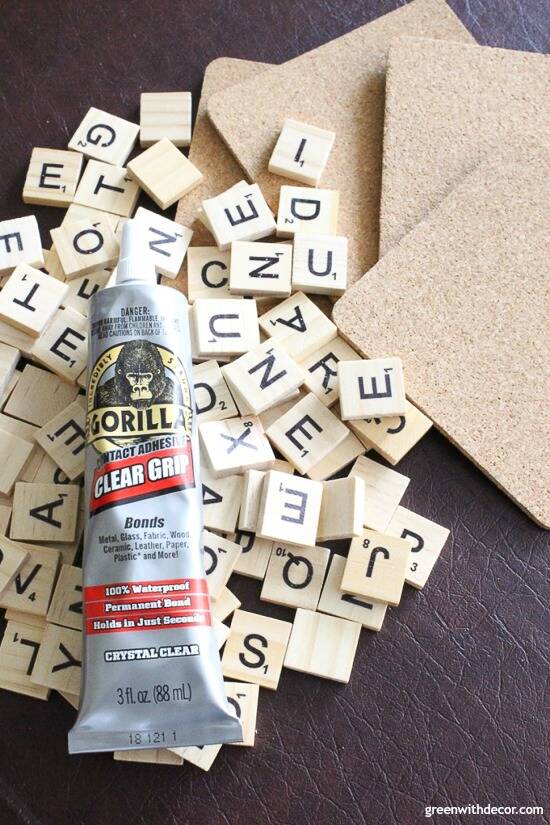
Supply list for scrabble tile DIY coasters:
- Scrabble tiles
- Cork coasters
- Gorilla Glue’s Clear Grip (You can get some here or here.)
- Dry cloth
- Ruler
- Drop cloth or old newspapers
- X-ACTO knife
- Topcoat, Satin low-sheen finish
How to make scrabble tile DIY coasters:
1. Plan out your words.
Make sure whatever scrabble tiles you’re buying that you’ll have enough for whatever words you’re planning out. (I ordered these so I’d have plenty of extras!)
I picked 5-letter words based on the cork coasters I ordered, so take the size into consideration, too.
I love that you can totally customize the coasters to say whatever you want – sports terms, favorite TV shows, you name it!
2. Line up your words nearby your cork coasters.
3. Glue your scrabble tiles down onto the cork coasters.
I lined up the first row, using a ruler to make sure everything was straight.
Oddly enough, even though I used letters from the same set of tiles, a few were just slightly smaller or larger, so the rows aren’t all *exact*, but they’re close enough.
I used Gorilla Glue’s Clear Grip to glue the tiles down. You may remember I used it earlier this year on the DIY cork shamrock?
It’s super easy to use and you don’t have to worry about burning your fingers like you do with a hot glue gun.
I call that a win!
Plus Clear Grip works on pretty much any surface – metal, glass, fabric, wood, ceramic, leather, paper, rubber, plastic, you name it – so it’s a good one to keep in the craft closet or tool box.
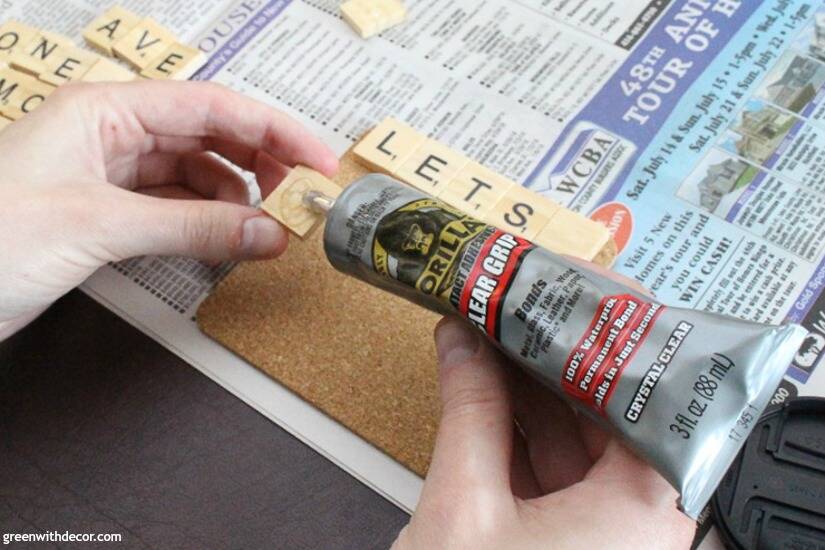
Apply some of the Clear Grip to the back of your tiles and onto the cork.
Then let it partially dry for about 2 minutes.

Press the tile onto the cork coaster with a little pressure.
The bond will start to form immediately, so be sure to place the tile in the right space (the ruler helps with this), because it can be difficult to move the tile after it’s placed.
I did the first letter of each word next, so you have an inverted L-shape on your coasters. I just wanted to be sure I could line all of the tiles up as much as possible.
Then I filled in each row one at a time.
I also applied Clear Grip along the tile borders (see picture below) to reinforce the bond.
When you’re done, wipe off the Clear Grip nozzle with a dry cloth to get rid of any excess material before putting the cap back on.
Let the Clear Grip cure for 24 hours before moving your coasters.
4. Cut off any excess cork backing.
This will depend on the exact size of the tiles and coasters you use, but if you use the same pieces I did, you’ll have some cork trim to cut off.
Use an X-ACTO knife to cut just inside the cork tiles.
Don’t cut too much off, or your coasters will be wobbly – just enough that you can’t see the cork backing from the front.
5.Seal your coasters.
Since these DIY coasters will probably get wet from drinks sweating (is this not the hottest summer ever?! Maybe that’s the pregnancy talking!), I wanted to seal them.
Clear Grip is waterproof, but I wanted to protect the tiles and cork backing.
I used this top coat that we also used on our DIY cork bulletin board.
Just spray it on and let it dry – super easy! (It does smell a little, so I’d do this part outside.)
6. Enjoy!
Aren’t these so cute?!
I think they’d make a good Christmas gift or hostess gift, too.
I had to take a picture with the copper mugs next to the coasters so you could actually see them.
As I said to my (soon-to-be) sister-in-law when I texted her a picture of the finished project though, they’ll be a whole lot cuter when I’m enjoying a beer on them, too! (A few more weeks!)
Have you made anything with scrabble tiles? Or made any DIY coasters?
Or used Clear Grip on any fun projects?
I have a bunch of scrabble tiles left over, so I may need to come up with another project idea!
For more easy craft ideas, check out these posts:
- The 10 pieces not to skip at the thrift store
- An easy way to DIY faux concrete vases
- Easy DIY placemats with burlap and marker
Remember to bookmark or pin this post if you want to save it for later!
Pin it!
Want to read more posts like this?
Follow along: Get my emails | Facebook | Pinterest | Twitter | Instagram
Roxanne says
These are SO creative Meg! Only a few more weeks to go!
GreenWithDecor says
Thanks, Roxanne! You got it – can’t wait!
Emily says
I love these! What a fun way to use letter tiles 🙂
GreenWithDecor says
Thanks, Emily!
Amanda Dorich says
This is such a cute idea! You can really customize them as gifts to whatever the person likes, as well! Saving this idea for Christmas!
GreenWithDecor says
Thanks, Amanda! Wouldn’t they be such fun Christmas presents?!
Vicki And Jenn 2 Bees in a Pod says
These coasters are so cute and creative!!
GreenWithDecor says
Thanks, ladies! They were fun to make!
Barbara says
Did you seal the cork side too?
GreenWithDecor says
Hi Barbara! I didn’t seal the cork side.
Paula Iacono says
Hey the “top coat sealer” link doesn’t work. I also googled it under Lowe’s and Valspar and found no products….?
GreenWithDecor says
Hmmm that is weird! I can’t find it now anywhere either. I’ll have to find a good substitute!
GreenWithDecor says
It seems like they don’t make this anymore…