Making a DIY cork bulletin board is even easier after you know these little tricks!
I’ve mentioned before that Kalen is a fabulous gift giver. He always thinks of something that person really wants or needs.
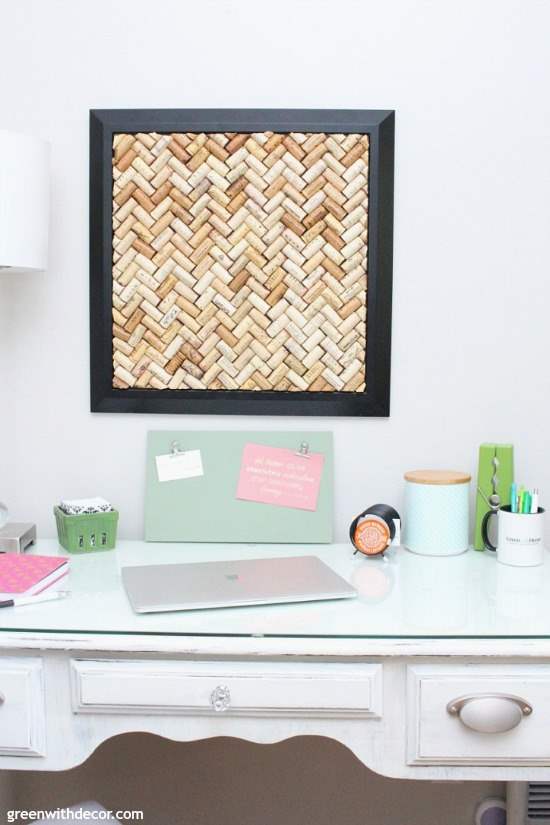
I’d been tossing around ideas for the blank wall above my painted desk so of course, he came up with a great idea: a DIY cork bulletin board.
He was going to surprise me for my birthday that’s coming up, but he decided he wanted to be sure I liked it before he put it all together.
Smart guy. 🙂
I was all in. Plus he handled most of the project himself, which makes it even better.
Isn’t it cute?!
He even figured out a few secrets that are helpful for pretty much any cork project you do going forward, so I knew I had to share them with you guys!
For fun, let’s look at how this frame looked when I found it at Goodwill:
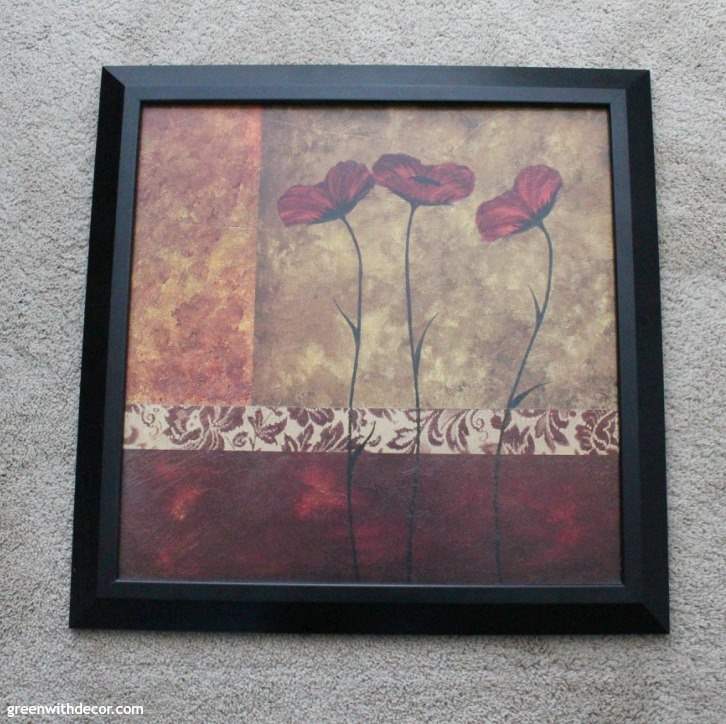
(See all of my favorite pieces not to skip at the thrift store here – the DIYs with old picture frames are endless!)
This post contains affiliate links. This means if you click the link and buy something, I may receive a small percentage of sales at no extra cost to you.
Supply list for a DIY cork bulletin board:
- An old frame
- A whole lot of corks (Our neighbors save them for us.)
- X-ACTO knife
- Hot glue gun
- Hammer
- Nails
- Topcoat, Satin low-sheen finish
- Sawtooth hanger
How to make a DIY cork bulletin board:
1. Paint your frame. (optional)
I didn’t paint our frame, because I like how the corks pop against the black.
But if you are going to paint, do it before you line up all the corks inside.
It will be way easier than worrying about getting paint on any corks.
2. Line up your corks inside the frame.
Figure out what pattern you want to do.
Then start in a corner and work your way out.
Keep in mind two things: one, you’re not actually attaching the corks to the back of the frame yet, just using the frame as a border for your pattern, and two, this will end up being the backside of the corks (more on that in step 3).
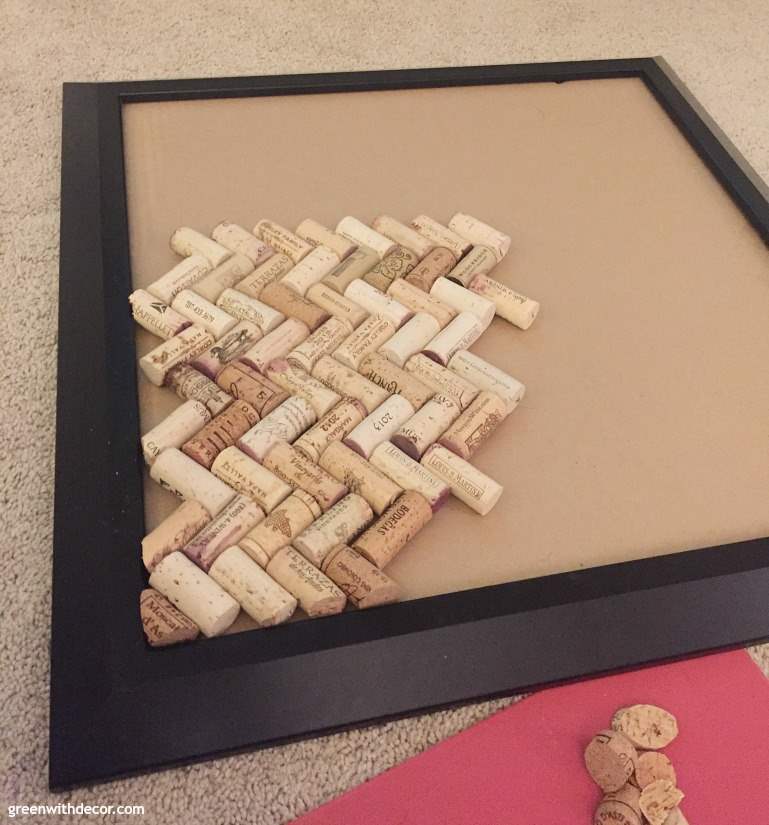
Fill in all of the whole corks, then cut corks to size to fit in all of the spaces around the edges.
3. Hot glue each cork to each other. (secret #1)
Don’t pick up the corks to get the glue in between, just apply the glue over the intersections of each cork.
Remember, you’re working with the back of your corks, so don’t worry about any glue showing.
There will be PLENTY of glue showing, but you’re going to flip the entire thing over once it’s all glued together so it doesn’t matter.

I don’t know why I’ve never done cork projects like this before.
I was always worried about getting the glue exactly in between the corks so you couldn’t see it instead of just laying them all flat and applying the glue on one side (the backside) like this.
So much smarter and faster!
Be sure to apply glue on every intersection so that the corks are all held together tightly.
Let the glue dry for a few hours.
4. Flip the cork piece over so it’s outside of the frame.
5. Use the topcoat to seal the corks and give the whole board a protective finish. (secret #2)
I’ve done a lot of cork projects (I have them all linked at the bottom of this post if you’re interested), and I’d never used this topcoat before.
It is a game-changer and so easy!
I’m going to go back and apply it to a few of the cork projects from years past just to give them extra protection.
Hold the can about 8-10 inches from your cork piece and spray across the corks in rows, making sure you hit each cork.
It will look a bit ‘wet’ as soon as you finish.
Let it dry for a few days so the smell goes away.
6. Put the cork piece back into the frame. (secret #3)
Here’s another little secret: We started to use rubber cement but quickly realized we had too much area to cover and not enough time to place the corks down before the rubber cement was drying in some areas, even with both of us working on it.
So instead, put the cork piece back into the frame, holding it with one hand while you flip the frame on its side to hammer nails into the back of the frame to secure the corks to the back of the frame.
7. Attach a sawtooth hanger (if your frame doesn’t already have one) and hang it up.
Here’s a close-up of the corks.
Oh, and I finally got new business cards after getting my logo redesigned a few months ago. Just in time for a conference I’m at this week.
Funny how deadlines motivate us to get things checked off!
It’s much better to have something pretty and functional over my desk instead of looking at a blank wall.
And with that, I think we can officially call this desk nook done! It feels good to check off another room.
GET THE LOOK:
Since a popular question I get is “Where’d you get that?!,” here are links to the same or similar sources:
- Wall color: Agreeable Gray by Sherwin Williams
- Green clipboard (DIY)
- Pink card was from a friend, this one has the same fun quote
- Painted desk tutorial (drawer pulls here and crystal knob here)
- Desk chair
- Lamp from TJ Maxx
- Green basket
I’ve done quite a few cork DIY projects over the years. You can see them here:
- Cork chalkboard
- Cork place cards (perfect for a wedding or the holidays!)
- Cork initial
- Cork standing Christmas tree
- Cork Christmas tree ornament
I promise we didn’t drink even close to most of the wine from the corks for all of these projects. 🙂
Remember to bookmark or pin this post if you want to save it for later!
Pin it!
Want to read more posts like this?
Follow along: Get my emails | Facebook | Pinterest | Twitter | Instagram
Caitlin says
What size frame for x amount of corks would you recommend? That’s the only thing I’m lost on. Thank you!
GreenWithDecor says
It really depends if you want to place the corks horizontally/vertically or in a pattern like this! For reference, our frame was just shy of 20″ wide/long. I’d get a frame you like, and play around with corks in different layouts to see which you like best – and how many more corks you may need. Cheers! Have fun!
Georgia says
What is the purpose of the topcoat spray?
GreenWithDecor says
It helps keep your corks protected and makes the board more durable so it lasts!
Andrea says
It looks great. I’ve been wondering what to do with our corks when my husband said the cottage needs a cork board for pictures of fun things we do here.
Is it durable enough to actually use as a cork board with repeated use?
GreenWithDecor says
Thanks, Andrea! It’s been durable enough for us with repeated use. We love it! How fun to make one for your cottage!
Lisa M Morlock-Wright says
Oh my gosh! The thought of drinking all that wine to make a large bulletin board gives me (great joy) a viable reason!
Thanks!
GreenWithDecor says
Ha! Cheers!
Debbie says
Since I have a ton of corks that I have been collecting for years, this post caught my eye. Stellar idea!! Thank you so much for the step-by-step instructions!! I only hope mine comes out as beautiful as yours!
GreenWithDecor says
I have tons of corks, too, haha! Happy crafting!
Kayla says
I’m so impressed with all the little pieces you cut to fit in to the spaces missing. I made the easy part of this project, but unsure if I’ll finish the bits and bobs piece! Looks awesome, great job and thanks for the inspiration!
GreenWithDecor says
Definitely not the most fun part of the project, ha! We still love this cork board, enjoy yours!
Amanda aka ‘Nykole Davis says
Wow, you are so creative! Just brilliant…thank you for the tutorial!! Can’t wait to try this! 🍾
GreenWithDecor says
Thanks so much! This is still one of my favorite projects. Good luck with yours!