If you’re wondering how to paint a dollhouse bookcase, read this easy DIY tutorial for a quick dollhouse bookcase DIY makeover.
Disclosure: This post is sponsored by Velvet Finishes. All opinions, images and love of painting projects are 100% mine.
We’re very slowly working on a toddler bedroom over here, and part of my plan is this awesome dollhouse bookcase.
I bought this on one of those Facebook mom / kids groups (way too addicting) and knew I could give it a paint job to make it look awesome.
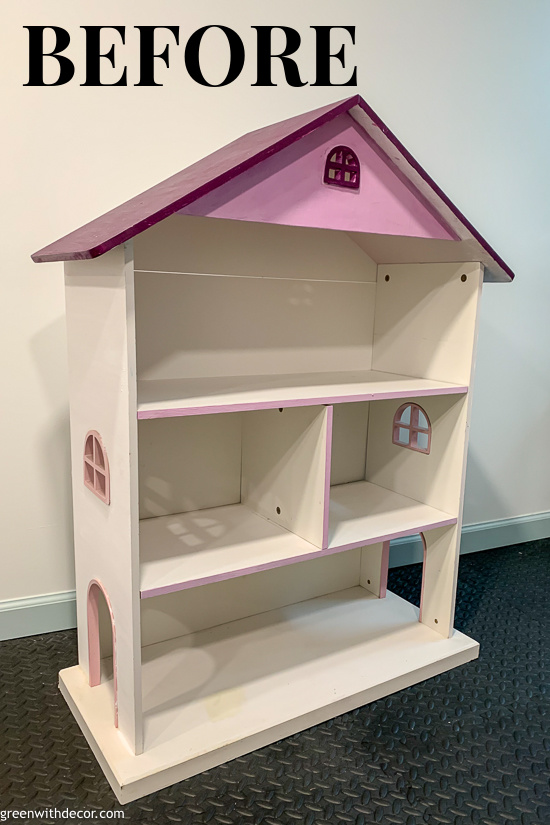
Here’s how it started.
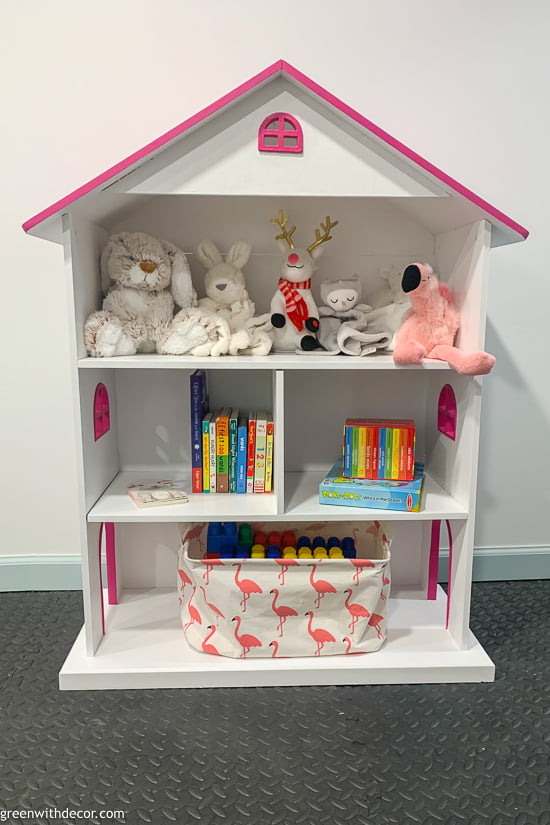
Here’s how it looks now:
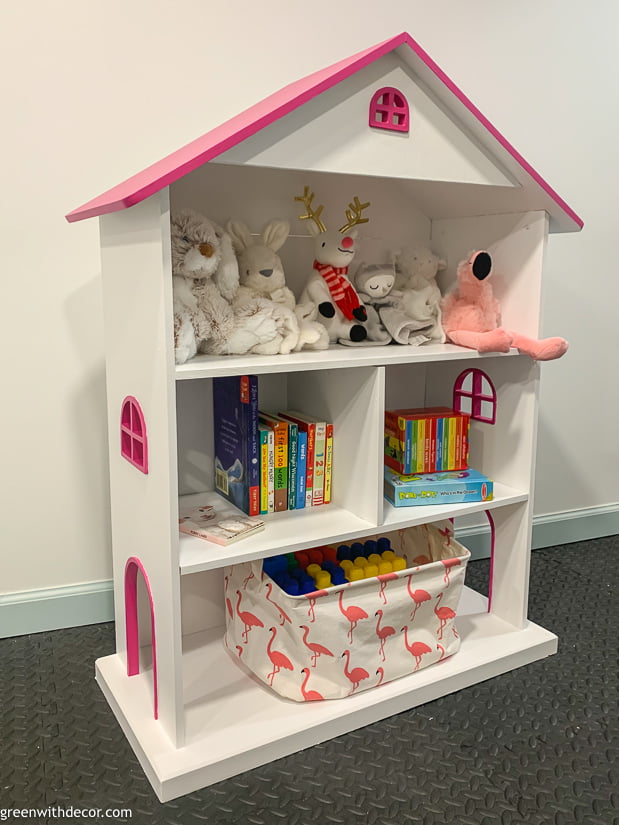
The difference may not look too crazy, but the previous white paint needed some freshening up and looks much crisper and cleaner now! Plus there were a few bumps that needed to be sanded down for a smooth finish.
And our toddler is obsessed with pink, so there’s that.
I used paint by Velvet Finishes, which is designed by my friend Kellie and really easy to use. They have lots of fun, bright colors. (I’ve painted this rocking chair, this chair and this nightstand with Velvet Finishes if you want more color inspiration!)
This post contains affiliate links. This means if you click the link and buy something, I may receive a small percentage of sales at no extra cost to you.
Supply list for a dollhouse bookcase DIY makeover:
- Drop cloth or old blanket
- Tack cloth
- Sandpaper or sanding block
- READY by Velvet Finishes
- A clean cloth
- Painter’s tape (this is my favorite to use on fresh paint)
- Paint stir stick(s)
- Paint brush (one per color)
- Very small paint brush
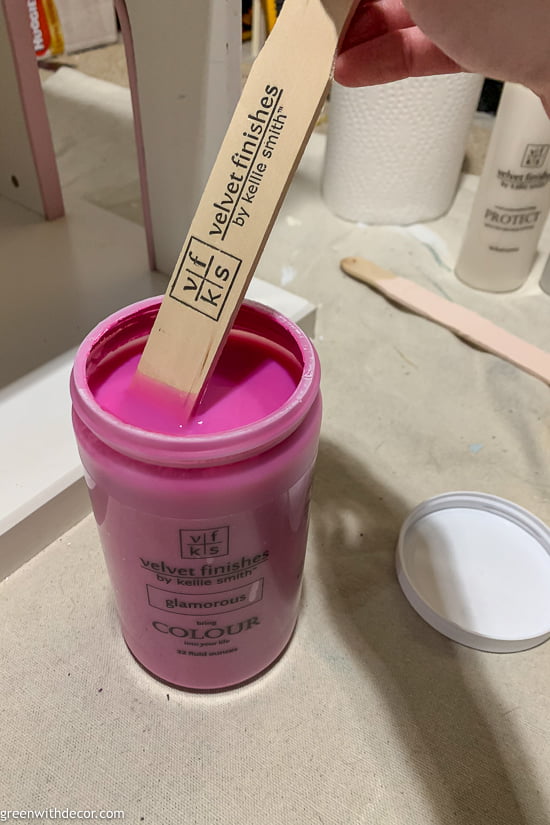
- Paint – I used Glamorous and Minimalistic by Velvet Finishes
- PROTECT by Velvet Finishes
How to paint a dollhouse bookcase
1. Clean your piece.
Get rid of any dust and dirt. This has been sitting in our basement for months waiting for a makeover so it was a bit dusty.
I ended up painting this in our basement because this Wisconsin spring weather has been a joke as always (It SNOWED a couple weeks ago) so I can’t paint outside. And I didn’t want our toddler to see this until it was done so I couldn’t paint upstairs.
Nothing like renovating your whole house and then hiding in the basement to do a project …
2. Prep your piece.
Normally if you use READY, you can skip sanding. But if your piece has bumps or previous dried paint drips like this dollhouse bookcase did, you’ll need to sand those out so your piece is smooth prior to painting.
You don’t have to sand the whole piece prior to painting, just those specific places. Use a tack cloth to wipe up the sanding dust. Tack clothes are seriously amazing and collect ALL the dust. Waaaaay better than a damp paper towel.
If your piece is smooth already, no need to sand. Just spray the READY mixture on, let it sit for a minute, then wipe it off. Really easy!
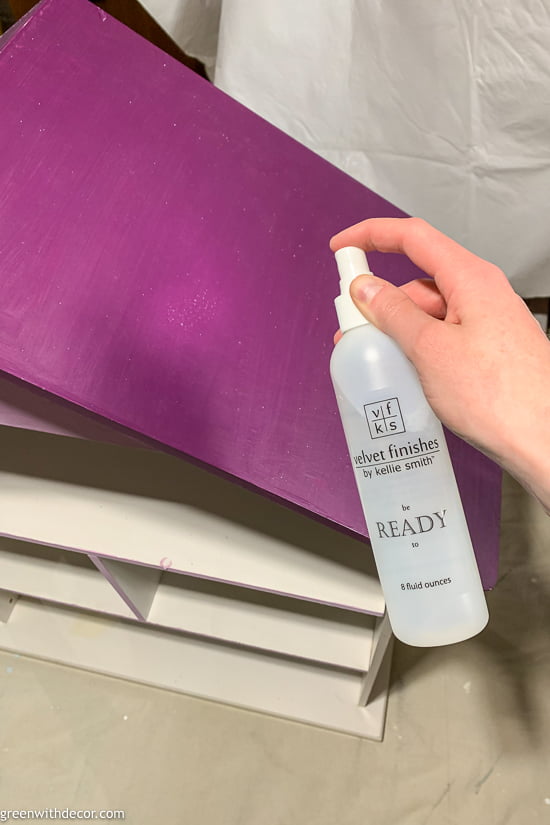
If your piece is still shiny, just spray on again, let it sit and wipe off.
3. Paint!
Shake and stir your paint. One of the best things about Velvet Finishes paint is that brush strokes don’t matter, so you can paint furniture whichever way you want, and they won’t show after the paint dries.
Don’t go back over any paint that’s starting to dry. Velvet Finishes is self-leveling, plus you’ll get more coverage with a second coat of paint.
The first coat always seems to take the longest, which definitely seemed true with this dollhouse bookcase. There were a lot of surface areas to cover, and I was trying to squeeze this in during nap times. Luckily I got it done!
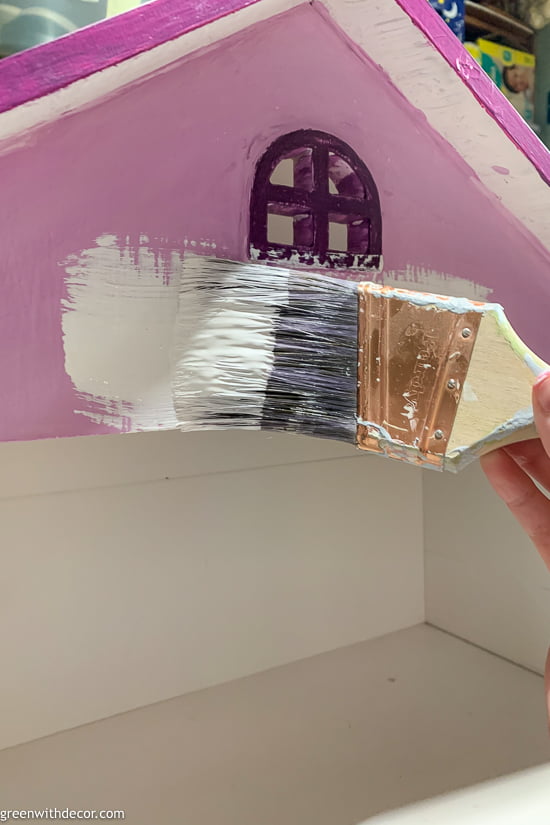
And a quick tip if you’re painting the edges of bookshelves like this, apply your brush in quick vertical strokes.
Your brush should have paint on it but not be soaked. It can seem like long horizontal strokes is your best bet here, but that usually means you’ll end up with paint drips on either side of the shelf, which then dry into stubborn little pieces you’ll have to sand and repaint. (No thank you.)
In between coats of paint, wrap your brush in a damp paper towel and place it in a plastic resealable bag in the fridge instead of wasting your time washing it out.
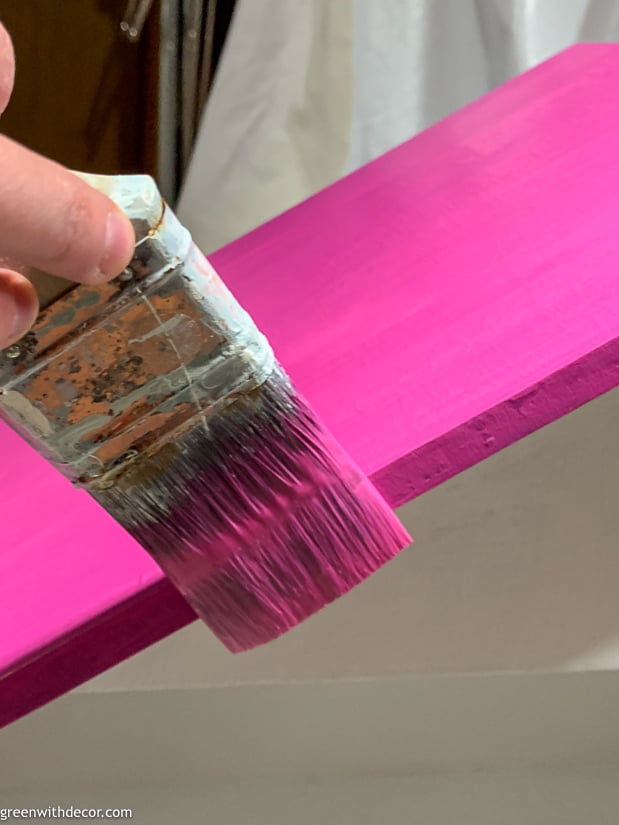
I painted the roof pink (Glamorous) and the bookcase white (Minimalistic) in the same painting session since the two places weren’t really touching. (I went back later and did the windows and doors trim after the paint was dry, see step #5 below.)
4. Do a second coat of paint.
Coverage always looks so much better after two coats of paint! It’s like magic.
My white paint looked great after two coats. So much brighter and cleaner! If you want a really crisp bright white for furniture, Minimalistic is your color!
The pink (Glamorous) needed a third coat since that dark purple underneath was harder to cover up. Note Velvet Finishes doesn’t recommend more than 3 coats of paint in a 24-hour period.
5. Repeat steps 3-4 for additional portions of your pieces until it’s all painted.
When I painted the windows and doors trim, I used this painter’s tape to protect the freshly painted dollhouse bookcase. It’s perfect for delicate surfaces, aka pieces that have recently been painted.
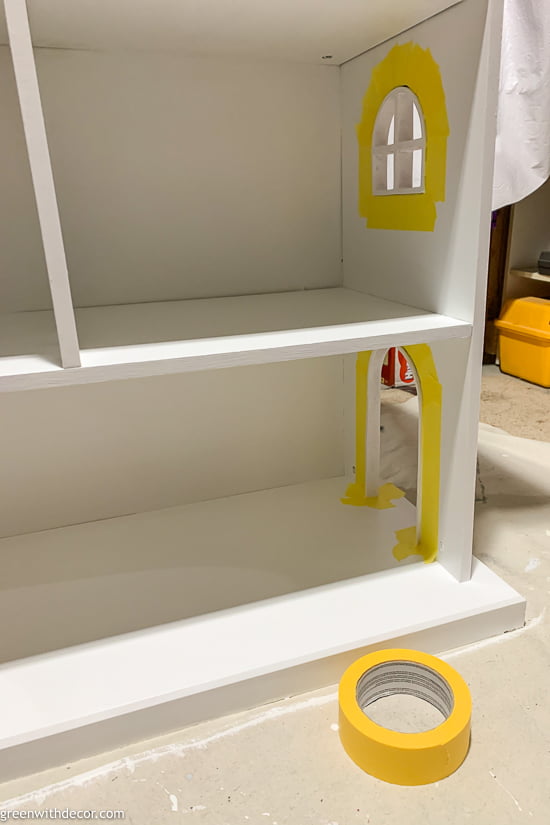
These curves proved to be a huge pain. It’s basically impossible to tape perfectly around them.
I used a regular paint brush to paint two coats on, then removed the painter’s tape.
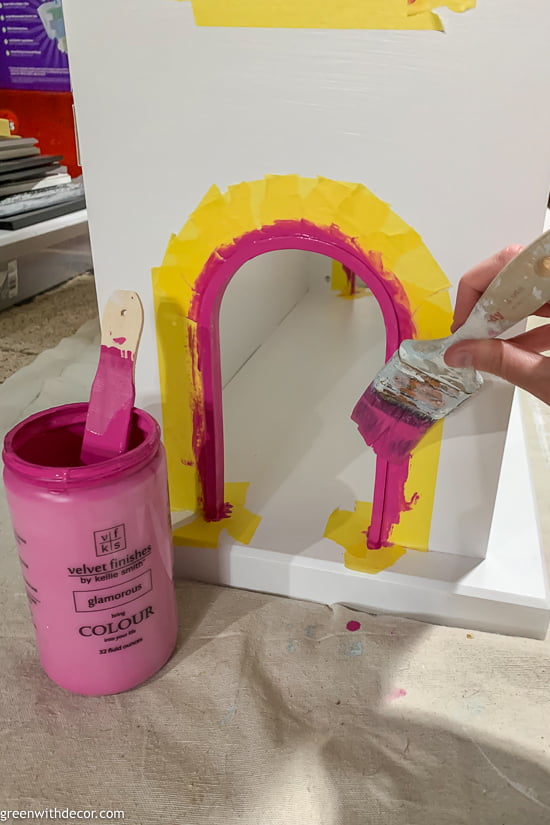
Use a very, very small paint brush to touch up any spots where the tape wasn’t perfect around the curves. And I really do mean small or you’ll end up with paint in the wrong spots and end up going back and forth between the two colors painting forever and ever to fix it.
And no one wants to do that.
Can’t say I’m in a hurry to paint any pieces with curves like this again anytime soon! This dollhouse bookcase is adorable, but I’m glad the project is done.
6. Apply Velvet Finishes’ PROTECT.
Velvet Finishes’ PROTECT is a non-yellowing polycrylic designed to protect painted furniture.
Apply it with a paint brush. If you see streak marks, apply more, which I know seems counter-intuitive, but it works!
8. Let your paint cure.
Cure time matters with painted furniture! Let your painted dollhouse bookcase (or whatever piece you’re painting) cure for several days to decrease chances of scratches or dents in the paint later. This is always important but even more so with kids’ pieces.
Hope this is helpful if you’ve been looking for dollhouse bookcase makeover inspiration! It’s an easy project.
If you have any questions about Velvet Finishes, check out their FAQ section on their website.
GET THE LOOK:
Since a popular question I get is “Where’d you get that?!,” here are links to the same or similar sources:
- Wall color: Extra White by Sherwin Williams
- Trim color: Tradewind by Sherwin Williams (DIY: how to paint trim)
- Gym floor
- Flamingo basket
We’ll get this dollhouse bookcase moved upstairs eventually. Stay tuned for more progress on the toddler bedroom makeover.
I’ve been on a search for the perfect artwork for a while and haven’t quite found what I’m looking for. We’ll get there!
If you want more kids’ furniture makeover inspiration, check these out:
Remember to bookmark or pin this post if you want to save it for later!

Pin it!
Want to read more posts like this?
Follow along: Get my emails | Facebook | Pinterest | Twitter | Instagram
Leave a Reply