If you’re wondering how to fix rusted outdoor furniture, follow this simple DIY tutorial.
Disclosure: This post is sponsored by Wagner. All opinions, images and love of painting projects are 100% mine.
This post contains affiliate links. This means if you click the link and buy something, I may receive a small percentage of sales at no extra cost to you.
We’ve been busy with backyard updates! I talked about our new light fixture, swing set and landscaping plus the search for new patio furniture and outdoor pillows in this post if you missed it.
I bought these gorgeous swivel chairs for our patio after looking at approximately a million options, and they’re a great addition back here! (They go in and out of stock almost daily, so if you want them, too, keep checking back!)
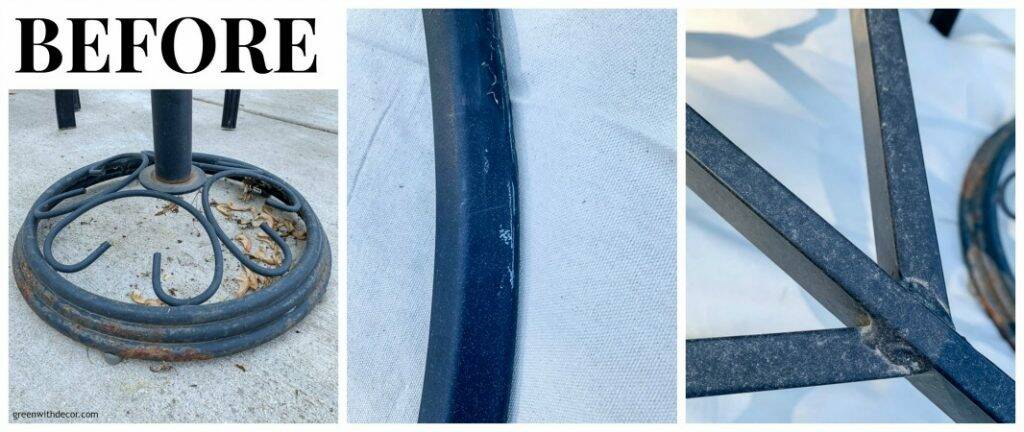
But the base of our patio table was rusted and the rim has a few scratches, which doesn’t make for the best look. I knew with some paint, I could make it look new.
Ready for the before and afters?!
Here are closeups of the table base, table rim and part of the table legs:
And now:
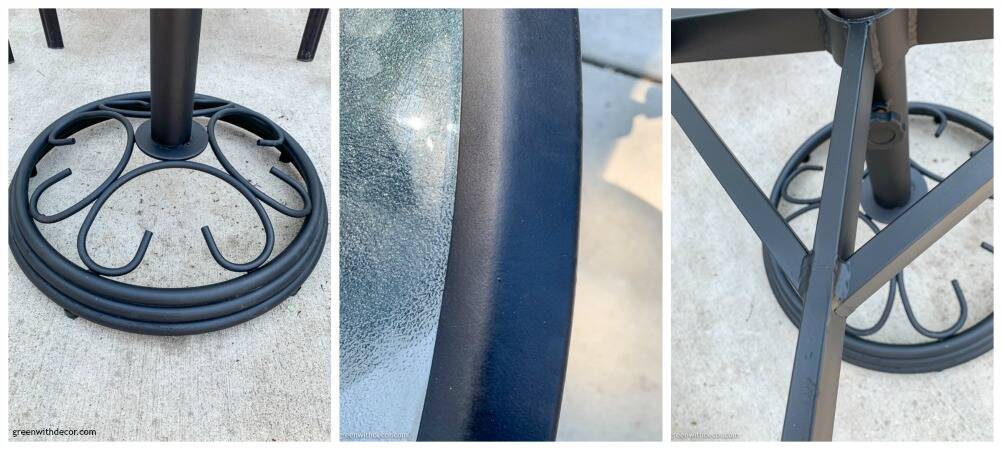
Paint really never ceases to amaze me. It works wonders!
GET THE LOOK: Outdoor pillows | Outdoor light fixture | Copper mugs | Faux boxwood plant
Supply list for fixing rusted furniture:
- Drop cloth or tarp
- Screwdriver
- Plastic resealable bag for screws so you don’t lose any!
- Sanding sponge
- Old cloth for cleaning
- Painters tape
- FLEXiO 3000 paint sprayer (also available here or here)
- Extension cord (if needed)
- Paint (this paint is known for rust resistance and works on indoor/outdoor metal surfaces)
- Paint stir stick
How to fix rusted furniture:
I used our handy Wagner paint sprayer to knock this project out during a quick toddler afternoon nap (the best/only time for projects around here).
1. Take your table apart.

Set the glass piece (carefully!) aside so it wont’ get any paint on it. (Don’t lay it on your grass or you might kill all of the grass underneath. Ask me how I know … the grass underneath where I painted is completely fine though!)
If your table is a huge pain to take apart, you could leave it assembled and tape off your glass, but that definitely sounds like a lot more work!
2. Sand and clean your table base and rim.
Sand your table base and rim to remove any loose rust or flaking paint pieces. It doesn’t have to be perfect, just keep in mind you’ll see whatever bumps you’re painting over, so smooth any you want to get rid of!
These sanding sponges are perfect for this step!
Then clean the table to remove any sanding dust, dirt, leaves, etc.
I used painters tape to tape off the little screw part where the knob for the umbrella is. If yours comes out easily, you could also just remove it to avoid getting paint on it.
3. Prep your paint.
Stir your paint. Pour it in the paint sprayer cup.
4. Put together your paint sprayer.
The FLEXIO 3000 comes with two nozzles. The detail nozzle (the smaller one) is perfect for painting projects such as furniture or shelving where you’re moving between different surface areas while painting.
5. Adjust your paint sprayer settings for your project.
Spray shape / air cap: You can set this to get a horizontal, vertical or round spray pattern.
Material flow control: You set this based on the type of paint material you’re using. Turn it up if you’re not getting enough paint coverage; turn it down if your paint is running.
Air power control: You set this based on how thick (start higher) or thin (start lower) your paint is. You can adjust as you go. Check Wagner’s manual if you have questions on this.
6. Paint!
A few tips on using a paint sprayer:
- Practice on the practice sheet Wagner provides if it’s your first time using a sprayer. (It really is easy – just go for it!)
- Keep moving so you don’t spray too much in the same spot
- Move your wrist with your sprayer. If you just flick your wrist, your paint won’t go on evenly.
- Keep the paint sprayer about 6-8 inches from whatever you’re painting.
- Do one coat of paint, and let it dry. Then do a second, slightly heavier coat of paint. (Don’t move your furniture piece until that second coat is dry.)
7. Clean your paint sprayer.
It’s easier than you might think. This video walks you through the process.
8. Assemble your table.
Once all of the paint is dry, of course.
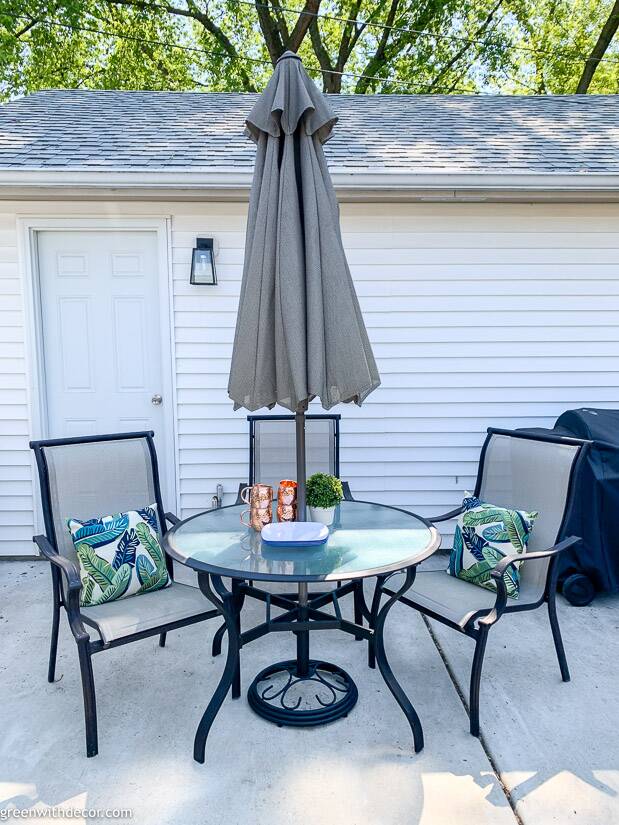
The table looks new again, don’t you think?! Perfect for our next patio meal!
And stay tuned for more backyard updates! (They’re all linked here if you want to see more!)
We love this space so much, even more now that our daughter is old enough to run around and enjoy it, too!
If you want more outdoor projects, check out these posts:
Remember to bookmark or pin this post if you want to save it for later!
Pin it!
Want to read more posts like this?
Follow along: Get my emails | Facebook | Pinterest | Twitter | Instagram
Malloree says
Hi! I’m wondering how you protected the fabric on the chairs when spray painting? Did you put a fabric protection film down? Thanks!
GreenWithDecor says
You could use painter’s plastic to cover the fabric! I talk about it more in this blog post where we painted outdoor chairs: https://greenwithdecor.com/repair-outdoor-furniture-scratches/.
Alice Mcmiller says
Your tips for fixing rusted outdoor furniture are a game-changer! I never knew that rust could be managed so effectively with a combination of sanding, painting, and using rust converters. The step-by-step instructions and photos make the process seem manageable even for someone like me who’s not very handy. Thanks for sharing this valuable information!
GreenWithDecor says
Glad you found it helpful!