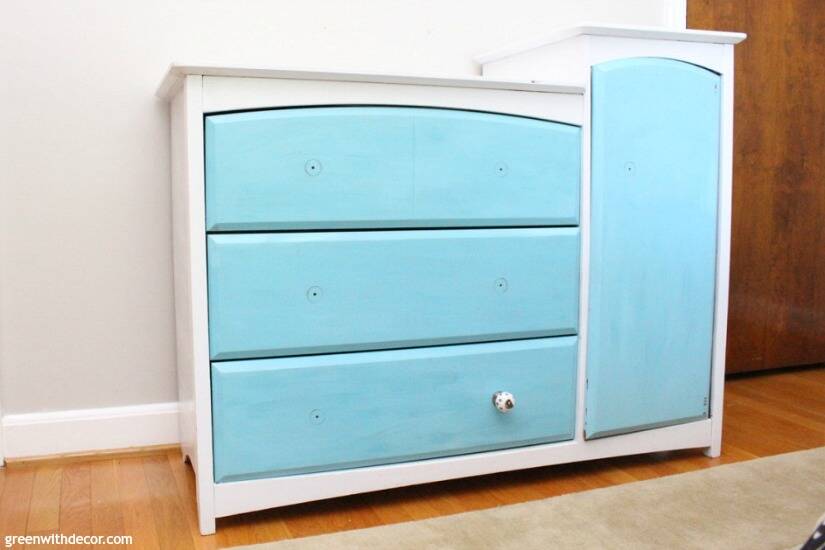
See how this dresser from the side of the road looks after some clay paint and new crystal hardware. Such a pretty furniture makeover!
What’s your favorite thing to do on New Year’s Day? Pick up old furniture?
Kalen saw an old furniture piece listed in a local Facebook group for FREE last year (yes, it’s been sitting in the basement that long) and knew I’d love it.
So we hopped in the car and hoisted this big ol’ dresser into the car. Happy New Year? Haha.
Well I thought eventually it might be cute for a kid’s room … and here we are!

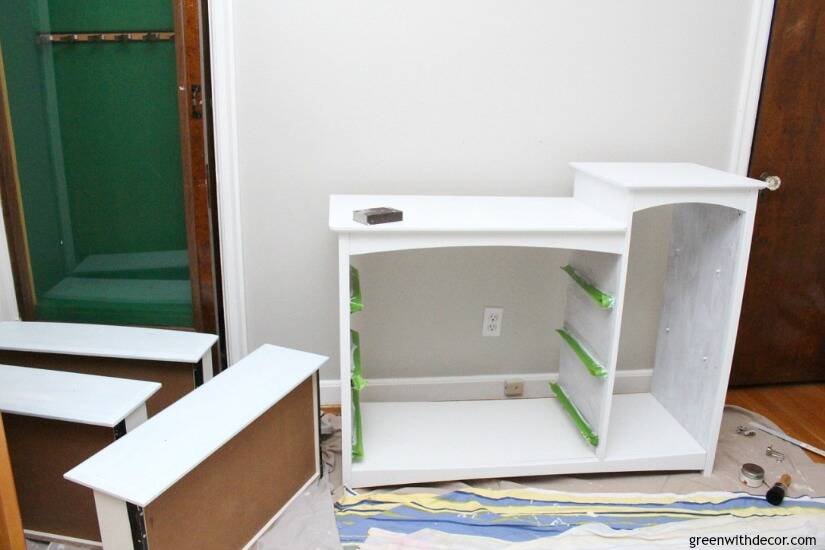
Here’s how the lovely piece started:
It was missing almost all of the hardware, but no big deal. I usually end up replacing old hardware anyway.
Also, random question, what would you guys call this thing? A dresser? I didn’t know what to call this post!
Wayfair calls them combo-dressers, so let’s go with that.
We’re debating using this as the changing table, so we might be adding a changing pad to the top at some point, but I thought I’d share the furniture makeover so far.
This post contains affiliate links. This means if you click the link and buy something, I may receive a small percentage of sales at no extra cost to you.
Supply list for a furniture makeover:
- Drop cloth (or an old blanket)
- Screwdriver
- Wood filler
- Putty knife
- Sanding sponges
- Painter’s tape
- Paint – I used Country Chic Paint’s Elegance
- Primer (optional)
- Paint brush
- Paint stir stick
- Wax – I used Country Chic Paint’s Natural Wax
- Wax brush
- Lint-free cloth
- New hardware (optional) – I used these crystal knobs (or these are similar)
How to paint an old piece of furniture:
1. Clean your furniture.
Especially if you also pick something up from the curb, odds are, it’s covered in some dirt.
2. Take the hardware off.
Tape off any drawer hinges with painter’s tape. (Or you could unscrew them and take them off, but taping them is easier!)
I say that, but I did take the door hinges off because I figured it’d be easier to paint the door when it was laid flat.
3. Use wood filler to fill in any holes.
Is it weird I really like wood filler? The texture is just kinda fun to work in those holes, haha.
Use either a putty knife or just your finger to apply the wood filler.
Let it dry, then use a sanding sponge to smooth everything over.
4. Prime your furniture piece. (optional)
With clay paint, you don’t have to prime anything, but it might save you a coat of paint later.
I figured priming couldn’t hurt on this one for two reasons: the original paint job was a bit streaky and since it was originally two-toned, primer would give me a more even starting point for painting.
If you’re painting a light color over another light color (or painting with dark paint), you don’t really need to prime.
5. Paint!
Shake and stir your paint, then start painting.
Apply your brush strokes in the same direction as the wood grain of your piece.
(This is a bad cell phone photo – eek! The color looks green in this picture.)
Let the first coat dry overnight, then do a second coat. The difference in coverage between one and two coats always amazes me. (So don’t be discouraged if your piece doesn’t look great after just one coat!)
You can see in this picture how the back part of this piece has just one coat, and the bottom portion has two coats.
Usually two coats is enough (especially if you primed), but do a third if you’re also painting over bright blue that might be peaking through your new paint!
I’ve had people ask about painting the inside of drawers.
I usually don’t, just because no one really sees them except you. I did paint inside the vertical side part of this piece just in case we ever decide to just take that door off and leave it open. Totally up to you!
6. Distress your piece. (optional)
I didn’t distress this one, but you can see how to distress in this chippy dresser makeover tutorial if you’re interested.
7. Wax your furniture piece.
I tend to use Country Chic Paint’s Natural Wax since it’s clear and doesn’t alter the color of the piece you just painted.
I always say this, but a nice wax brush definitely makes a difference over a cheap, flimsy one. I learned that the hard way!
After your paint has dried for 24-28 hours, swirl your wax brush in the wax and apply the wax to your dresser in a circular motion.
Buff off any excess wax with a clean, lint-free cloth.
(This is the front of one of the drawers so that hole is a hardware hole.)
Wax should be reapplied every 6-12 months depending how often you use your piece.
I don’t usually wax pieces that much just because we don’t see a lot of wear and tear on our pieces. That might change if we use this piece as a changing table! 🙂
8. Put your new hardware on.
I used these crystal knobs (or these are also similar).
Now doesn’t that just look perfect for a kid’s room?!
I know it’s blue, but no, we don’t know the baby’s gender yet!
I just wanted to paint the dresser a color that would work in a boy or a girl’s room plus I love trying new paint colors, and I hadn’t tried this one before.
GET THE LOOK:
Since a popular question I get is “Where’d you get that?!,” here are links to the same or similar sources:
- Wall color: Agreeable Gray by Sherwin Williams
- Crystal knobs here or here
- White vase
- Green clothespin was a Goodwill find I painted
- Silver lamp
Have you picked up any fun pieces from the side of the road for a furniture makeover?
It’s amazing what paint can do!
For more furniture makeovers, check out these projects:
Remember to bookmark or pin this post if you want to save it for later!
Pin it!
Remember to bookmark or pin this post if you want to save it for later!
Sue says
That is a very cool dresser! And I love the color! Great job!!!
GreenWithDecor says
Thanks, Sue! I’m so glad we found it!
Jodi says
Hey, Meg –
What’s your top recommendation for painting a dresser (wood with laminate top)? Do what you did above? Or do you have other recommendations?
GreenWithDecor says
Laminate is a bit trickier to paint, but it’s do-able! Lightly sand the entire piece and be sure to prime the dresser with a shellac-based primer (not water-based or oil-based primer). Other than that, you can follow the steps above! Happy painting!
Cindy says
It looks like an old-style baby change table dresser combo. Love the new color and the glass knobs. I would leave the door off the right side section, add some shelves and nice baskets.
GreenWithDecor says
Thanks, Cindy! Baskets would be fun in that side part, wouldn’t they?!
Liz says
Great job! That would be a chifforobe. I think it’s from the 50’s.
GreenWithDecor says
Oh good to know!! Thanks, Liz!
Tori says
I happened to find giant clothes pins like that at the Dollar Tree craft section several months back. Not sure if they still carry them.
Love this little dresser! Such a versatile color❤️
GreenWithDecor says
Great finds! Thank you, we love it, too!
Rebecca Payne says
Gorgeous!
GreenWithDecor says
Thank you!
Cheryl Atkinson says
hi Meg! I painted one. if these for my. daughter to use as a changing. table. my son. in law put wood around the top so baby wouldn’t fall off. I love this color!
GreenWithDecor says
How fun! That’s a great idea.