This DIY wall art tutorial shows how to paint metal for a distressed look. Painting metal is easy and a fun way to get a rustic look, just follow these simple steps.
Ever have those DIY project ideas that float around in your head forever and ever?
That’s pretty much how this DIY wall art project went.

I thought about it for ummmmm ever and just never quite got around to it since it didn’t seem as important as painting the TV stand or building the farmhouse dining table.
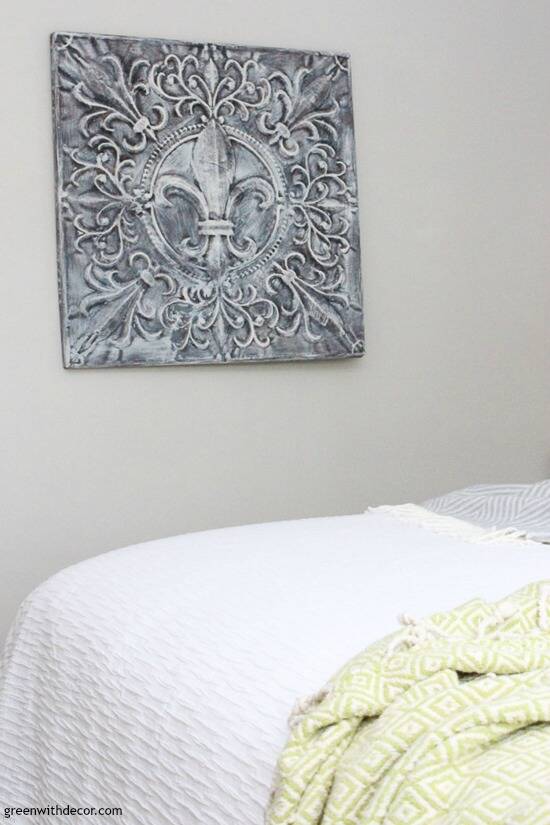
Those projects seemed a bit more necessary than working on some wall art that I didn’t even have a place for until recently … when it struck me that this metal piece would be a PERFECT little DIY wall art project for the neutral rustic bedroom makeover we’re tackling.
We had this bronze piece for a while, and I liked the texture of it.
But it was just too dark after a while. You know, decor styles change over time and all that.
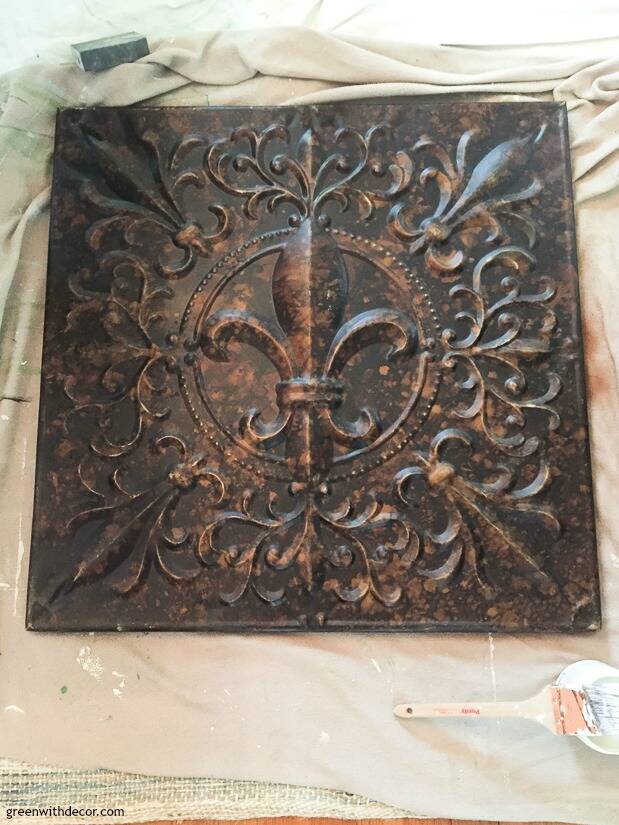
I had this idea in my head that painting metal wouldn’t be that hard and I could give it a kind of distressed, farmhouse look in the process.
And good news, it turned out in my head pretty much how I imagined!
Even better news, it was super easy. It took a little trial and error, but that’s why I love playing around with paint.
You really can’t screw it up because even when you do, you can just re-do it.
This post contains affiliate links. This means if you click the link and buy something, I may receive a small percentage of sales at no extra cost to you.
Supply list for painting metal:
- Drop cloth (or old blanket)
- Clay or chalky paint (I used Country Chic Paint’s Vanilla Frosting)
- Paint brush
- Paper towels (a few dry and a few damp)
If you want a similar distressed look, definitely use clay or chalky paint. If you just want to paint metal a totally new color without any distressing or chippyness to it, spray paint will work, too.
How to paint metal for a distressed look:
1. Wipe off/dust your piece.
Don’t sand your metal, it’s not necessary and you might end up scratching it.
2. Get your brush ready to dry brush.
I talk all about how to dry brush here if you want more details.
But basically, dip the tip of your paint brush into the paint, getting as LITTLE paint as possible on the brush.
Wipe the brush on a paper towel so you feel like you don’t have any paint on your brush. It’s okay, it’s easier to add more paint than to remove it (although you’ll see I had to do that.)
3. Paint your metal piece.
Apply light pressure and go over your piece with quick, random brush strokes.

Don’t work paint into the grooves of the piece. This method will naturally create some places where the paint adheres better to the metal and other places where it barely touches it.
Here’s a close up so you can see what I mean:
And another one:
If you add too much paint:
I totally had too much paint on the piece after my first attempt / before I decided dry brushing was the way to go. All part of the ‘how to paint metal’ learning experience!
The good thing about painting metal is that the paint kind of sits on top before it seeps in and dries like it does on wood, so just use a damp paper towel or two to wipe the paint off and start over.
I know I always say you can just repaint something if you don’t like it, but with metal, it’s even better than usual.
It’s almost like erasing a chalkboard. You can completely start over if you wipe the wet paint off before it dries. Which makes painting metal the perfect painting project if you’re worried about totally screwing up.
(Although obviously if the paint is already dry, you’re out of luck there.)
4. Let it dry.
The paint will take a bit longer to dry on metal than on wood, but it will still dry relatively quickly.
And you’re all set!
Have you worked on any DIY wall art projects lately? Or painted anything metal? Let’s see it!
For more DIY wall art projects, check these out:
- The secret to making a DIY cork bulletin board
- Make a DIY towel rack from an old wooden spool
- Update an old tile with furniture glaze
Remember to bookmark or pin this post if you want to save it for later!
Pin it!
Want to read more posts like this?
Follow along: Get my emails | Facebook | Pinterest | Twitter | Instagram
Christina Daggett says
I love this look. We are having a metal front door installed in an old apartment that we are renovating. You’ve given me a great idea on how to get the distressed look that I wanted for the door.
GreenWithDecor says
Great to hear! Happy painting!
Heather says
Great tips! Especially the dry brush method. What type of paint do you recommend for metal?
GreenWithDecor says
Most paint will work well on metal! I’d use clay, chalky or spray paint depending on the look you’re going for. Happy painting!
Dawn says
I’ve dry brushed ceramics before, so I know the technique. I’m hanging metal skirting with a brick look on my house right now. I saw some of the squares you show in your post (the before) and I thought how neat my skirting would look done that way instead of a solid color. But I couldn’t tell if it was a black base coat with the lighter color on top, or vice versa. I also couldn’t tell if it was “antiqued,” which in ceramics is a special paint that is painted on and then wiped off (such a waste!). So, thank you for your post! Dry brushing the skirting is going to be a long job, but if I paint the whole thing black first, then it’s just the dry brushing part that will be time consuming. Thanks for the tips!