Renovations almost always take longer than planned. It’s just a fact of renovating, especially in an old house.
We were winding down in the kitchen, but things were still crazy. Being busy at work on top of renovating an entire house, we decided to have our contractor install the kitchen cabinet handles for us just to get it done and be one step closer to having the renovation complete.
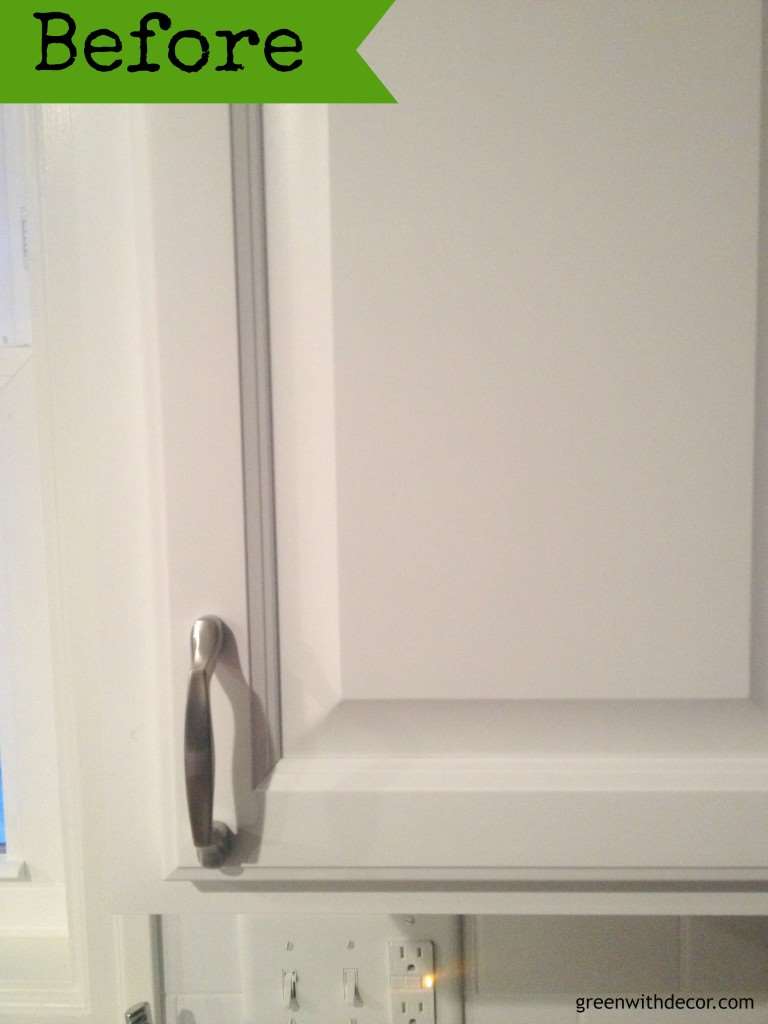
Well … he drilled holes in all (yep, all) 41 cabinet doors before checking how the cabinet handles fit on the doors.
Word of warning: don’t ever do this!
Drill the holes for the handle on ONE cabinet door (preferably not one right in the middle of the kitchen!) and make absolutely sure that you like it there.
Or you could end up like us.
The cabinet handles looked awful. Really, really awful.
This post contains affiliate links. This means if you click the link and buy something, I may receive a small percentage of sales at no extra cost to you.
Getting that phone call from the contractor was probably the worst day of the entire renovation (and if you’ve ever renovated a house, you know there are frustrating days!).
We were so excited about our beautiful brand new cabinets – but now they had each had two holes drilled in the completely wrong place.
Our contractor suggested leaving the holes and finding new cabinet handles that fit in these holes.
We went to just about every home improvement store in the Milwaukee area to look at new cabinet handles. The fact was, these holes were just way too low – there weren’t any cabinet handles that looked good drilled in at that level.
Plus, we really liked the cabinet handles that we had decided on.
So …
Supply list for installing cabinet handles:
How to fix it if your cabinet handles are installed wrong:
This can be solved!
1. Put wood filler in the incorrectly drilled holes, and let it dry overnight.
The wood filler will contract a bit as it dries, so be sure you put enough in the hole (without overdoing it.)
2. Sand the door to get an even surface.
3. Buy paint.
We went back to Hobo, where we bought the cabinets, and bought the same paint that was originally used on our cabinets. You can always bring a cabinet door with you to a paint store to have them color match the color, too.
4. Use a paint sprayer to spray the paint over the filled holes.
Don’t use a paintbrush – using a paint sprayer makes the paint less likely to drip down the cabinet door.
If you’ve never used a paint sprayer before, I walk through the easy steps to use a paint sprayer here.
5. Let it dry.

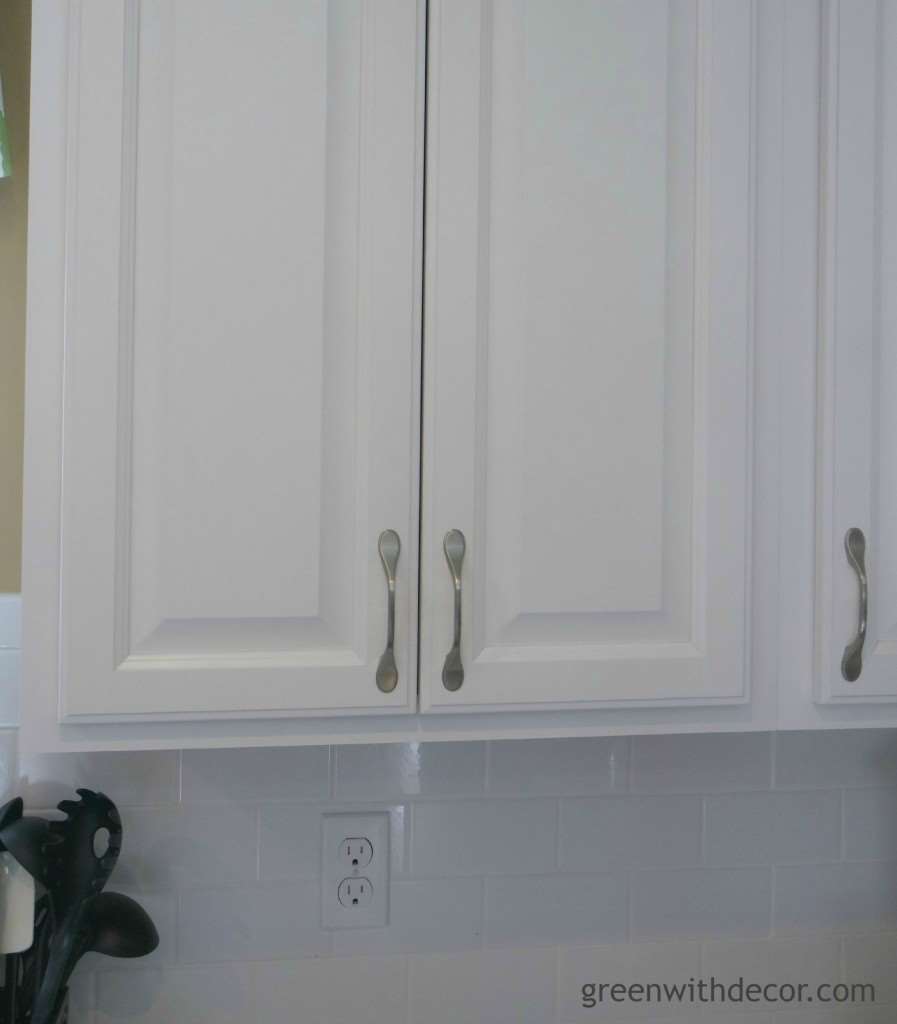
You can still see the original holes on the inside of the cabinet doors if you look closely.
6. Drill new holes in the right place!
We moved our cabinet handles up slightly – to a more appropriate place – so the bottom of the cabinet handle actually covers the original (wrong) bottom hole – so you can’t even see it from the front.
Have you run into any problems installing kitchen cabinet handles? How’d you fix it?
Planning your own renovation?
Download my printable Kitchen Renovation Checklist so you can easily keep track of each step.
*Please note: All printables and downloads designed by Green with Decor are for personal use only. Please do not alter the files or claim them as your own. These files are not intended for resale, nor are the printed versions of these files.
Like kitchen renovations? You’ll want to see these, too:
- 5 must haves in a kitchen renovation
- Seleting countertops: Quartz versus granite
- Our best kitchen renovation advice
Remember to bookmark or pin this post if you want to save it for later!
Pin it!
Want to read more posts like this?
Follow along: Get my emails | Facebook | Pinterest | Twitter | Instagram
Kaye says
What a nightmare! I’m so glad you managed to get it sorted in the end, I’d be livid!
GreenWithDecor says
So glad it all worked out!
Sam @ PancakeWarriors says
Oh bless I would have been so upset!! What a nightmare!! Thanks for the tip – luckily you had painted cabinets – I can’t imagine it would be that easy with wood colored cabinets
GreenWithDecor says
True – good thing!
Jessie says
I’m so glad you were able to fix this problem. Renovating an old house can be exasperating. I’m sure I should look at it as an adventure or something full of life lessons…. 🙂 But right now the word exasperating seems to fit.
GreenWithDecor says
Haha, there are days when “exasperating” is the perfect word 🙂
Sara says
Omg Meg! I’m so sorry. What a mess!!!! So glad you fixed it … What a tedious job! Looks great! Glad you got to keep your original hardware you picked too
GreenWithDecor says
It was a mess! So glad it worked out!
Carol Sharma says
I just did the same thing! It was first time trying any kind of DIY renovations. I wish one of tutorials I watched would have said to match up your cabinets before drilling holes for hardware! Now I’m trying to fix them. I just put the wood filler in the holes. I guess I can be thankful it was only 5 of my cabinet doors & not all of tgem. Lol!
Elizabeth Kazaka says
I m in the middle of the Hell of a kitchen remodel . We have had problems every step of way. I made a point to tell my cabinet people yesterday where I wanted cabinet knobs& pulls installed. Came home to find a few crooked and 4 of the pulls in the wrong spot. I am livid !!!!Brand new cabinets that will now have extra holes in it. My husband googled how to fix and found this post. Thanks for sharing so we can show them how to fix it
GreenWithDecor says
Oh no! I’m sorry to hear that, it’s the worst! So glad this post helped. I was so happy when we could fix ours. Good luck with the rest of your reno!