If you’re wondering how to paint barstools, it’s easy with the help of a paint sprayer! Just follow this simple DIY tutorial.
Disclosure: This post is sponsored by Wagner. All opinions, images and love of DIY painting projects are 100% mine.
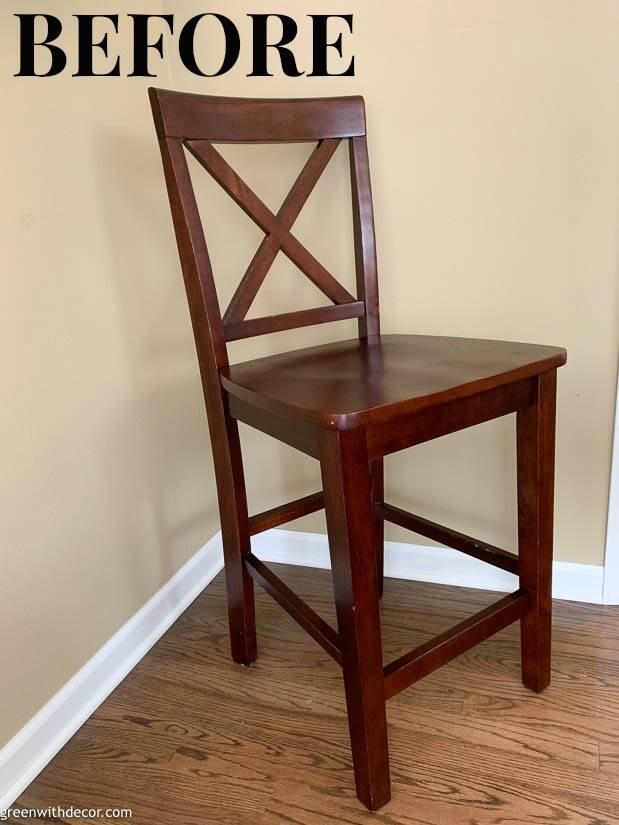
After months of debating, thinking and looking for new barstools, I ended up going in a totally different direction and painted our existing barstools.
They started like this:
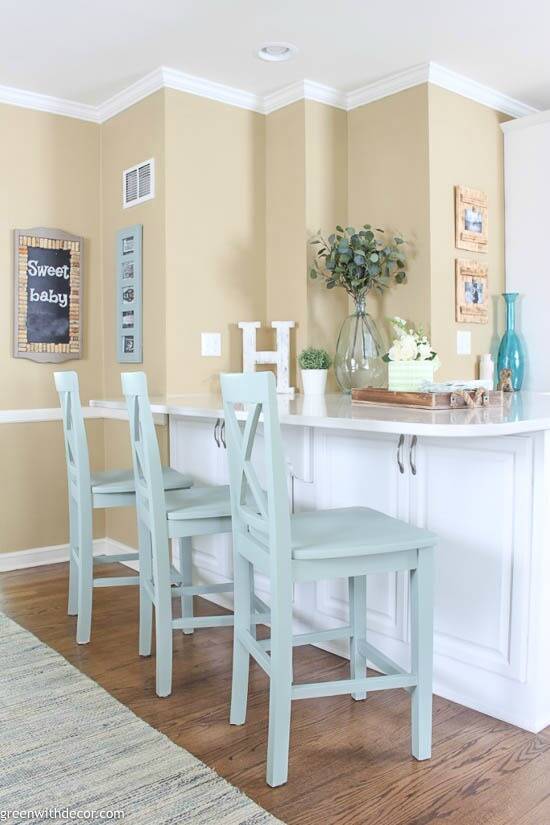
And now:
This post contains affiliate links. This means if you click the link and buy something, I may receive a small percentage of sales at no extra cost to you.
Gorgeous, right?! I’m obsessed!
Painting them definitely wasn’t my plan, but I looked at about a million options to buy. (Remember this post with all my fave coastal barstools?!) I even bought these, but when they arrived, the backs were too short so I returned them.
Since I couldn’t decide, I figured painting the barstools was a good way to test out having a pop of color in here. Plus I really wasn’t into the dark wood barstools so even if I ended up not liking them painted, I didn’t like them as they were anyway so there was really nothing to lose. (Which is totally a reason not to be afraid of paint!)
But none of that matters, because I LOVE the new barstool color! Basically paint solves everything once again. Happens every time.
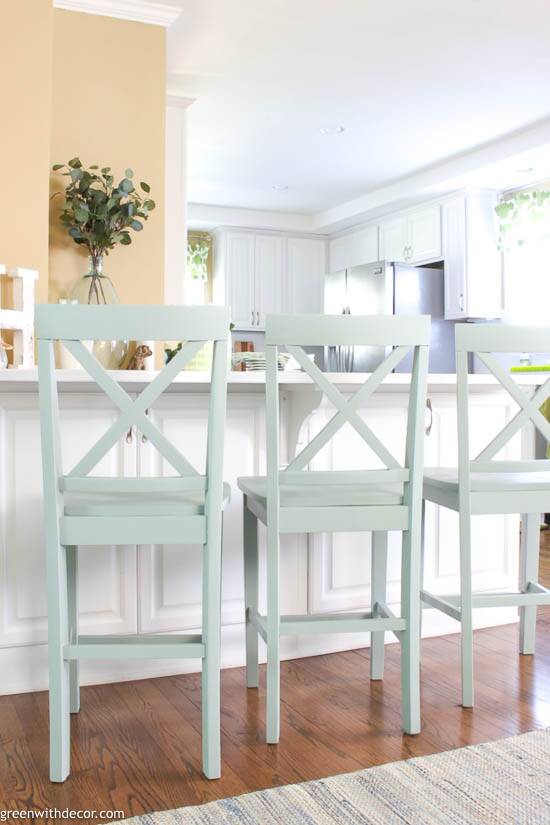
The pop of light blue is just perfect and makes the whole room feel lighter. I don’t even think I realized how much the dark wood barstools drew your eye to them. They just looked too dark in our white and bright kitchen.
Here’s an old pic so you can see what I mean:

I love the chairs and our new seagrass basket gallery wall, and I love that the new barstool color plays off those with a lighter touch.
So light blue it is! (More on the exact paint color below.)
Supply list for painting barstools:
- Drop cloth
- Sandpaper or sanding block
- FLEXiO 3000 paint sprayer (also available here or here)
- Extension cord (if needed)
- Primer – I used this.
- Paint
- Paint stir stick
- Paper towel
- Polycrylic
- Paint brush
- Tack cloth
For paint, I did something a little different. I love the color Dune Grass by Country Chic Paint. (I used it on this painted end table if you want to see.)
I love, love, love Country Chic Paint, but I’m thinking our barstools are going to see the most use of pretty much any furniture piece I’ve ever painted.
I don’t want to deal with waxing and re-waxing the barstools to keep them protected from the regular kicking feet, banging into counters, etc. that they’ll probably see, especially as we head into toddler years. So to be extra cautious here, I had CCP’s Dune Grass color matched at Sherwin Williams.
(I just want to say, because I really do love Country Chic Paint, we don’t have any issues with the multiple tables, TV stands, etc. that I’ve painted over the years with CCP, but those don’t see the beating that I think barstools will.)
I know people have mixed feelings on how well color matching works. Well in this case, it worked perfectly! I put a barstool next to our painted end table, and the color looks the same.
How to paint barstools with a paint sprayer:
1. Sand your barstools.
If your barstools have this same shiny finish, sand them with a fine sandpaper to roughen that finish up a bit. This will help the to absorb the paint.
2. Clean your barstools.
3. Prep your primer and/or paint.
Stir your primer/paint and pour it in the paint sprayer’s paint cup.
I used primer since I was going from a dark wood to a light blue color. If you’re painting a light color over another light color, you can skip priming.
4. Pick the right nozzle for your project.
The FLEXiO 3000 has two nozzles: the detail nozzle and the iSpray nozzle. The smaller detail nozzle is for smaller projects, and the iSpray nozzle is for bigger projects like painting walls.
And a quick note about thinning your paint since it relates to the nozzles. I almost never thin paint when using paint sprayers (you really don’t need to with the iSpray nozzle). But after starting spraying with the primer, it was coming out splotchy. Even after adjusting the paint sprayer settings, it was still coming out too splotchy so I thinned it a bit, and it came out much better.
Wagner’s manual is really helpful for troubleshooting any problems you have – like if your paint is coming out too splotchy – so definitely keep it on hand when painting.
5. Put your paint sprayer together.
Screw the paint cup into the sprayer. Pay attention to the direction of the tube depending if you’ll be painting upward or downward.
6. Adjust the paint sprayer settings.
There are only two settings on the detail nozzle: the material flow control (gray knob behind the trigger) and the air power control (red dial on top of the sprayer).
When painting something with a small surface area like the barstool legs and rungs, usually a low material flow and low air power will work best. Start low, and you can always adjust them higher as needed.
You can also adjust the air cap at the front of the paint sprayer depending if you’ll be spraying with horizontal, vertical or a round pattern.
With painting barstools that have about a million different vertical and horizontal surfaces, I turned the air cap a lot throughout this project.
7. Start painting your barstools!
Spring has been pretty non-existent here in Wisconsin, but we did finally get a nice day (yes, seriously only one recently!) where I could paint the barstools outside.
But if you’re still dealing with cold temps, I’ve used Wagner’s Studio Spray Tent to paint furniture inside. (You can see it in this post on painting an old TV stand.)
A few tips for painting with a paint sprayer:
- Keep moving, don’t spray too much paint in one spot.
- Move your wrist with the paint sprayer, don’t flick your wrist or your paint won’t be sprayed on evenly.
- Keep the paint sprayer about 6-8 inches from the barstools.
- Wipe the nozzle with a damp paper towel every once in a while to stop any bits of dried paint from messing your paint flow.
With the barstools, I did a coat of primer, let it dry, flipped them over and did a coat of primer to be sure I hit all of the rungs and legs.
Then I did two coats of paint.
The first coat can be pretty light, you’ll cover everything with your second coat. The paint may look uneven as it’s going on, but it will dry evenly, so don’t worry about it.
8. Clean your paint sprayer.
I cleaned out the paint sprayer completely between the primer and paint. Cleaning the sprayer really isn’t bad. Just tackle it right away, because it’s way easier when the paint is still wet.
Wagner’s manual goes through the cleaning process if you have any questions. This video is helpful, too.
9. Seal your barstools.
Since these barstools will see a lot of use, I wanted to seal them for protection.
I prefer to use Polycrylic since it’s clear. Apply 2-3 coats with a paint brush, always applying the brushstrokes in the same direction. Let each coat dry in between, then sand with 220 grit sandpaper and wipe down with a tack cloth to get rid of any sanding dust.
And that’s it! As always, for more info on using paint sprayers, check out Wagner’s website!
I am SO excited about the new barstool color. The whole kitchen just feels lighter, and I’m loving it.
Now that we have the barstools painted, our DIY farmhouse table in place, wall decor hung up and the microwave moved to a normal height, I feel like we’re in good shape in the kitchen!
You can click to see the full before/after kitchen renovation if you’re new around here.
GET THE LOOK:
Since a popular question I get is “Where’d you get that?!,” here are links to the same or similar sources:
- Wall color: Camelback by Sherwin Williams
- Counters: Blanco Canvas quartz
- Boat artwork
- Wood bead chandelier (my favorite light fixture ever!)
- Farmhouse table (DIY)
- Benches (DIY)
- Chairs
- Table runner
- Bread bowl
- Moss balls
- Seagrass chargers
- Rug
- Aqua glass vase
- Faux eucalyptus
- Wood and rope tray
- White + aqua napkins
- Cabinet handles
And one more thing about the gorgeous cake you can see in some of the pics above. (If you follow me on Instagram, you probably saw it the other night!)
My friend Laura made this pretty cake! (We were actually neighbors in Cincinnati and now both live in Milwaukee, how fun is that?!)) Her cakes are beautiful AND delicious.
You know I love that color green she used! So if you’re local and love cake (who doesn’t?!), check her out on Instagram here.
Hopefully summer weather is really going to come and stay so I can start painting furniture outside more regularly!
Do you have any painting projects planned? It’s like a never-ending list around here.
Remember to bookmark or pin this post if you want to save it for later!
Pin it!
Want to read more posts like this?
Follow along: Get my emails | Facebook | Pinterest | Twitter | Instagram
Ella Hosea says
What a great idea! They look sooo good and only the cost of paint.
GreenWithDecor says
Thanks so much, Ella! Gotta love paint!
Lindley says
Have you had any issues with the paint on the seat wearing or chipping? Did you seal that with anything?
GreenWithDecor says
We haven’t but we have cushions on the seat part to make them more comfy!
Jackie says
These bar stools turned out so good! I love them so much. I am having our kitchen cabinets refinished; I will need to try this out to finish up the space. Thanks so much for sharing!!!
GreenWithDecor says
Thank you! Good luck with your kitchen!