Did you see my fun St. Patrick’s Day wine bottles I posted last week? It’s one of my favorite St. Patrick’s Day DIYs I’ve done.
I’m obviously a big fan of St. Patrick’s Day projects, so I have another one to share today plus I rounded up a few of my blogging buddies to share their own St. Patrick’s Day /green DIY projects as part of the Home With Decor blog series. Scroll to the bottom of this post to see everyone else’s project.
Today’s project is really simple. I started to make a St. Patrick’s Day sign, but honestly it’s taking longer than I thought so I’ll hopefully share it next week. Just in case you were thinking bloggers always get DIY projects right on the first try. Spoiler: We definitely do not.
It’s one my favorite things about DIYing though. Sometimes you take on projects you never realized you’d actually be able to tackle yourself, which is awesome, and sometimes, it doesn’t work out like you planned. But that’s okay because this whole DIY thing is always kind of learning experience.
So this is my backup DIY project. 🙂

This post contains affiliate links. This means if you click the link and buy something, I may receive a small percentage of sales at no extra cost to you.
Supply list for a St. Patrick’s Day DIY hat:
- Flower pot
- Drop cloth
- Green paint (I used this by DecoArt.)
- Paint brushes
- A straw
- Gold paint (I used this, my favorite gold paint, by DecoArt.)
- Black paint
- Painter’s tape
- Twine
- Scissors
- Rubber cement or a hot glue gun
How to make a St. Patrick’s Day leprechaun hat:
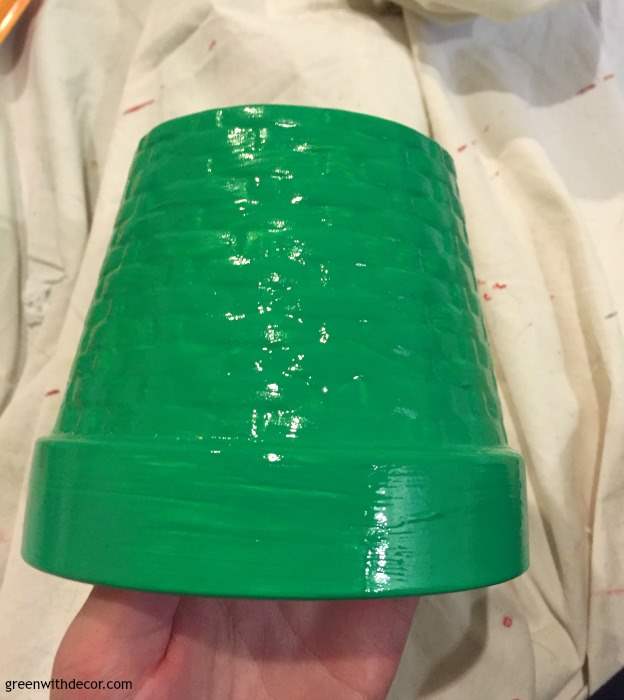
1. Paint the flower pot.
This flower pot was originally orange, and I painted it a light green a couple years ago. But, big surprise, I like changing things up, so I decided it was time. With my (slightly insane) paint collection in my craft closet, nothing is safe around here.
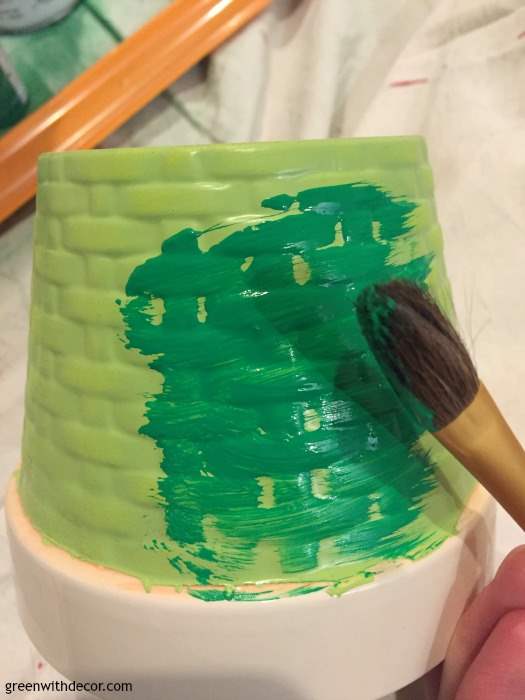
I gave the pot two coats to get good coverage.
2. Paint the straw gold.
And if you’re like me and haven’t yet thrown away the paint stick from the clear gloss paint you used to seal your DIY distance arrow sign that’s now dried to a paper plate, you’ll have a perfect place to let the straw dry standing straight up just like I did.
Sometimes I’m so prepared I even surprise myself.
Or so focused on other projects I forgot to throw this away. No, forget that, I’m going to stick with ‘prepared.’
Seriously, sometimes (okay, almost all of the time), the basement is just a hot mess of projects around here. As organized as the rest of our house is, the front room of the basement is the complete opposite.
I talked more about my junk collecting/hoarding for future projects in this post last week.
3. Paint the belt around the hat.
Use painter’s tape to section off the black belt and paint it.
4. Make your ‘buckle.’
Cut the straw into four equal parts. String twine through all four parts, forming a square shape with the four pieces.
Glue it onto the ‘hat’.
Display and enjoy!
I’ll be sharing all my St. Patrick’s Day decorating ideas next week. Meanwhile, you can see how we decorated for St. Patrick’s Day last year here.
Remember to check out the other ladies’ projects, too for even more St. Patrick’s Day DIY inspiration!
If you love St. Patrick’s Day, you’ll want to see these, too:
- A St. Patrick’s Day DIY project with old wine bottles
- 7 St. Patrick’s Day decorating ideas for the kitchen
- A DIY cork shamrock for St. Patrick’s Day
Remember to bookmark or pin this post if you want to save it for later!
Pin it!
Want to read more posts like this?
Follow along: Get my emails | Facebook | Pinterest | Twitter | Instagram
Tee @ Beauteeful Living says
So clever that you used a straw for that buckle! Such an adorable project for St. Patty’s Day. Thanks for hosting this blog hop!
GreenWithDecor says
Thanks, Tee!
Samantha says
This is SO adorable! I love the little straw buckle! Thanks for hosting!
GreenWithDecor says
Thanks, Samantha!
Kim says
So cute, Meg! What a fun project for St. Patty’s Day!
GreenWithDecor says
Thanks, Kim!
Celeste says
This is super cute, and perfect for St. Patrick’s Day! Your entire home must be so festive with all the green during this time of year!
GreenWithDecor says
Thanks, Celeste! There is definitely a LOT of green around here this time of year!
Bre says
What an upcycle! I love it! I also love that you had the paint stick dried to the paper plate. That is SO me!!! I always have crusted up plates, stir sticks and brushes lying around. So nasty!
GreenWithDecor says
Thanks, Bre! Haha glad I’m not the only one!
Katy {ashadeofteal} says
This is such a cute idea and I love up-cycling projects like this! Thanks for hosting!
GreenWithDecor says
Thanks, Katy! Glad you could join in!